-
How to choose best drawing tablet for photoshop
Donnerstag, 23. Februar 2023 - keine Kommentare
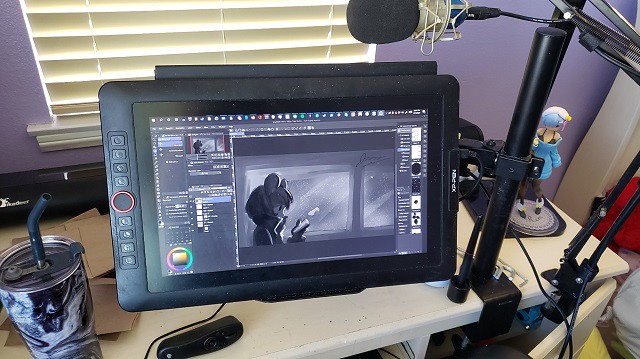
Creating art began with a pencil and paper for most artists. Paint and the paintbrush were introduced further down in the art journey. And with many crumpled-up canvases and unfinished ideas, many potential masterpieces fell by the wayside. Although nothing can replace traditional art material, drawing tablets for beginners are efficient pieces of technology to expand your ideas and store them digitally.
Drawing tablet are often called graphic tablets. They are unique devices that allow you to create digital hand-drawn images and edit photos. They use styluses that closely resemble the look and feel of pens. Using the stylus with the drawing tablet, you can create a wide variety of beautiful digital art and navigate photo editing software.
The tablet surface is connected to a computer, and the drawings are translated into digital form on the computer screen. Which are essential tools for artists, animators, and graphic designers, as they offer a more natural and intuitive way of creating digital art.
Stylus
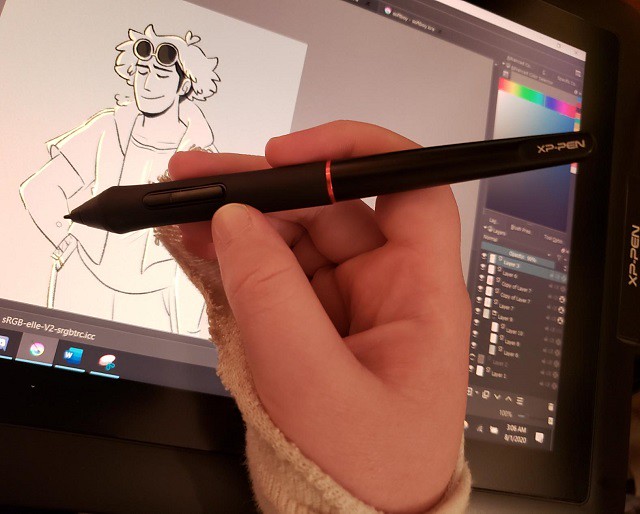
No matter if have a screen or a non-screen tablet, it's also good to adjust the pressure sensitivity. The greatest advantage of a drawing tablet over a computer mouse is that the former is sensitive to pressure—it registers how hard you press the pen to the tablet. Just like with a pencil, you can push harder to draw thicker, darker lines, and lighter to draw thinner, lighter lines.
This refers to how closely the drawing tablet and pen can capture how hard you are pressing the pen. The best drawing tablet for Photoshop tend to have pressure sensitivity measured at around 8000 levels.
The pen tip and eraser, senses the amount of tilt between the tool and tablet. The standard values in which this function operates are ± 60 levels.
This is used to create natural-looking pen, brush, and eraser strokes in applications that support tilt-sensitivity.
Customizable Buttons
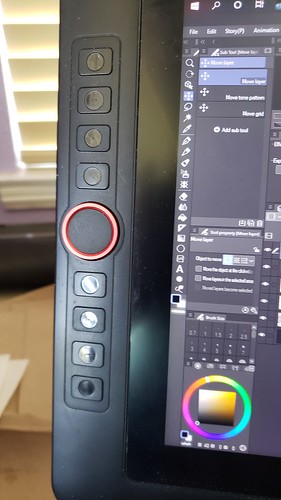
Some graphics tablets do not contain any customizable buttons, while others have a number of buttons and scrolling wheels on both the tablet and pen. I find these incredibly helpful in my day-to-day use of my editing pad for Photoshop.
Customizable buttons and dials add more control for each individual user to allow them to program their most used commands into them, allowing for a much more distraction-free experience when editing. The addition of buttons, jog dials, and wheels allow users to zoom, scroll, and swap tools quickly without having to go back to their keyboards, keeping their eyes on the task at hand.
Size
Size is more of a personal preference. Some people like smaller tablets because it’s more portable and space-saving for small working desks.
This refers to the area or surface you can actually draw, write, paint, or annotate on using a stylus. If the drawing tablet has a screen, this refers to the actual screen size (not the area surrounding the screen). If the drawing tablet doesn’t have a screen, the active area is the surface, which works with the stylus. Some tablets have buttons or controls surrounding the work surface.
Connectivity
To connect a drawing tablet to a PC, you will typically need a USB cable, and the appropriate driver software. The specific steps may vary depending on the brand and model of the tablet. Once the drivers are installed, and the tablet is connected, it should be recognized as a separate input device by the computer, and you can use it to draw or take notes in compatible software.
Screen
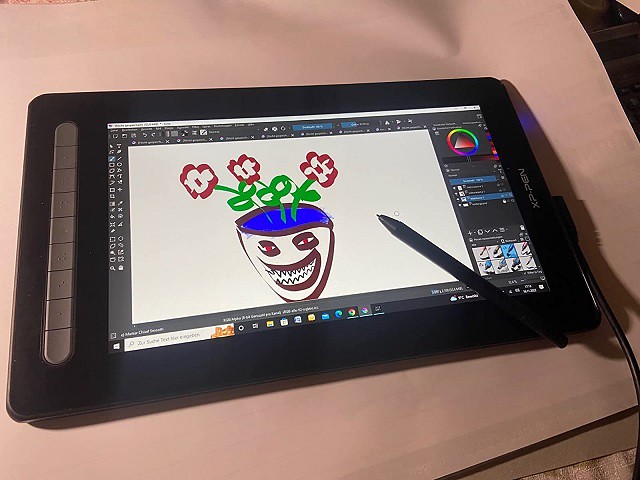
Seeing what you’re working on is vital when it comes to Photoshop. A good screen makes a huge difference, allowing you to get up close and personal with every aspect of your artwork. The display is one of the most important factors to consider when buying a tablet.
The screen size of your tablet will determine how much working area you have and the dimensions of the screen impact the overall size of the tablet. The size of the screen doesn’t affect the tablet’s capabilities but rather depends on your preference.
The screen resolution is measured in pixels and refers to how much detail is shown on the screen. The higher the resolution, the better the overall screen quality.
Conclusion

Choosing the right drawing tablet can be a daunting task, While there are some technical differences, most graphics tablets work in the same way. The drawing area of the tablet creates a magnetic field, and the pen draws on this to produce its own magnetic field, which is tracked by the sensors in the tablet.
A drawing tablet is an artist’s companion in the creative field. It is the perfect gadget for an artist’s ideation and doodling in a digitalized manner. Spending time bridling the creativity on a digitalized platform gives wings to imagination and ideas.
Photo editing tablets are one of the most valuable tools for your editing workflow. A drawing tablet is almost a second touchscreen for computer, making it possible to use a pen or stylus to input information onto a screen. Any creative task on a computer that requires pinpoint precision can benefit from a pen's tactile response. Drawing tablets can help presenters, artists, graphic designers, and Photoshop geeks.
Source:
-
How to choose best drawing tablet for photoshop
Donnerstag, 23. Februar 2023 - keine Kommentare

-
7 Best professional and most expensive drawing tablets for senior artists
Montag, 30. Januar 2023 - keine Kommentare

This digital age has artists moving away from traditional materials and jumping into drawing tablets. Designers can draw and retouch more naturally with tablets than with a mouse or a touchpad.
A drawing tablet is an artist's companion in the creative field. It is the perfect gadget for an artist's ideation and doodling in a digitalized manner. Spending time bridling the creativity on a digitalized platform gives wings to imagination and ideas.
Are you planning to become a professional artist or graphics designer? Then you will need to use a graphic tablet with professional drawing capability.
Buying a professional drawing tablet can be confusing & difficult for first-time buyers. The pricing is confusing, and important features like pressure sensitivity and resolution aren't always easy to understand.
This guide is useful for just about anyone in need of advice on what drawing tablet to buy or what tablet to replace their current device with.
So, whether you're a professional artist, a novice, or you just wish to express your creativity using a drawing tablet for fun, read on to find out which drawing tablet best suits your needs!
What is a Graphic Tablet? the types of the tablet?
A graphic tablet is a computer input device composed of two main parts: a digital pad and a stylus pen.
The tablet's sensor board receives the stylus' electromagnetic signals, detects the incoming data, and tracks the pen point's current position.
Drawing tablets comes with 3 versions: drawing tablet without screen, drawing tablet with screen and standalone drawing tablet.
A non-display drawing tablet is regular graphics tablet with a black drawing surface. You connect it to a computer via a USB cable or wireless and look at your monitor while drawing on the black surface.
This can certainly take some getting used to, but starts to feel natural after a while.
Display drawing tablets, on the other hand, work the same as a pen and paper. You simply trace lines on the drawing tablet with your drawing pen and they appear on the tablet screen.
This type of tablet still need to connect to a computer, and it will be detected by the operating system as an additional monitor. Then our tablet works as a very sensitive and precise screen.
The stangalone drawing tablets are in fact portable computers with a touch screen. The biggest advantage of these graphics tablets is that you do not need a second computer to work with.
Especially it is useful when you travel a lot and you like to create while traveling. For this reason, when choosing a tablet, it is worth paying attention to the battery life.
Tablet Features & Considerations
When choosing to buy a drawing tablet for yourself it's helpful to check what the features to consider. This can give you a good idea which drawing tablets are worth buying.
Active work area
The working area is the section of drawing tablets that is responsive to pen input and this area's size is important for comfort and detail.
Drawing tablets without screen come in varying sizes. The smallest have an active area of about 4 x 3 inches, while the largest ones have an active area of more than 13 inches wide and a height of over 8 inches.
With no display, you will want your drawing tablet size to be closer to the size of your monitor and if possible the same size. This is because the way drawing tablets without screens work is by mirroring your monitor.
But if the tablet is much smaller this mirroring is scaled down to be able to match your bigger monitor's size.
The smaller-sized tablets are more convenient for beginners and hobbyists, while larger active areas (that's the portion of the screen you can draw on) better suit the needs of professionals.
Pressure Sensitivity
The pressure sensitivity of a drawing tablet is the most important characteristics to consider before making a purchase.
The greater the sensitivity, the more control you have over your strokes.
Pressure sensitivity is important because it allows you to create lines of varying thickness and opaqueness to add dimension, shadows, and highlights to your work. And you can manipulate the lines' weight with a single pen!
A drawing tablet with at least 2,048 levels of sensitivity is a must if you wish to have better control over your strokes.
Tilt Recognition
This feature, e.g. of the Airbrush tip and eraser, senses the amount of tilt between the tool and tablet. The standard values in which this function operates are ± 60 levels.
This is used to create natural-looking pen, brush, and eraser strokes in applications that support tilt-sensitivity.
Resolution
A tablet's resolution impacts the quality of the art you create.
The higher the resolution, the more lines per inch (LPI) you can draw, i.e., the more details you can add to your drawing.
Most smaller-screen tablets have 2,540 LPI, while medium and large have 5,080 LPI.
Although the difference between devices of the same size is often insignificant, you should factor in the resolution when buying a tablet.
Responsiveness
Responsiveness impacts the speed at which the lines you're drawing appear on the screen.
It depends on a laptop or tablet's operating system, its CPU, GPU, and RAM, which is why it's important to check the tablet's specs to avoid having issues with lag.
If your PC has limited processing power and RAM, then you're destined to run into input lag.
Pen Type
Stylus (pen) comes in two varieties: lithium battery-powered and electromagnetic resonance, but all are intended to simulate the feel of a pen on paper.
Rechargeable: Rechargeable pens have lithium batteries inside. They need to be charged like your phone or a laptop, typically every eight to ten hours. like apple pencil or surface pen.
Electromagnetic resonance (EMR): This type of pen is the most convenient because it doesn't require recharging or fresh batteries. Instead, EMR styluses rely on the electromagnetic frequency, which wirelessly infuses them with the tablet's power. like the stylus of wacom and xppen.
Shortcut buttons
Most higher-end drawing tablets offer buttons somewhere along the body of the pad. These can serve as a custom function.
These extra keys, which are normally located on the left, are intended to save you time and streamline your work routine. Instead of flipping between menus, apps, or just clicking brushes in Photoshop, hotkeys will save you a significant amount of time.
Additional Features to consider when buy the pen Screen monitor
Outside of the screenless tablet, there are some special terms used for pen display options. These are fairly important to consider when purchasing a drawing tablet and its accompanying pen.
Screen Size: The screen size dictates how much work space you have on screen. Most pen display monitors range from 10 to 24 inches, measured diagonally from corner to corner.
In order to consider the screen size, you need to look at the space available on your desk or the portability.
The professional user will be happy with 22-24" screens. This range provides enough screen real estate for general productivity tasks and even heavy multitasking without overcrowding your desktop.
Screen Resolution: The most common screen resolution today is 1920×1080. Full HD is characterized by a screen with 1,920 horizontal pixels and 1,080 vertical pixels (1920X1080).
The resolution of 2K QHD is 2 times that of FHD, reaching an ultra-high resolution of 2560X1440. A 2K resolution screen display offers a clearer, sharper image for showing videos and photos with higher source resolution.
Monitor Pixel Density: Another feature that affects the clarity and sharpness of a display is the Pixels per Inch (PPI), which measures the pixel density of a screen. PPI is calculated using the resolution and diagonal size of the screen.
A higher PPI results in a clearer, crisper, and more precise image. ipads and retina screens looks so crisp because they have a very high PPI ratio.
Color Gamut: The color gamut represents the range of colors visible to the human eye on an output device. The wider the color gamut range is, the richer the screen colors are. Otherwise, no matter how high the resolution is or how powerful the graphics card is, the screen will still look gray, yellow, and dim.
The common color gamut range of drawing tablets is NTSC, sRGB and Adobe RGB, which is often represented by a percentage; the higher the percentage, the bigger the color range that can be displayed.
Panel Technology Types: In-Plate Switching (IPS) displays are known for their great image quality, color accuracy, and viewing angles.
They offer a wide viewing angle, which represents how far down, up, to the left, or to the right the content can be observed without loss of image integrity.
The benefit of IPS displays is that the user can view the screen from several different positions, plus several users can collaborate on one screen.
OLED monitors are still prohibitively expensive for most consumers, but they offer incredible contrast ratios, color reproduction, and response times.
Instead of using LED backlights to illuminate the screen, OLED monitors are capable of lighting each pixel individually. This gives them the ability to create incredible levels of black, simply by turning off specific pixels. As a result, these screens can offer up truly remarkable picture quality unmatched by these other technologies.
Refresh Rate:The screen refresh rate (measured in Hertz or Hz) is the number of times per second a video display renders a new picture. For example, a typical drawing tablet monitor will have a refresh rate of 60 Hz, meaning that it displays a new frame 60 times per second. In general, the higher the refresh rate, the smoother video appears on the screen, especially if it involves lots of motion.
Fully laminated vs non laminated screen: When it comes to pen displays, there are two main types – laminated and non-laminated.
Laminated displays are more expensive, but they offer better image quality and durability. The glass and the display panel are actually completely glued to each other, eliminating air gap so you touch what you see.
A laminated display removes parallax and helps significantly to make cursor tracking more accurate. Non-laminated displays are less expensive, but they have more parallax.
Matte vs Glossy Screen: Matte screens offer anti-glare better than Glossy screens and can be visible in well-lit environments such as sun-lit rooms. But it also makes the image quality slightly more dull and hazy.
Glossy monitors, on the other hand, have a more vibrant and intense picture quality, but a very reflective screen.
Since neither coating is flawless, the choice mostly depends on personal preference.
Brand
If you're looking into purchasing a traditional graphics tablet, these 2 brands probably keep coming up: Wacom and XP-Pen.
Wacom is the brand of choice for most professional artists. XP-Pen carved out a niche by offering appealing, affordable alternatives to the industry leader.
Drawing performance is excellent across the board with both brands of tablets.
And the famous big players like Apple, Samsung and Microsoft also developed some excellent standalone drawing tablets over the years.
Price
Non-Screen Drawing tablets are appealing as a first-time purchase at their much lower price points.
Display Drawing tablets are considerably more expensive than non-display drawing tablets.
The standalone drawing tablet is the most expensive, but it offers the great overall experience.
Wacom tablets tend to be more expensive, than other options. For beginners, the other brand like XP-Pen comes with plenty of accessories and functions at lower price.
7 Best professional and most expensive drawing tablets for artists
The market today offers various kinds of drawing tablets each suited for different users with different configurations.
Below is a short list of some professional drawing tablets. Obviously, you need to make sure that these drawing tablets will be a good match for your needs, so do your research!
1. iPad Pro

The iPad Pro 2022 is a great option for those who are looking for a powerful and portable standalone drawing tablet with a screen. There are many apps for sketching and drawing which is created for iPad Pro specifically like Procreate, Adobe Fresco and Sketchbook.
iPad Pro has a gigantic 12.9-inch mini-LED Liquid Retina XDR display with a resolution of 2,732 x 2,048 pixels and up to a 120Hz refresh rate. The colour accuracy is near perfect, with vibrant tones and deep dark shades.
It's powered by Apple's M2 chip, which gives it impressive performance, with 16GB of RAM, all your most demanding apps will run smoothly. Plus, with up to 512GB, 1TB or 2TB storage.
Draw on the iPad using the Apple Pencil (2nd Generation), which has lag free tracking and tilt sensitivity that is designed to work like a regular pencil. So if you're working in Procreate app and decide to shade at an angle, the Apple Pencil will simulate the effect of shading with the side of your pencil with a thicker line.
The other great things about the Apple Pencil, is that it has palm rejection when working with the stylus, low latency, pressure sensitivity and incredible precision. The only downside is that the Apple Pencil will have to be bought separately from the iPad.
The iPad Pro 12.9" boasts an excellent battery life with a large 40.88 Wh battery (10758 mAh). The device was able to last through a full ten-hour day, but it really depends on how you use the iPad.
This is the best standalone drawing tablet on the market for those who want a versatile device, that they can use for drawing, photography, videography, listening to music and more.
2. Samsung Galaxy Tab S8 ultra
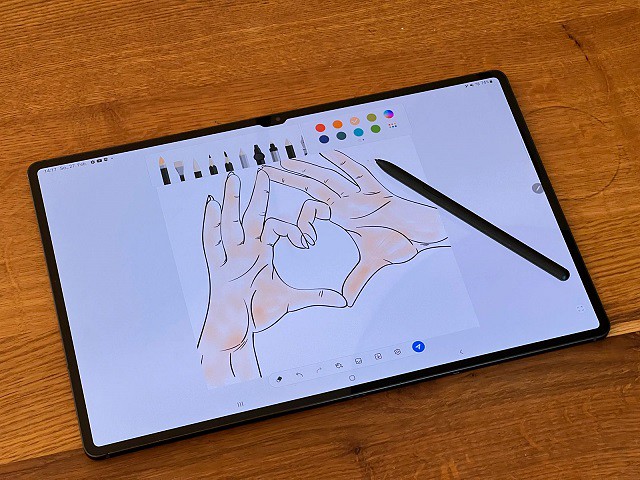
The Samsung Galaxy Tab S8 ultra is one of the best Android tablets on the market.
The 14.6″ Super AMOLED display is bright and clear. It's large enough that you won't have to zoom in and out too much when working on art projects.
The screen offers the resolution of 2960 x 1848, and a dynamic refresh rate that gets up to 120Hz ensures super smooth animations.
The screen can cover 99.87% of sRGB and 99.4% of DCI-P3 color gamuts while maintaining a very low Delta E number – and that means this screen is very color accurate and doesn't deviate off from the true color much.
It's fast, It has Qualcomm's Snapdragon 8 Gen 1 Octa-core chip paired with 8GB, 12GB or 16GB RAM. Storage tops out at 512GB but a microSD card slot lets you get an additional 1TB space if you want it.
The tablet comes with the S Pen, so you can use it to draw, write or take notes. It's great that the stylus ships with the tablet and we're not forced to buy it separately.
The S Pen feels nice and sturdy in the hand, shorter than the Apple Pencil, and it feels more natural on first use given the softer, more pen-like tip. It also uses Wacom tech and supports up to 4,096 levels of pressure sensitivity with tilt recognition.
One of the best features of this tablet is DeX mode. This allows you to use the tablet as a PC. You can connect a keyboard and mouse and use all your favourite Android apps on a larger screen. This is great for when you need to be productive and get work done.
With a 11,200mAh power pack, the Samsung Galaxy S8 Ultra’s battery is meaty enough to provide that gigantic screen with loads of juice. it only has a battery life of 6.5 hours with High refresh rate enabled, and a more acceptable 8 hours with the Standard refresh rate!
If you need a fast, large screen Android tablet that can also double as a PC, the Samsung Galaxy Tab S8 Ultra is a great option.
3. Microsoft Surface Pro 9

The Microsoft Surface Pro 9 is a high end standalone drawing tablet with some great features.
The tablet has a 13″ PixelSense display with a 2,880 X 1,920 resolution, which outputs at a smooth 120Hz and supports Dolby Vision HDR.
The screen achieves 106.1% of the sRGB color gamut, 82% AdobeRGB, and 75.1% DCI-P3, all excellent results. It also has 10 point multi-touch support, so you can use your fingers to draw directly on the screen.
The Surface Pro 9 is powered by an Intel i5 or i7 12th Gen Core processor and has a snappier LPDDR5 RAM of 8GB or 16GB RAM. It can also be kitted out with either 128GB, 256GB, 512GB or 1TB of M.2 SSD storage.
This is a great tablet, that bridges the gap between drawing tablet and laptop. It's the 2-in-1 tablet design we've all grown to enjoy, including the built-in kickstand and removable keyboard.
This keyboard includes the built-in storage (and charging) solution for the Surface Slim Pen 2 – which will also cost you an extra $130.
Microsoft's Surface Slim Pen 2 resembles a carpenter's pencil and it works even better when paired to Surface Pro 9. it offers a smooth drawing and note-taking experience. The pen itself is very nice and has no noticeable lag.
Having Windows 11 is also a major boon for this tablet, as it means you can use the full desktop version of programs like Adobe Photoshop CC and illustrator CC.
Microsoft Surface Pro 9 battery capacity is 5900mAh, it ran the PCMark battery life test for just over eight and a half hours, don't expect that 16 or 19-hour result.
The Surface Pro line has always looked sharp and performed well. It remains the best overall example of a Windows-based tablet/laptop hybrid.
Use this device for any of your art business needs. For running your favourite drawing software, editing images for print or doing the admin for your art shop.
4. Wacom MobileStudio Pro 16
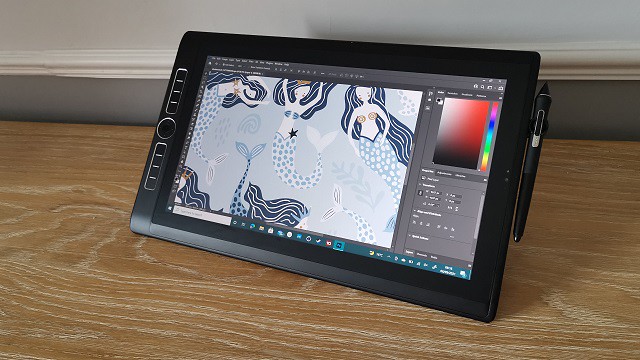
Wacom makes a tablet at every price point, from the entry-level One by Wacom, to the mid-level Intuos tablets and Cintiq displays, to the top-of-the-line MobileStudio Pro.
The Wacom MobileStudio Pro has something to offer people of all skill levels, but it's ideal for people who draw professionally and draw often. This device comes in a 13.3” & 15.6” size, and runs Windows OS.
The 15,6" display has stunning 4k UHD (3840 x 2160) resolution, With 4k resolution, you will be able to see all the smallest details and colour transitions in your work.
The display covers 85% of the Adobe RGB color space, which is good, though it's a bit disappointing that this art-focused device does not hit 100 percent.
The thin etched glass minimizes parallax and provides a distinct, tactile experience as you draw, mimicking the feel of a pen on paper.
Great drawing performance thanks to professional computing power, powered by an i7 Intel chip, 16 GB system memory, 512 GB SSD storage, and powerful 4GB GDDR5 graphics card.
Multi-touch function, 8 customizable ExpressKeys, Radial Menus and one-touch shortcuts are design for better productivity.
The Wacom Pro Pen 2 stylus really makes the drawing experience feel natural on the MobileStudio Pro 16, as there is virtually no lag and no parallax. The pen has 8,192 levels of pressure sensitivity and 60 degrees of tilt function.
The 7.6 V, Li-polymer, 70 Wh battery’s life isn’t as great as one might like. With very light use, you could probably get it to last up to 6 hours, but really we’re talking about maybe 3 hours of use.
The price is the highest amaong the list, but if you are someone who enjoys working on the go without switching between several devices and requires the reliability, multi-functionality and processing speed of a quality computer, then this could definitely be for you.
5. XPPen Deco Pro

The XPPen Deco Pro graphic tablet is reliable, long-lasting, and large enough for the creative.
The XPPen Deco Pro comes in two sizes---Small and Medium. With an active area of 9×5 inches or 11×6 inches, provides you a sufficient creative area.
It has Bluetooth capability, allowing you not to worry about carrying the USB cable, and you can still use it while it is charging.
The build quality of deco pro feels like a premium tablet and sleek in appearance, black plastic mixed with silver color aluminum alloy scheme has won several design awards.
The dual wheel (dial + virtual wheel) and eight shortcut buttons are a welcome addition, which can be really handy for making quick changes.
The included PA1 stylus is amazing, It does not have a battery inside and does not need to be charged. The tip is firm, the rubber grip is comfortable, and there are 2 buttons on the side for added convenience.
The 8192 levels of pressure sensitivity and ±60° tilt recognition is great, it's able to detect extremely minute shifts in pressure and tilt. It feels like an actual pen you're working with.
The XPPen Deco Pro is compatible with Android, Chrome OS, Linux, Windows and Mac OS devices. It comes with a USB cable and an adapter, so you can just plug it in and start using it right away.
The tablet can be used with just about any digital art software, and includes bonus free drawing software (choose one from ArtRage 6 and openCanvas ) to help create and edit your art.
6. XPPen Artist Pro 16TP

The XPPen Artist Pro 16TP tablet has a 15.6" screen with 4K UHD (3840 x 2160) resolution and can display 92% of the Adobe RGB color space.
Its IPS display is color accurate, with good contrast levels, and the pixel density is such that you don't ever feel you're working with a screen.
The Artist Pro 16TP's laminated screen provides excellent precision, Parallax is minimal as the glass screen is quite close to the display. The cursor will always be beneath the pen tip.
The matte textured screen surface reduces glare and makes it easier on the eyes when working for long periods of time.
The battery-free pen has 8,192 levels of pressure sensitivity, 5080 LPI and 60 levels of tilt recognition. it comes with two buttons, a pen nib, and an eraser at the end, Drawing feels fluid and natural.
The screen supports multi-touch gestures for fingers. Touch functionality is a necessity for several types of digital design, where this aspect is totally seamless and smooth.
It features a combination of glass surface and metallic body, giving it a more premium look and feel than most cheap tablets. The only drawback of this tablet is the lack of shortcut buttons.
This Artist Pro 16TP tablet is compatible with Linux, Mac Os, Windows, Android OS and Chromebook devices. it can be used with any design software that supports graphic tablets.
7. XPPen Artist 24 Pro
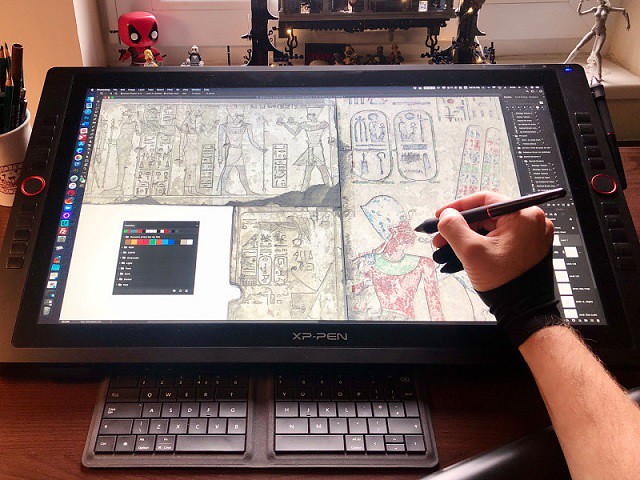
The XPPen Artist 24 Pro is a professional drawing tablet with a large 24" IPS screen that offers excellent performance, and stunning visuals.
The 24″ tablet is the largest canvas ever made by XPPen, it reduces the need for panning and zooming in and out on the artwork.
It also reduces the need for extra screens to display reference photos and composition sketches, as there is more than enough screen space to have it all right in front of you in one place.
The display has stunning 2k QHD (2560x1440) resolution, and 90% Adobe RGB color coverage, which makes it the perfect tablet for colour sensitive work, like designing prints.
The PA2 stylus is battery free, has 8,192 levels of pressure sensitivity, tilt-response and lag-free tracking. There are two buttons on the pen for access to customizable shortcuts.
The tablet itself also feels well-constructed, with robust, high-quality materials and an impressive stand, which offers shallow angles from 16 degrees all the way up to 90 degrees.
The tablet also comes with 2 Red Dial Wheel and 20 Shortcut keys that you can customise to create shortcuts for your favourite software functions. This is a handy feature that can help speed up your workflow.
This is a great tablet for professionals who have the budget to spend on a high spec piece of kit. It is more appropriate for office and studio use.
Conclusion
Buying a high-quality drawing tablet can be a major investment so we hope this article has helped you narrow down your choices.
Traditional drawing tablets are a staple of digital art and design. But nobody's saying that you have to do your work at a PC. There's always the ultra-portable standalone drawing tablets like iPad Pro. it depends on your needs and preferences.
Advanced artists and professionals may elect for an advanced model like the display drawing tablets. The display tablet model is available in various sizes and price tags, but the additional features and investment may not be right for a beginner.
The best choices make a balance between price, screens, size, and other drawing features. Your hard earned money deserves the best drawing tablet for making digital art or your digital markup.
-
XPPen Drawing Pads Black Friday Promos 2022
Dienstag, 15. November 2022 - keine Kommentare
Are you planning to buy a fantastic gift for yourself and your friends in the tech world?
Black Friday 2022 falls on November 25 and we're tracking the best early deasl on drawing tablets.
Early Black Friday XPPen drawing tablet deals in 2022 are now live now! the Deals are live now from November 14 to December 02. And XPPen United States Official Store is offering up to 40% discount on it's tablets plus free shipping during this period.
It's great news for those who want the XPPen drawing pad experience without breaking the bank.
What are the advantages of a graphics tablet?
Drawing tablet is a computer device that will enable you to draw on a computer with a pen. This is very helpful for artists because with it you can draw pictures on your computer the same way as you would with a piece of paper and pencil.
Most of the drawing tablets connect to the computer using a USB cord so they are compatible with either Macs or Windows PC.
The drawing tablet can also be used in all applications; they are not specific to Photoshop, Illustrator, Gimp or any other program one might use.
Drawing tablets usually have up to 8192 different levels of pressure sensitivity. Mouse only have two levels of pressure sensitivity; clicked or not clicked. This gives tablets a huge advantage over mice, especially for detail-oriented image editing.
When using Photoshop, the pressure sensitivity applies to your brushes as well. This makes it so much easier to blend colors, add effects, and apply retouching techniques.
Sketch your ideas on the canvas, write notes and doodles with tilt + pressure, draw storyboards, product sketches and design plans, edit photos.
The designers really love them, because of how easy they make both doodling and highly detailed image-editing. Anyone who has ever sketched with a pencil and paper will be able to easily pick up the basics, and the advanced user will be able to open up worlds of deep functionality.
A few other things worth mentioning would be the fact that they are programmable so one could set up quick keys specific to them, which would be useful and efficient.
Finally, the last general advantage of using a drawing tablet is the fact that it can help reduce the risk of repetitive strain injuries (RSI) or carpal tunnel syndrome. These tablets could work wonders for people that already have those sorts of wrist problems because it eliminates the repetitive clicking motion that comes with using a mouse.
Is XPPen worth?
XPPen is a popular manufacturer of budget through to high-end drawing graphics tablets, designed for a wide audience and skill level.
XPPen's EMR (Electro Magnetic Resonance) technology never requires a pen battery or recharge. Excellent pen experience for art with little jitter, smooth flowing lines and great tilt recognition.
There is one for every level from the beginner-friendly XPPen Star, medium level XPPen Deco up to the professional grade XPPen Artist. which are designed to help you make your imagination come to life.
Among them, the XPPen Artist 2nd generation series pen display monitors are the most notable , which offers the most advanced laminated anti-glare screen and X3 smart Chip pen technology designed to digital artists & graphic designers.
These devices are powerful and can connect to Windows, Linux, Android, Chrome and Mac OS devices to transform it into a virtual canvas.
Best early Black Friday 2022 XPPen Tablets Deals
Black Friday is your best chance to get hold of the biggest savings you'll find all year on drawing tablet devices, whether they be tablet deals on the XPPen Star Series, Deco Series or Artist Series.
Get yourself a new XPPen tablet with the help of these Black Friday XPPen deals. No matter which level you go for, a XPPen drawing pad is a great device for typical digital writing, drawing, editing photos, taking notes and even productivity and creativity.
1. XPPen Artist Series
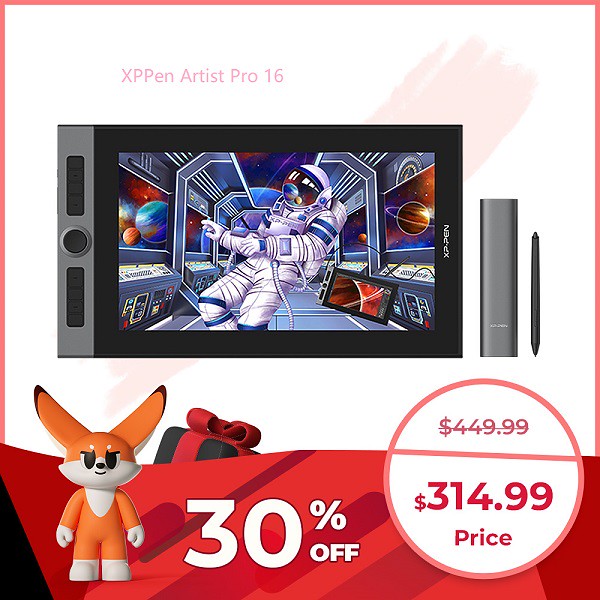
The XPPen Artist is a Series of interactive pen display monitor that lets artists draw and perform actions on screen.
Its laminated anti-glare technology, IPS panel, FHD resolution, excellent color performance, and best-in-class stylus are more than meets the needs of any working professional, especially photographers and digital artists.
Whether it's the light super accurate pen, the stylish design, the included downloadable creative software or online tutorials, XPPen Artist is all you need to get creative digitally with a display graphics tablet.
If you're a graphic designer, you'll want to upgrade to the larger model with a display, it might be pricey, but it'll save you time in the long run.
Artist 10 (2nd Gen) (10.1", $144.49, -15%)
Artist 12 (2nd Gen) (11.9", $199.99, -20%)
Artist 12 (2nd Gen) Gift Edition (11.9", $199.99, -20%)
Artist 13 (2nd Gen) (13.3", $144.99, -15%)
Artist 16 (2nd Gen) (15.4", $319.99, -20%)
Artist 22 (2nd Generation) (21.5", $399.99, -20%)
Artist 24 (23.8", $559.99, -30%)
Innovator 16 (15.6", $299.99, -25%)
Artist 12 Pro (11.6", $207.99, -25%)
Artist 12 Pro Line Friends Edition (11.6", $209.99, -30%)
Artist 13.3 Pro (13.3", $209.99, -25%)
Artist 15.6 Pro (15.6", $277.49, -25%)
Artist Pro 16 (15.6", $314.99, -30%)
Artist Pro 16TP (15.6", $629.99, -30%)
Artist 22R Pro (21.5", $449.99, -25%)
Artist 24 Pro (23.8", $629.99, -30%)
Artist 12 (11.6", $159.99, -20%)
Artist 15.6 (15.6", $269.49, -10%)
Artist 22E Pro (21.5", $424.99, 15%)
2. XPPen Deco Series

The XPPen Deco Series are an excellent tool in graphic design and artistic purposes. aimed at beginners that feels capable enough to grow with your skills.
Every aspect is great: Very thin design, intuitive driver, precise pen with phenomenal pressure levels and reliability.
It includes a plethora of great features: Connect wirelessly by Bluetooth, different color options,Ample shortcut buttons, Compatible with android and Chrome devices... highly recommend!
Deco Mini 4 (Active area: 4 x 3 inches, $19.49, -35%)
Deco Fun XS (4.8 x 3 inches, $23.99, -20%)
Deco Fun S (6.3 x 4 inches, $31.99, -20%)
Deco Mini 7 (7 x 4.37 inches, $42.49, -15%)
Deco Mini 7w wireless (7 x 4.37 inches, $50.99, -15%)
Deco MW Bluetooth (8 x 5 inches, $62.99, -10%)
Deco Pro S (9 x 5 inches, $74.99, -25%)
Deco Pro SW Bluetooth (9 x 5 inches, $90.99, -30%)
Deco L (10 x 6 inches, $62.99, -10%)
Deco LW Bluetooth (10 x 6 inches, $80.99, -10%)
Deco 01 (10 x 6.25 inches, $46.74, -15%)
Deco 01 V2 (10 x 6.25 inches, $47.99, -20%)
Deco 01 V2 Line Friends Edition (10 x 6.25 inches, $47.99, -20%)
Deco 02 (10 x 5.63 inches, $67.99, -20%)
Deco 03 wireless (10 x 5.62 inches, $74.99, -25%)
Deco Fun L (10 x 6.27 inches, $39.99, -20%)
Deco Pro M (11 x 6 inches, $97.49, -25%)
Deco Pro MW Bluetooth (11 x 6 inches, $111.99, -25%)
3. XPPen Star Series

The XPPen Star Series drawing tablet has been designed for those who are getting started digital art on their Mac or Windows PC.
The XPPen Star Series is the company's least expensive entry-level option, and it's perfect for starters looking for a reliable graphics tablet. Empowering for novice digital artists and hobbyists.
Easy to setup and feels great to use. It's a good and affordable series for doing sketches, illustrations, digital editing, etc.
Star G430S (Active area: 4 x 3 inches, $17.99, -40%)
Star G640 (4 x 3 inches, $27.99, -30%)
Star G640 Line Friends Edition (4 x 3 inches, $27.99, -30%)
Star G640S Android (6.5 x 4 inches, $39.99, -20%)
Star 05 wireless (8 x 5 inches, $52.49, -25%)
Star G960S (9 x 6 inches, $34.99, -30%)
Star G960S Plus (9 x 6 inches, $41.99, -30%)
Star 03 V2 (10 x 6 inches, $44.99, -25%)
Star 06 wireless (10 x 6 inches, $68.79, -20%)
Conclusion
Black Friday is of course the biggest shopping time of the year. And, you can save ahead of time with early Black Friday deals going on right now.
If you're on the prowl for some early Black Friday drawing tablet deals, this is where to be.
Black Friday is a great opportunity to get that XPPen drawing tablet that you've always wanted, at a steeply discounted price.
XPPen's black friday sale 2022 are worldwide, people from other countries can navigate to your local online store by click the "choose your country or region" menu to enjoy the XPPen black friday special promos.
If you're just starting with a graphics tablet, my advice would be to get a big tablet, these cost more, but they're better for precision and will make learning a whole lot easier.
-
6 Best Drawing Tablets for 3D Modeling & Sculpting in Blender and Zbrush
Montag, 7. November 2022 - keine Kommentare
If you love 3D sculpting or modeling in Blender, Zbrush, Sculptris, SketchUP, Maya..... you need a drawing tablet.
Drawing tablets and pens have always been the popular choice by animators and visual effects artists.
Working with tablets makes your work easier and allow you to create perfect models through various tools.
What is a drawing tablet?
drawing tablet is basically a computer input device which is used used for digital drawing. It is also called pen tablet, graphic tablet, or digital art pad.
You require a Stylus (Pen) to use it, it utilizes pressure sensitivity, and the tablet itself usually comes with a lot more function buttons (hotkeys).
The pen also acts like a computer mouse, giving you the ability to left and right click by using a button on the side of the pen.
It can be a tablet with screen or without screen. The screen drawing tablets still needs to be connected to a computer to function, whether its a PC or Mac.
Blender vs Zbrush

Both ZBrush and Blender are amazing 3D design software. They are similar in the aspect of sculpting and modeling but are quite different at the core.
ZBrush is a sculpting program from Pixologic famous for its perfect digital sculpting technique. On the other hand, Blender is an open-source 3D modeling program famous for its modeling, sculpting, animating, rigging, concept arts, and storyboarding.
Blender is free to use, while ZBrush costs money. This can be a major consideration for some people, as free software is always appealing.
ZBrush is a much more robust and feature-rich program than Blender, so it may be worth the investment for serious 3D modelers.
ZBrush is better suited for modeling intricate details, while Blender is better for more general modeling.
If you're looking to create models with a lot of small details, ZBrush is the better option. However, if you need to create simpler models or don't need as much detail, Blender will probably serve you better.
Blender has an integrated game engine, which can be used for creating games or prototypes. ZBrush does not have this capability, so it's not as good of an option for game development.
Both programs have a learning curve and take some time to master. But they have active communities of users who are willing to help beginners get started.
If you need to sketch a quick concept, with simple but efficient tools: choose Sculptris! which is a very feature limited version of Zbrush, but it's free.
Are drawing tablets and pens good for 3D modeling?
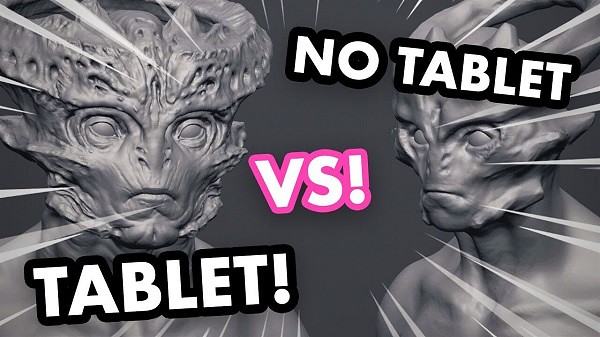
In the past, most modeling work was done with a simple mouse, a keyboard. As technology evolves, 3D modeling has taken a different shape and modelers are asked to be more resourceful than their counterparts were back in the day.
You'll be very hard-pressed to find mice useful in 3D sculpting. Sculpting essentially requires a stylus, for best (most natural) results. 3D modeling is close to drawing so you are basically using a pen to sculpt.
If you are a 3D designer or digital artist working with a tablet is more efficient and comfortable than a mouse, especially when you use it for longer period of time. You can use it for making 3D sculpted models in softwares like zbrush, Sculptris, SketchUP, Maya, and blender…
The digital pens have a natural feel that can give you better control in drawing objects or characters. The tablet lets you work as if you are drawing on paper which allows the modeler to freely move their hand in a more natural way.
The pressure sensitivity of digital pen can be mapped to such functions as the strength or size of your stroke (The harder you push the bigger the effect). This allows you to more organically dictate how much of an effect you will have on your model as you perform such tasks as sculpting or texturing.
And you can even customize the buttons on the tablet with your favorite shortcuts conformed to individual software. Hence, with the drawing tablet, you can unleash your creativity in a whole new level. And that too, with such an extent of convenience and efficiency you never knew could be possible!
Tasks such as sculpting and texturing are probably the most suited to tasks for a Drawing Tablet and you can really benefit from using one. The pressure sensitivity helps adjust brush strength whereas the precision helps get each stroke to look exactly how you want it to.
If the tasks you are performing in 3D program only rely on clicking buttons or dragging items it really isn't necessary. Such tasks include animation, composition and rendering.
Screen tablet vs Screenless tablet
The screenless pen tablet get connected to a computer through a USB cable or through wireless (2.4GHz wifi or bluetooth). Looking at the screen while drawing takes getting used to. but it takes up less workspace, cheaper, better for ergonomics.
Usually the disconnect between drawing on a non-screen tablet and seeing the results on your computer monitor goes away with very little practice. Some people even prefer it as neither your hand or your pen will ever cover what you are drawing.
A display tablet is a tablet that allows users to draw directly on the screen of that tablet. It's More costly, takes more workspace, ergonomics require some setup (keyboard placement, screen placement, practicing good posture), the hand in the way thing.
But the advantages are 1:1 Interaction with the digital clay when sculpting, larger work area (though you mostly use the middle part), generally pen displays come with better colors than computer.
Even though there are many great tablets for 3D modeling that aren't display tablets, display tablets have an advantage as it's easier to do 3D modeling when you can draw directly on a tablet's screen. It makes work more intuitive and you feel more connected as you are not working on a surface separate from what you look at.
I am not saying you cannot do 3D animation with a drawing tablet, many do, but if you get a chance compare working on both types. Not everyone prefers a heavier, larger, more fragile tablet however.
What should I look for in a drawing tablet for 3D modeling?
Before you go and purchase a drawing tablet for 3D modeling & sculpting, you need to know that there are certain features that a tablet for 3D modeling should have. These features can differentiate what tablet is good for 3D modeling and what tablet isn't.
Here are a list of features you should consider when picking which tablet to buy:
Size options
Drawing tablet works in absolute mode, each point on the tablet maps to a point on the screen. for optimal experience and precision, buy a tablet that matches (roughly) your monitor dimensions.
Generally, with drawing tablets, the bigger the device, the larger the drawing area. However, as the surface area increases so does the price of the tablet.
The working area you should opt for is dependent on your convenience, preference, mobility, desk space, and the magnitude of artworks or sculptures you need to create.
You'd require larger models for producing bigger artwork as it'll require wider hand movements and vice versa. But smaller ones can be ideal for portable use or when you are short on space.
Stylus Pen
The Pen is one of the biggest factors to consider when purchasing a tablet. It has to be comfortable to hold for extended periods of time. It needs to feel natural and fit in with your workflow.
The pens come in 2 types. Battery-Free Electromagnetic Resonance pens which as the name suggest do not require to be charged and pens with batteries requiring charging.
Opting for battery-free ones would be a smarter move as it would eliminate the hassle of recharging. It relies on the electromagnetic signal being sent from the pen to the tablet.
Other features you need to consider are the pen's pressure sensitivity, resolution (Lines Per Inch), Responsiveness (Report Rate Speed), tilt function support, etc.
Pressure Senstivity
High levels of pressure indicate a more sensitive stylus which can detect even the faintest difference between the pressures exerted.
It can provide the most detailed outputs as you'd be able to produce lines of a more versatile range of thicknesses and opacities.
When purchasing a drawing tablet it is pretty standard to have 8192 levels of pressure sensitivity this is basically a measure of how responsive a brush is to pressure. Some cheaper ones with will have half of that with 4096 levels.
8192 levels is preferred for 3D Program however 4096 is adequate. This ensures if you need to make any adjustments to the pressure curve (how hard you need to press to get the desired result) you still have a reasonable amount of levels to do so.
Responsiveness
Report Rate Speed measures how many times per second the tablet sends information about the stylus position & pressure back to the computer. Usually, above 200+ RPS is ideal for drawing.
The tablet for 3D modeling should also be highly responsive to your pen strokes or other inputs. This is crucial for receiving the most realistic sculpting/drawing feel as a laggy device will not only be annoying and time-consuming, but will also result in inaccurate outputs.
Lines Per Inch
Lines per inch (LPI) refers to the resolution of a drawing tablet. The LPI determine how well a tablet can pick accurate strokes and tiny details.
For 3D modeling, you need a tablet with at least 2540 LPI. This LPI is sufficient to provide enough detail for your sculptures and illustrations. Depending on what you want, you can go for tablets with higher LPI, even reaching 5080 LPI.
Tilt Function
You will also note that a lot of the pens have tilt senstivity support. This is irrelevant in 3D Program as it is not supported so don't be concerned over this function.
Tilt support on a drawing tablet just means that when the pen is tilted, it will result in a different size of the brush. It's definitely not necessary, but can sometimes make drawing with a tablet feel more “organic” or similar to traditional art tools.
Hotkeys
Hotkey and shortcut keys is where having a tablet for 3D modeling can really come in useful. The need for keys to navigate, masking, smoothing and even undoing soon add up. the more the better.
Wireless Connectivity
this is one of the things that can make a noticeable difference in terms of comfort while using the graphics tablet. A wireless drawing tablet is always a good thing as it reduces the amount of cables over your desk and allows you to work more comfortably.
The wireless tablet can connect to your computer wirelessly via 2.4GHz Wifi technology or Bluetooth technology, with a wireless range of up to 10 meters.
Your non-screen pen tablet can operate wirelessly or in USB cable mode, but not both at the same time.
Pen display monitors generally use 3 cables to connect: a HDMI cable for video, a USB cable for data, and a separate power supply cable.
Some screen tablets however include a convenient 3-in-1 cable that incorporates the 3 functions in one cable, reducing the amount of cables over your desk and helping you keep a much tidier workspace.
Some newest pen display models support usb-c connection, which hailed as one connection to rule them all, it was developed to handle power, data and video, and it was drop-dead simple to use. you just need one cable to connect to your laptop.
Compatibility
The drawing tablets on the market are compatible with almost all operating systems, including the Windows, Linux and Mac OS.
Some new models even support Android and chrome OS devices. Therefore, no need to fret over that since you can connect to practically any device and resume your work.
Basically, any tablet that is compliant with a stylus is good enough for using 3D modeling programs.
Other features to Consider When Buying pen display monitor
A good tablet (≤22-inch) has a screen resolution of at least 1920 x 1080 or more, so that the colors are sharp and crisp.
If two screens both with a 1080p Full HD resolution. the smaller monitor will have a more densely packed pixel density, resulting in smoother lines and sharper images.
The color gamut describes a range of colors within the spectrum of colors, or a color space, that can be reproduced on an output device. The most commonly known color gamut might be “NTSC” ,“sRGB” and “Adobe RGB”.
In-Plane Switching (IPS) panels are the ideal panel technology for monitors for graphic design because they feature a brighter display and higher color accuracy, giving you a clear and real-life color image.
Compared to non-laminated screen, full-laminated screen can effectively reduces parallax and brings the pen tip closer to the cursor, allowing for more accurate positioning.
A matte display comes with an anti-glare coating that helps minimize reflections on your screen. but the image quality in displays with matte finish is not as sharp or bright as a glossy screen.
6 Best Drawing Tablets for 3D Sculpting & Modeling
Choose between Pen tablets without a screen, or a screen drawing tablet, whichever you choose, there is definitely something for you.
If money is not the problem and you need the best drawing tablet, get a Wacom. Wacom is the industry standard and they make fine products.
If you are a beginner then XPPen is the best option. XPPen is a nice option for the drawing purpose with reasonable price. which might give you a bit more for the same price.
As a leading graphic tablet manufacturer, XPPen tablets allows you to draw, paint, and create amazing artworks. you really can't go wrong with either one.
1. XPPen Deco 03

The XPPen Deco 03 is one of the best tablets for 3D sculpting. This tablet comes with a bunch of features that make it excellent for professional 3D modeling work. Best of all, it is quite affordable.
It features a 10 x 5.62 inches active area with papery texture surface, so you have plenty of space to create and get work done.
The Deco 03 tablet can be used wirelessly or wired. For wired use, you simply need to connect the USB cable a PC. For wireless use, the tablet has an ISM 2.4G USB receiver.
The battery of the Deco 03 tablet charges quite fast. With 2 hours of charging, the tablet will be good for use for up to 16 hours.
The tablet features 6 programmable shortcut keys and a red roller wheel. This will make your sculpting work easier.
This stylus P05 does not need to be charged since it is battery-free. and it has a high 8192 levels of pressure sensitivity. Therefore, your strokes will feel natural and the drawings or 3D models come out life-like.
2. XPPen Deco Pro
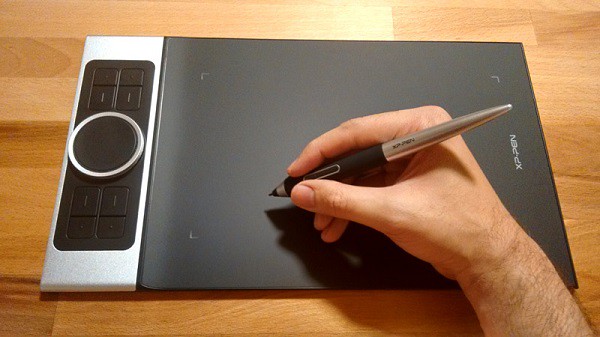
The XPPen Deco Pro tablet features a very sleek and unique design with silver aluminum alloy casing, which gives this tablet a much more beautiful and durable feel.
It has 8 programmable keys for functionality, however what is really cool is the double wheel deign. You could map one to brush size the other to zooming for instance.
The Deco Pro is available in two sizes, small (9" x 5" drawing surface) or medium (11" x 6" drawing surface), but these should not be confused with Wacom's small and medium sizes as XPPen's small and medium sizes are much larger!
The Deco Pro MW & Deco Pro SW version features Bluetooth connection option. So you can work wirelessly by pairing your tablet to a computer by Bluetooth.
It comes with PA1 battery-free stylus which has 8,192 levels of pressure sensitivity, has virtually no lag, and has a natural tilt response, making each stroke more organic.
Compatible with Windows, Mac, Linux, Chrome OS. It is even compatible with Android OS, so you can connect it to your Phone or tablet.
3. XPPen Artist 13 (2nd Gen)
-
XPPen 17th Anniversary Sale 2022: Best Drawing tablets Deals this Summer
Freitag, 19. August 2022 - keine Kommentare
You may be considering getting a tablet to help with digital art such as 2D illustrations, Photo editing, digital painting, 3D texture painting, 3D sculpting, or other common uses.
A drawing tablet is a tool that can translate the strokes from a pen-shaped stylus to a digital screen in an extremely accurate way. It's a good buy for any level digital artist who uses their computer as the locus of their workstation.
This technology is commonly used by artists, illustrators, animators, digital photo editors, architects and engineers, for example, to transplant their art and work onto a digital canvas.
Well, creating digital art with a drawing tablet is a given. It can be super-useful for creating eye-catching visuals. or just a wonderful hobby in and of itself.
If you're on a budget, you can Save big on select XPPen drawing pads this summer with their 17th Anniversary deals on the XP-Pen Star series, Deco series, Artist series, and more!
Graphic Tablet vs Pen display: Advantages and Disadvantages?
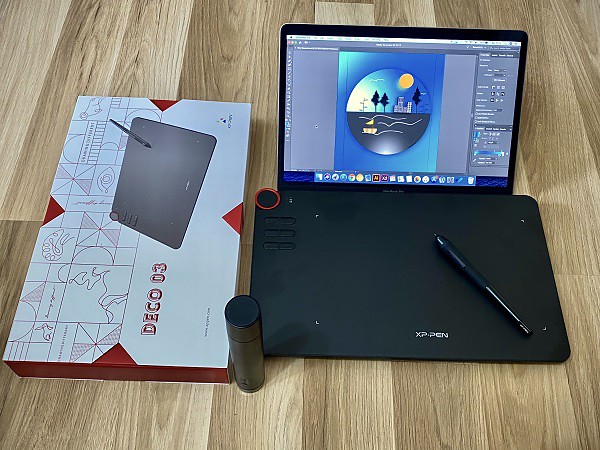
Pros for a screenless tablet, there's less cable management and it's cheaper. which is a great affordable option for a beginner to digital art.
But there is a learning curve to tablets without a display since you have to look at your monitor and not where you're drawing, but once you get used to it, it's pretty easy to use.
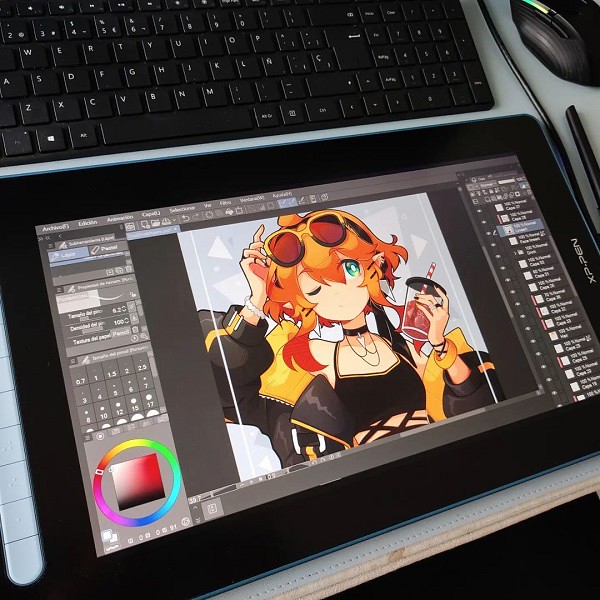
Pros for a screen display, it's definitely nice to be able to be able to draw directly on the screen. It is easier as it is the most like drawing on paper and you are able to look at your hand whilst drawing.
But They're more expensive; They break much more easily so you can't carry them around carelessly like you would do with a Wacom Intuos or XPPen Deco; Once you start drawing on a graphics tablet that has a screen you will never want to draw with another that doesn't.
Plug your drawing tablet into your computer using the plug-in cable and download the tablet driver from the Brand‘s official site. At this point, your tablet should be ready to start using.
Download and open a graphics application such as photoshop or illustrator that is compatible with your tablet. then just Start creating! There are also a lot of free digital art programs for you to use. which can helps you create stunning images.
Drawing tablets - are they worth it?
The digital pens comes with graphic tablet can be used as a mouse as well as a drawing tool. Even if you're not drawing, a tablet is a game changer. It's just so much easier to do certain things with a pen than it is with a mouse.
The big benefits are the pressure sensitivity. The drawing board on the market now usually offers about 8,192 levels of pressure sensitivity, which let them feels much more natural and responsive.
With a small amount of practice your fingers on a pen are likely far more dexterous than your arm and wrist manipulating a mouse; it takes some effort to learn, but it can become a more natural and precise motion when using a pen.
You can use this device for concept art , sketches, preparing compositions, preparing stencils, doodling. It will changed your career. It's a joy to draw, and your production and efficiency are through the roof.
You can use it on photos that need touching up (more than just slider/level adjustments). It's very beneficial if you're using tools that take advantage of the pressure sensitivity. Masks, brushes, dodge/burn, etc all become far more effecient when you don't have to muck about with brush sizes and whatnot.
If you've ever worked with a 3D software like Zbrush, Blender, Maya or 3D Max you know that you spend a lot of your time looking at the character model and moving its body parts around. Doing that with a pen feels so much more natural than a mouse, it's like touching the model with you hands. You get more precise with your tweaking and you move around incredibly faster.
A Drawing tablet and the stylus can significantly improved the work flow for note taking and productivity. with the note taking apps such as OneNote, Evernote... which support pen input function, you don't have to worry about losing/damaging the notes, and searching for specific topics / info is much quicker, you can re-edit and re-add anything and everything whenever you want.
It even have the ability to write in Microsoft edge browser. To do this, select the drawing tool in Microsoft Edge and you'll be able to write over any webpage.
About XP-Pen
Wacom is the industry standard. and they have the most experience brand wise and user experience. but the price is quite expensive and pricey.
Wacom has more competitors now than it has ever had in it's life and there are more coming every day.
If you're starting out, XP-Pen might be a more budget friendly way than Wacom to get into trying digital art using a drawing tablet, and the reviews one the Internet are much and seem quite good.
Founded in Japan, XPPen is a professional company that has been making graphics tablets since 2005 and they improve their products and closing the gap with Wacom products and in even exceeding in some areas while keeping them more affordable.
Their screen-less drawing pads includes Star series and Deco series offer great control that attaches to your computer via USB or Bluetooth.
The XPPen Artist series elevates this functionality with a truly beautiful screen display that syncs right in with your computer, to make a deeply integrated digital art workstation that especially for Windows and Mac users.
You will find non-screen xppen tablets for any size, including A4, A5, A6, A7. And the drawing monitors offers from 10" to 24". both types of tablets come with plenty of buttons and roller wheels to customize shortcuts, etc. it's amazing.
The XPPen's stylus uses the most advanced EMR technology. It creates an electromagnetic field that extends 10 millimeters up from the tablet/screen surface. This means the digital pen can works without batteries, it doesn't need to be charged. When the device is on, the pen is on.
To get you started, XPPen provides you with free creative software: Artrage 6, Toon Boom, Zoner Photo Studio X, ArtRage Lite, openCanvas, Cartoon Animator 4. Software bundles differ by model. you just need to register your product on xppen official site after purchase.
XPPen Anniversary Sales Event 2022
XPPen 17th Anniversary Sales Event 2022 has arrived! Don't miss out on this chance to save a lot of money and get some excellent discounts.
Whether you're back-to-school shopping or thinking about upgrading your graphic tablet and pen display monitors, the XPPen Anniversary Sale has everything from XPPen Star series, Deco Series to Artist series marked down now.
You can save up to 35% off on selected XPPen drawing tablets and Accessories during their 17th anniversary promotion. These XPPen drawing tablet deals are available from August 16 to September 16. nonetheless, I strongly advise taking advantage of them right now. the next special sale would be black friday and christmas.
See the list below for opportunities to save up to $270!
1. XPPen Artist Series

The XPPen Artist's display is magnificent. It's a low-gloss glass pane that's comfortable to draw on. The IPS panel has a rather remarkable color gamut. for example the 15,4" xppen artist pro 16 model is capable of displaying 99 percent of the Adobe RGB spectrum.
What this means is that Adobe RGB is well suited for CMYK printing for paper projects, and more accurately displays a band of cyan-inflected hues than the other color spaces.
The screen is also impressive for its resolution and brightness. even the cheapest 11,6" xppen artist 12 model has a 1920 x 1080 resolution, meaning it's really pixel rich (strong feature for a pixel manipulator).
The brightness of XPPen artist series is rated at 250 nits. That brightness and resolution paired with the glass ( come with an anti-glare screen protecter ) means that you can see everything on the screen clearly, even in direct sunlight.
Artist 10 (2nd Generation) (10,1", was $169.99, 10% off)
Artist 12 (11,6", was $199.99, 15% off)
Artist 12 (2nd Generation) (11,9", was $249.99, 20% off)
Artist 12 (2nd Gen) Gift edition (11,9", was $249.99, 20% off)
Artist 12 Pro (11,6", was $259.99, 20% off)
Artist 12 Pro LINE FRIENDS Edition (11,6", was $299.99, 20% off)
Artist 13 (2nd Generation) (13,3", was $299.99, 15% off)
Artist 13.3 Pro (13,3", was $279.99, 15% off)
Artist 13.3 Pro Holiday Edition (13,3", was $299.99, 20% off)
Innovator 16 (15,6", was $399.99, 25% off)
Artist 16 (2nd Generation) (15,4", was $399.99, 15% off)
Artist Pro 16 (15,4", was $449.99, 20% off)
Artist Pro 16TP (15,6", was $899.99, 25% off)
Artist 15.6 (15,6", was $299.99, 10% off)
Artist 15.6 Pro (15,6", was $369.99, 20% off)
Artist 22 (2nd Generation) (21,5", was $499.99, 20% off)
Artist 22E Pro (21,5", was $499.99, 15% off)
Artist 22R Pro (21,5", was $599.99, 25% off)
Artist 24 (23,8", was $799.99, 30% off)
Artist 24 Pro (23,8", was $899.99, 30% off)
2. XPPen Deco Series

The big difference between the regular Star series and Deco series range is mainly in the build quality of the tablet. the deco series tablet have a better stylus that come with a squishy rubber grip,which is extremely comfortable to use.
The high end xppen deco series tablet is beeter at simulating natural media. most of the deco tablets comes with ±60º of Tilt sensitivity, Allows you to quickly and professionally edit photos and create digital artwork using natural pen control.
If you do a lot of drawing and painting then the xppen deco is a worthwhile investment. It has better control and is a lot more durable.
Deco Mini 4 (4 x 3", was $29.99, 20% off)
Deco Fun XS (4,8 x 3", was $29.99, 20% off)
Deco Fun S (6,3 x 4", was $39.99, 20% off)
Deco Mini 7 (7 x 4,37", was $49.99, 20% off)
Deco Mini 7w Wireless (7 x 4,37", was $59.99, 10% off)
Deco MW Bluetooth (8 x 5", was $69.99, 10% off)
Deco Pro S (9 x 6", was $99.99, 20% off)
Deco Pro SW Bluetooth (9 x 6", was $129.99, 25% off)
Deco L (10 x 6", was $69.99, 10% off)
Deco LW Bluetooth (10 x 6", was $89.99, 10% off)
Deco 01 (10 x 6,25", was $54.99, 15% off)
Deco 01 V2 (10 x 6,25", was $59.99, 15% off)
Deco 01 V2 Line friends (10 x 6,25", was $59.99, 10% off)
Deco 02 (10 x 5,63", was $79.99, 15% off)
Deco 03 Wireless (10 x 5,62", was $99.99, 25% off)
Deco Fun L (10 x 6,27", was $49.99, 20% off)
Deco Pro M (11 x 6", was $129.99, 20% off)
Deco Pro MW Bluetooth (11 x 6", was $159.99, 25% off)
3. XPPen Star Series

If you are a photographer pen angle don't matter much but if you are drawing freehand you will need the pen angle in order to aim the airbrush tool. With no pen angle on the XPPen Star series (except the star g960s plus model) tablet the angle is forever fixed at "straight down".
Notably, the XPPen star series graphics tablets are relatively inexpensive at about $20 - 50 USD, and perfect for beginners. but it's backed with the assurance of the XPPen brand and features the most important specs such as the battery-free pen, 8192 levels of pressure sensitivity, plenty of active area size options, hotkeys.....
The XPPen Star is a good pick for a starter graphics tablet if you're on a tight budget or just trying out digital art.
Star G430S (4 x 3", was $29.99, 35% off)
Star G640 (6 x 4", was $39.99, 25% off)
Star G640 Line Friends Edition (6 x 4", was $39.99, 25% off)
Star G640S (6,5 x 4", was $49.99, 20% off)
Star 05 Wireless (8 x 5", was $69.99, 10% off)
Star G960S (9 x 6", was $49.99, 20% off)
Star G960S Plus (9 x 6", was $59.99, 20% off)
Star 03 (10 x 6", was $59.99, 35% off)
Star 06 Wireless (10 x 6", was $85.99, 25% off)
Conclusion
If you live in the US or canada, you can buy from the XPPen US online official store: https://www.storexppen.com
If you live in other country or Region, just select your country or Region from the "choose country" menu then jump directly to the locial online store. The XPPen Anniversary Sales event is global,but the discounts will vary based on regions.
If you have drawing skills, there are also drawing contests to enter and win the award. the award include three display drawing tablets: XPPen Artist 10 (2nd Generation), Artist 12 (2nd Generation), Artist 16 (2nd Generation). it's great, isn't it?
At the same time, you can subscribe to the xppen social channels (youtube, tiktok, instagram, and twitter) for livestream, discounts and giveaways! more details you can visit this page: https://www.xp-pen.com/AnniversaryGuide
Having the right tool is important! Let's get ourselves a new drawing tablet and enjoy it. Maximum power for design work and digital drawing!
-
XPPen Deco MW excellent bluetooth drawing pad Review
Mittwoch, 6. Juli 2022 - keine Kommentare

Whether you are a graphic designer, illustrator, video editor or photo retoucher, having a comfortable workspace and professional tools is fundamental to fuel your creativity and productivity.
If you want to get started in digital art the drawing tablet is an ideal choice. Using the best drawing tablets can make creating art digitally as natural as sketching on paper or painting on canvas.
There's so much to choose from when it comes to drawing pads! the best quality tablets will come from Wacom and XP-Pen. Once Wacom was the only brand in drawing tablets, now XPPen carved out a niche by offering appealing, affordable alternatives to the industry leader.
XP-Pen is a chinese firm that specialises in graphic tablets, pen display monitors and related devices. It was formed in 2005 in Japan. With Star, Deco and Artist series, it is a national high-tech firm with multiple patents and autonomous R&D capabilities.
I have been a XP-Pen user since 2018 as well as for writing detailed reviews of their new products a few years ago. my old model tablet is still served but the Specifications are out of date now. because the technology has improved a lot since then!
Since the type of artistic freelance work I do requires me to have a tablet, I went ahead and bought the smaller XPPen Deco MW, hoping it could serve me well for a couple of weeks. It turns out the tablet is a good buy for beginners, an acceptable fit for artists on a tight budget.
Like the other XPPen Deco tablets, the XPPem Deco MW Tablet is a graphics tablet—with a writing surface but no screen—responsive to an included pen stylus commands. Your pen strokes are mapped to your computer's screen or monitor, so you can draw, edit photos, and perform other actions and see the results almost immediately.
The XPPem Deco MW is a great addition to the lineup, because it's small and portable, while packing the punch of its larger siblings. it comes in two versions: Deco M, and Deco MW. Deco MW is the wireless Bluetooth model and Deco M is the wired.
I love to use the small Deco MW when traveling and its great to fit on a podium or table while speaking at events.
It's a good choice as a graphics tablet for use with a laptop, especially for mobile use where your working space may be at a premium.
Introduce

The active horizontal drawing area of the Deco MW is 8″ x 5″. Thickness is 8.8 mm. It's light, thin and easy to move around the table, and it has rubber feet to prevent slipping.
This tablet uses two-shot molding with a rubber material to protect the edge. which help protect it from drops, bumps and scuffs. Overall design looks quite seamless.
There is a row of eight shortcut keys on the side. The tablet can be turned so the keys are on the left or right, depending on whether you're right or left handed.
One of the unusual features of the Deco MW is wireless Bluetooth 5.0. Also new is that the XP-Pen has rebuilt its wireless stylus from the ground up. The X3 Elite Pen equipped with the most advanced X3 Smart Chip technology.
The colors offered are pleasant to look at. The XP-Pen Deco LW Pen drawing tablet comes in four colors: green, pink, blue, and black.
More Information about Deco MW tablet from XP-Pen official site: https://www.xp-pen.com/product/1250.html
Unboxing

The box the XPPen Deco MW comes in is small, light and has a nice design on the front to catch your eye. On the back, You have all the information you need at your fingertips, including the size, colour and other infors.
On opening the box you will find the tablet, the stylus, 2 Adapters, Wireless Dongle, 10 Nibs, Nib Extractor, Quick Guide, Warranty Card and a USB-C cable.
The cable is used for charging the Deco MW as well as connecting it to a computer, which you will need to do to get started.
The two small adapters for use with Android or Chrome OS devices with USB-C or micro-USB ports.
Unlike other drawing tablet makers, XP-Pen is known for giving out so many useful accessories.
Connectivity
Bluetooth connectivity means you have extensive flexibility with your work setup—without annoying cords and cables in the way.
Bluetooth may or may not require the supplied USB dongle to work—it depends on your computer model and setup. The dongle is USB A, but the XP-Pen offers USB-C and Micro USB adapters if needed.
Surprisingly, the Deco LW feels snappy and responsive overall when being used wirelessly.
The device can also connects to your computer using the latest generation USB type-C connector.
One of the main advantages of USB-C is, it can be plugged on both sides which makes it very comfortable to use in both left or right-handed mode.
It comes with L-shaped connectors which makes the wires swiftly run along the sides of the tablet without making a mess. The wires are long and seem to be made of quality materials.
Driver Install
You can get your product drivers, manuals from xp-pen official site, There are drivers for Windows, MacOS and Linux. The driver enables the tablet to properly communicate with the computer and take full advantage of the hardware.
On the very first page of the driver, you will find a pressure curve that changes the pressure sensitivity of the pen. You also get the option for mapping your monitor, changing your button shortcuts and much more.
The 8 buttons can be customized to execute your choice of actions (apply modifiers like Shift, Ctrl or Alt for example), commands or navigation functions and can be used alone or in combinations. Think of them as a flattened and expanded set of mouse buttons. Once you decide and assign the operations you want automated, the keys are great time savers when used in drawing and photo editing.
The drawing tablet can be used with Android and Chromebook devices but because there's no driver, you won't be able to use or customise the shortcut keys or pressure sensitivity.
Setting up your XPPen Deco MW with a smartphone is pretty easy. To get started you would need a USB OTG connector and a compatible Android smartphone. Once you have those all you have to do is connect your tablet with your phone through the USB OTG connector. you can then use your Deco MW with a smartphone.
For Chromebook, The XPPen Deco MW is fully plug and play so all you have to do is connect your tablet with your chromebook laptop and unleash your inner artist.
Bundled free software
You have a few different options depending on the xppen's model that you get. Since I have the XPPen Deco MW model, I can download 4 different pieces of software. I can get Explain Everything, ArtRage Lite, Toon Boom and Zoner Photo Studio X.
“Explain Everything” is a software you are getting for free together with this tablet. It's great for remote learning and allows both students and teachers to share their thoughts and ideas in real-time.
ArtRage Lite is a realistic art media painting program that you can mix colors directly on the paper while you are painting.
Toon Boom Harmony is a 2D vector- and raster-based animation suite with a robust animation and compositing toolset.
Zoner Photo Studio X is a full photo-editing toolkit, with workflow, corrections, effects, online galleries, print ordering, and even Photoshop-like layer editing......
Drawing Surface

The work area of the Deco LW is slightly textured, which can make moving the stylus around while drawing feel more natural, like a pen on paper, by providing some resistance for the nib.
The Active area of XPPen Deco MW is 8 x 5 inches, which is verity good for the price you will pay for this tablet, giving how any Wacom with similar active area will cost much more than this one.
The current beginner Wacom Intuos Art tablet has a medium size of 8 x 5 inches drawing area costs a whopping 200 USD.
Bear in mind that the active area is different than the overall dimensions of the graphics tablet itself, which are 10.2 x 6.2 inches.
The bigger the tablet, the better the precision. As a rule of thumb, I normally recommend a large sized tablet for anyone using a monitor of 20" or larger.
I've tried the various sizes and Medium size has always worked best for me. Your mileage may vary, but I always encourage people to start with a Medium size and if you are dissatisfied after using it for a week then work with your seller to get an alternate size.
Stylus with X3 Smart Chip

The new stylus feature XP-Pen's most advanced X3 smart chip technology. This new tech allows for the stylus to have a lower initial activation force meaning, allowing the stylus to be much more sensitive. This results in nice, smoothly tapered lines and better control of the pen's 8,192 points of pressure overall.
There is over 8,000 levels of pen pressure, which means that you can get really nice, smooth transitions between opacity and line width, and it feels a lot more natural to draw.
The Stylus features a 60 degree tilt angle which allows you to simulate accurate brush strokes and create realistic drawing effects. "Tilt Angle" is actually the direction your pen is tilting. Which is controlled by the direction feature, in Photoshop under the brushes pressure drop downs menus. It will allow you to do things like use arrow brushes and have them always follow your crazy curvy lines to follow in the drawn't direction.
The stylus has two buttons by the side. There's no eraser and to me it's not really a big deal. I got around the inconvenience by customizing two express keys in Photoshop; one for the brush and the other for the eraser.
The stylus is thinner than the usual Deco ones. There's no rubber grip but the textured surface throughout ensures that it's not slippery even if you have sweaty hands. It has a nice weight and comfortable to hold and draw with.
Use Performance

All the shortcut buttons are placed on the left side of the device which is an ideal position for your hand to rest naturally. The quality of the buttons is great as they make a crisp click sound with good feedback.
This reliable wireless design also makes it easy to take it on the road with your laptop when you travel too!
The matte textured surface is nice to draw on. There's a nice tactile feel to the nib as it glides on the working area. There's no lag to speak of. Strokes appear instantly as dictated by the stylus movement. Quick strokes are smooth and have no jitter.
Apart from the physical feel, it performed great in various digital painting software. The stylus was very responsive, with no delay in between me placing a stroke and it showing up in Photoshop.
Its pressure sensitivity was on point, and there were no wobble and jittering in fast as well as slow movements. I was able to place some lovely strokes with different sizes and opacity.
The transition from low pressure to high very accurate and on point with no traces of pressure bumps. Lines are able to taper smoothly.
The Initial activation force is really very low. I was able to draw a thin line with barely any pressure applied. This is the most sensitive pen XP-Pen has made so far.
My digital artwork made by xppen deco mw tablet:

I love how the pressure-sensitive pen allows you to draw realistic and precise strokes. It almost feels like drawing with an actual pen. Besides drawing, I designed different hand-drawn fonts, icons, and brushes using the tablet.
I also highly recommend it for doing photo editing work like using the healing brush, creating complex masks, HDR, dodge & burn, painting, etc…
Even if you have a good touch screen, nothing replaces the XPPen Deco MW for photo editing in Photoshop (and it's pretty darn handy in Lightroom if you use the adjustment brush). It's just so much more easy and natural than using a mouse, and you get used to them really quick to the point that you can't live without them.
Although I used Adobe Photoshop throughout this review, let it be known that the Deco MW works with all major graphics applications.
In this new era of touch everywhere devices, one place where things were a bit clunky with pen tablets was that there was no mechanism for doing natural touch gestures like swipe.
Final Verdict
XPPen is a highly affordable, credible and reliable brand which makes it stand out from other brands. For many reasons, XPPen has quickly grown to become one of the the most popular drawing tools for digital artists around the world.
XPPen Deco MW is a good tablet for all kinds of creative digital work like illustration, vector design, image editing, etc. Although it's mainly advertised as a beginner or student drawing tablet, any level of creatives can use it.
This tablet is good value for money because its drawing experience is just as good as other fancier tablets that I use, and it costs much less. The size is small enough to take anywhere and at less than $70 USD its really worth it.
It can be a great option for your first tablet if you're new to graphic design and drawing. It's also a good budget option for those who are looking for a quality tablet at a lower cost.
I like how portable it is because I can work anywhere with the tablet and it doesn't take up much space in my bag or on the desk. This small size option is probably one of the most pocket-friendly tablets that you can find in the market.
I would also recommend investing an extra $20 to get the XP-Pen Deco LW which has a larger working area of 10 x 6 inches, if only for the better X3-Smart-Chip pen, less $20, get the Deco M version without bluetooth.
Once you advance in your career and start becoming a pro you might want to opt for a display drawing tablet like the XP-Pen Artist series. But, as a beginner or intermediate, the XPPen Deco MW will be your best friend for a long time.
Buy it from XP-Pen US Official Store: https://www.storexppen.com/buy/deco-mw.html
People from Other regions can select your country from the menu to reach the local store, the price may be different because of the Transport costs and customs tax.
-
XP-Pen Artist 12 (2nd Generation) Budget Pen Display Monitor Review
Dienstag, 22. Februar 2022 - keine Kommentare
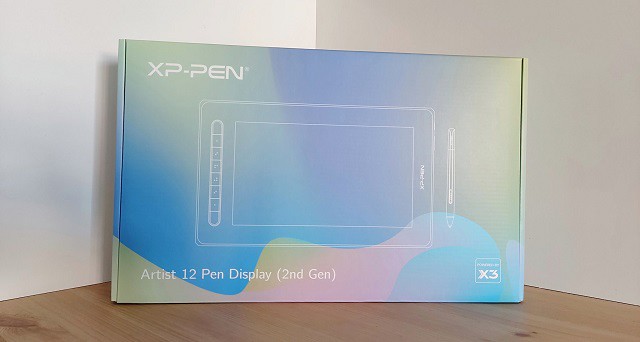
Remember the light pens that let you draw right on your screen? Take a look at XP-Pen's updated digitizing pad version - Artist 12 (2nd Generation).
Digitizing pads are wonderful things, but we're at our best when we can look at what we're drawing as we draw it. Looking down at your pad and then up at your monitor to see what the computer "saw" may be a great way to strengthen your neck muscles, but it's a tiring way to draw.
Designed to work in a multi-monitor environment or to be your only monitor, this tablet's display screen shows you what you're drawing as you draw it.
This is a huge upgrade for me. I have gone from the lower end XP-Pen tablets (Star, Deco...) to this. I am not a die-hard serious artist, but I do commissions from time to time and overall want to improve my work and the speed of my workflow.
My goal is to work on compiling coloring books at some point, so I really wanted to get serious without completely breaking the bank. I read each review on this product several times before finally making the decision to buckle down and buy this Artist 12 (2nd Generation) Pen display monitor .
Since XP-Pen is the only brand of tablet I have used and essentially the only brand that I trust, I had no concerns at least giving this tablet a try. And let me say, I am so very glad that I did!
Design

The XP-Pen Artist 12 (2nd Generation) combines the advantages of a high quality IPS LCD monitor with XP-Pen's patented, professional X3-Smart-chip pen technology to form the perfect interactive companion for your Mac or PC.
Thin and light, the new Artist 12 (2nd Generation) gives you the flexibility to work directly on screen as you would on paper.
Easily rotate your display when working flat on your desktop to find the right position for your hand, or for grater comfort, recline the Artist 12 (2nd Generation) on the desktop.
Ergonomically designed for maximum comfort, it's even light enough for use on your laptop.
Any way you choose to use it, the Artist 12 (2nd Generation) gives you a natural pen-on-paper feel in a digital environment.
The XP-Pen Artist 12 (2nd Generation) tablet is available in 4 beautiful colors: Black, blue, green, and pink.
There are four rubber feet on the tablet back to help it stay still on flat surfaces.
The bezel on the unit also sports 8 customizable keys. and the buttons are a productivity enhancing joy.
As well as being able to connect it to a Windows or Mac OS computer you can also use it with an Android device, like the Samsung Galaxy Smartphones.
Connection

The setup for the XP-Pen Artist 12 (2nd Generation) is technically simple. Plug in some cables, install the XP-Pen drivers which you can download from XP-Pen official site: https://www.xp-pen.com/product/1069.html , restart your machine, and you're good to go.
Admittedly, the set-up is a little daunting with all the cords that come with it.
The XP-Pen Artist 12 (2nd Generation) uses an all in one adapter that splits to 3 connectors for power, HDMI and USB.
The HDMI powers the display and the USB acts as an interface for the digitiser pen. The third cable ends in a jack, to which a cable to the power adapter connects.
you can also connect to any Mac or PC with a single USB-C cable (not included) to a USB-C port for both video and data.
I read over the instructions a couple of times before I started to ensure I had a good grasp on what I needed to do, and once I began plugging things in, it was a breeze.
Don't let the cords worry you too much. It is not pick-up-and-go portable, but not impossible to bring it with you on the go. Just set aside a little extra time for setting up everywhere you do go.
Driver Features and bundled drawing software
Like all XP-Pen tablets, the Artist 12 (2nd Generation) includes driver software that provides a variety of controls over the behavior of the tablet and individual pens.
This includes sensitivity adjustments for tip feel, and pressure sensitivity; button assignments for individual pens; and functions for the buttons on the tablet itself.
These settings can be made globally or assigned as custom settings for individual applications. This is useful, for example, when you want to set the button to scrub in Paint Tool SAI but zoom in Adobe Photoshop.
Like other XP-Pen Artists, the Artist 12 (2nd Generation) include a utility (built into the driver software) for calibrating the cursor with the position of the pen.
On the software side, it's also worth noting that the Artist 12 (2nd Generation) comes bundled with Artrage 6 , openCanvas, and Cartoon Animator 4 digital art software.
Color Accurate Screen

The Artist 12 (2nd Generation) sports a 11.6-inch IPS LCD display--a bit smaller than a Apple MacBook display. The screen has a resolution of FHD 1,920 x 1080 pixels and looks good at this size. so the images on screen appear sharp, crisp, and vibrant.
IPS display technology boasts bigger, better, and brighter colour contrast, visual and sound quality, and more robust viewing angles among other attributes than its predecessors (TN and VA monitors).
The viewing angle of this tablet is a whopping 178°, meaning that you are able to get the same crisp, colour saturated picture even when looking at the screen almost sideways.
The Artist 12 (2nd Generation) monitor have the capability of displaying a much wider range of colour of 94% Adobe RGB. What this all means in real world terms is the reproduction of much deeper more saturated, accurate and natural colours.
This enables better rendition of colour tones and better gradation in colour. For image processing and printing this is a key advantage and for photographers is critical to achieving the best possible results.
As a display designed specifically for visual artists, its quality is far superior to that of any notebook display I've seen. Colors, brightness, and contrast are even across the face of the screen. And the device calibrates up nicely using a colorimeter.
Above that, Artist 12 (2nd Generation) tablet has a laminated display, something that reduces parallax. This means there is no air gap between layers, thus there is no light refraction or light interference, making the screen clear and vibrant.
Many of the non-laminated display drawing tablets suffer from a common issue called parallax. In use there is a slight gap between the tip and the pen and the display when you draw, which allows for parallax error.
The tablet screen does not have a etched glass surface, but is covered with a matte film. As you'd expect from a matte screen protector, it does reduce glare considerably and it cuts down on fingerprints too.
X3 smart chip powered Stylus

As for the pen which comes with the X3 smart chip. The initial activation force is lower than other XP-Pen stylus which is a huge plus.
X3 Elite Stylus requires as little as 3 gram-force and probably less which is about equal to simply resting the pen tip on the digitizer. It can even start writing and drawing without exerting force and only relying on the gravity of the pen itself.
As usual XP-PEN Stylus works without batteries and is lightweight, so there's no need to charge it at all.
It has 8,192 pressure sensitivity levels, placing it among the best styluses on the market.
Pressure sensitivity determines how much you can vary the width of the lines you paint. This is done by applying different pressure on the tablet surface.
When it comes to that. Pressure sensitivity helps you draw like you do with traditional media. Like pencils & brushes.
The 8192 levels of pen pressure sensitivity will provide you with ultimate precision and control with every art and illustration that you are doing.
This stylus also supports a tilt function of up to 60 degrees. It means that when you use the appropriate brushes in Photoshop, the line on the drawing file will change from what angle the pencil holds to the screen.
Using the XP-Pen Artist 12 (2nd Generation)

Couple this with a laptop or, say, a Mac mini, and you have yourself an excellent, compact, portable setup for visual arts. Or combine it with a higher-end workstation and additional displays, and it makes a great companion tool that can also be taken on the road when needed.
The XP-Pen Artist 12 (2nd Generation) is compatible with any drawing software, including Photoshop, Illustrator, Paint Tool SAI, Sketchbook, Clip Studio Paint, Gimp, Krita.... and etc. It works transparently and, it's completely plug-and-play.
The screen is the perfect size for the type of work that I do, so I have absolutely no complaints about that in the least. I was initially concerned that the size would be to small, but it is great!
However, if you are more serious about your art or currently seeking to become a professional, it probably wouldn't hurt if you got a larger size.
Others have commented that they were scared about the stylus not being able to go all the way to the edge of the screen, but I do not have this problem at all. I am able to easily click, write or draw at the very edges with no concerns.
The pen is great. It is not too large or bulky and when I am drawing, it feels just like I am using a pen on paper. The cursor goes exactly where I intend for it to go with no lag or jumping. I like that I do not feel disconnected from my picture as I did in the past with my previous screenless tablets.
I could not believe how comfortable and natural it felt, the fact you can make strokes directly on the screen and see the result right beneath provided greater control and comfort.
The buttons to the side are an excellent addition. I love being able to zoom in and out freely while I am working on my lineart or coloring. Eliminating the need to stop drawing, look for the magnifying glass to zoom in/out, then returning to drawing saves me a lot of time.
The tablet is only senstivity to the pen input. So I have no issues with where my hand lays on the XP-Pen Artist 12 (2nd Generation), as I can always see what I'm drawing without any problems.
The XP-Pen Artist 12 (2nd Generation) a joy to use for photographic and retouching work. Display your image on the main monitor, then use the Artist 12 (2nd Generation) and its HotKeys to touch up the details, while keeping an eye on what effect your changes are having on the overall image.
Conclusion
For the price of $250 USD this is a terrific device that I have used this every day since I got it. and It had really streamlined my work and gave everything a boost in quality because it is just natural to use a pen and draw right on the display.
Taking it on the road is not much of a hassle, and it truly allows me to be able to do the same type of work in the same way, and in the same amount of time, as I can from the comfort of my studio.
If you are looking for a portable pen display experience solution, or can't afford the larger units but still want a drawing monitor for your work, this is the ticket.
Overall, I would definitely recommend this product on the XP-Pen Artist line, despite a few minor concerns. If you are interested in designing anything, this is the way to go for way cheaper than its big brother the 21.5 inch model - XP-Pen Artist 22 (2nd Generation) .
For the professional designer the pay off period is very short and the question of whether to purchase is a no brainer. For the student it is a good investment for the future and will certainly prove its worth.
That is really everything that I can think of, but if anyone has a question I will be more than happy to do my best to answer it. I am sure I have forgotten something!
XP-Pen US official Store: https://www.storexppen.com/buy/artist-12-2nd.html
-
7 Best Drawing Pads for Photo Editing, Photoshop and Gimp
Samstag, 12. Februar 2022 - keine Kommentare
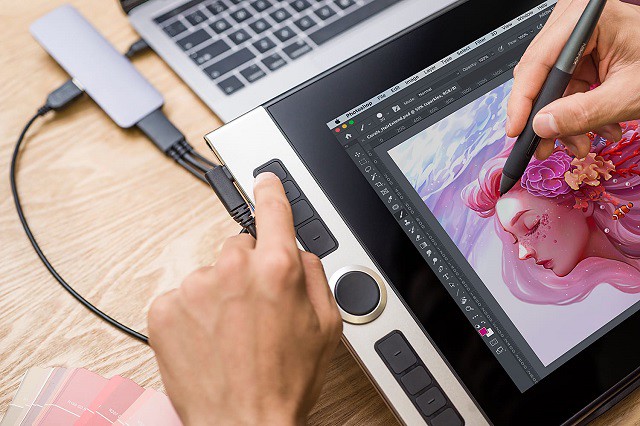
Photographers, Graphic designers and digital illustrators would agree that a drawing tablet makes the work easier and more fun.
When looking at photos taken by professional photographers, it's important to understand that they were post-processed.
Experienced photographers know how to fine-tune colors, edit the background or remove unwanted objects.
Today, almost all professional photo retouchers and graphic designers use graphic tablets for editing photos.
I have been using a XP-Pen Drawing Pad for about 5 years now. The degree to which it has impacted my Photoshop work is so high that I just couldn't go back to using a mouse.
I love my graphics tablet and as much as I'd like to encourage all photographers and creative professionals to run out and buy one.
Whether you're looking for a drawing tablet with a large drawing area, or one that's smaller and lighter; an expensive tablet or one that's most affordable, you're sure to find the best fit in this article.
Popular Photo editing software

If you stick with photography for any length of time, even as a beginner/hobbyist, you'll eventually end up with Lightroom and Photoshop.
Adobe Photoshop and Lightroom are the best-in-class photo editing software, but it also comes with a hefty price tag and an annoying subscription model.
If you are a graphic design professional, that price might be negligible considering how much your time is worth, but for people who are more of a hobbyist, the Adobe subscription is a bit much.
For beginners and amateurs who do not wish to invest in a paid software, they can turn to Gimp, the free equivalent of Photoshop, or Photofiltre, this easy-to-use photo software that allows you to retouch your pictures with a really specialized software, as you would do with Photoshop.
Gimp is among the very best free image processing programs one can find. Its capable of doing almost anything Photoshop can do. but the lack of cmyk support does kinda get in the way.
You can also Check out darktable and RawTherapee. Both are free open source Raw editors, and have almost the same functionality as Lightroom.
What is a graphics tablet?
A graphics tablet (a.k.a pen tablet or drawing tablet), just like a mouse, is an alternative input device that allows the user to interact with a computer using a stylus.
The device consists of two main parts: a flat surface that is mapped to your screen and a stylus. The image is shown on the computer monitor.
The drawing tablet with a screen, also known as a pen display tablet, is a tablet that has the obvious benefit of seeing what you create on the screen.
Benefits of drawing tablet for photo editing
It provides a more natural input for activities like photo retouching, drawing and digital painting because it emulates the way you draw with pencils on paper.
graphics tablets unlock new potential with the brush tool in Photoshop. Rather than having to continually change brush sizes, a tablet uses pen pressure. Just like when you are drawing on paper, the harder you press will alter the look of the brush stroke. This is exceptionally efficient when making adjustments to layer masks or dodging and burning.
If you dodge and burn or use luminosity masks its a must have to use a pen NOT a MOUSE. You will be able to target the important points of the photograph with your stylus, and correct the image, not in a global way, but by selecting each element independently of the others, in order to lighten, darken, or perform any advanced effects, on a fragment of the shot in particular. This makes image editing easier and faster.
For drawing paths with the pen tool or lasso tool a tablet is a hand saver so much faster, personally I wouldn't even begin to edit without one.
Think of making smooth Unnoticeable transitions of light vs stamped circles of light. even using LR filters with a pen is less effort.
Pen Tablets are absolute positioning devices while mice are of the relative positioning variety. Simply put, this means is that you may have to move your mouse several times to get the cursor from one side of the screen to the other. With tablets all you have to do is just place your pen on the device's surface and your cursor position will be mapped precisely to your screen.
Drawing tablets are more intuitive and ergonomic, offering for a more pleasant experience for those not only wanting to reduce the chance of developing repetitive strain injuries but especially for individuals who already have carpal tunnel syndrome, for example.
Most drawing tablets enable you to customize buttons on the tablet and on the stylus to perform certain actions. This can be a huge time-saver, especially when you need to frequently switch back and forth between tasks.
For these reasons, professional photographers, as well as experienced amateurs, can no longer do without their drawing tablet for image processing.
And so whether you're using Photoshop, Affinity Photo, Paint.Net, Photofiltre or Gimp, you'll probably find it surprisingly intuitive.
How to choose a drawing tablet for photo editing and photoshop?
Display vs Non-Screen
The distinction between display drawing tablets and graphics drawing tablets is pretty much self-explanatory. You may use the display drawing tablets to draw on their own screen.
You may don't need a graphics tablet with a screen, but they can improve the accuracy of your Photoshop work, depending on your technique.
If you do want one, you will be looking at a significantly increased cost, although it is possible to get a relatively cheap drawing tablet with screen, such as the XP-Pen Artist 12 Pro, if you are more budget limited.
For tablets with a screen, pay attention to the color gamut (a wider color gamut is always better), the size, and the resolution.
Size
Large drawing tablets provide a larger drawing surface to work with, however as their size grows larger, the device's portability suffers.
You have more portability with compact tablets. If you're searching for a tablet that's small and portable, these may well be the ones for you. There are also medium-sized drawing tablets to choose from.
For most photographers, a smaller tablet is more than sufficient. as it means you can move the cursor with smaller strokes of the pen. You can always zoom into a photo for higher drawing accuracy.
However, if you have space (and the money), then perhaps you might see an advantage in using a larger tablet.
Pen Pressure sensitivity
The sensitivity of the pen ranges from 2048 to 8192 levels. the harder you press on the stylus, the greater the pressure level identified and the thicker the line.
Beginners should look for a tablet that has at least 2048 pressure levels.
You may have a more natural and hands-on photo editing experience with higher degrees of pressure sensitivity, but for some people, it might not be as noticeable.
Tilt sensitivity
It is a vastly more precise input mechanism , Tilt Sensitivity is a digital tablet feature that allows the device to perceive the angle of the digital pen over the tablet surface.
The tilt function replicates what you get with a real world brush or pencil. The pen angle is useful when using certain brushes. In general use, the tilt will not affect your work.
Stylus Type
Battery-powered styluses are usually thicker so that they can accommodate the battery, which can make them feel too large for small hands.
Rechargeable styluses need charging like your phone or laptop.
EMR styluses employ an innovative electromagnetic frequency that transfers power to the pen wirelessly right from the tablet, so there's no need to charge it.
EMR powered digital pens are more common than you think. This technology could be seen in stylus from all the major brands such as Wacom, XP-Pen, Ugee , etc.
Resolution
Resolution refers to how many lines per inch (LPI) the tablet's display has & how much it can detect from the stylus. The higher the LPI, the more detail you can add to your drawings.
Responsiveness
Responsiveness refers to the speed at which the lines that you're drawing show up on the screen. In most cases this is instantaneous. But it all depends on the tablet's drivers and your computer's specs (CPU, GPU, RAM).
Controls and shortcut keys
Shortcut keys are helpful for digital artists of all skill levels. With these buttons, you have a more efficient workflow as they allow you to quickly browse any software or feature you use regularly. Shortcut buttons also allow you to change the size of the brush.
These buttons are often adjustable and may be modified. The more shortcut buttons, the more navigation options you get and that in turn results in a smoother workflow.
The best drawing tablets for photo editing
Choosing the best drawing pad for photo editing & retouching , though, isn't easy, because there are so many of them about. In this article, then, I'll narrow your choices down to the absolute best buys.
If you are not familiar with XP-Pen yet, you should know that the brand is one of the most popular manufacturers of graphics tablets.
XP-Pen has become very popular with designers and photographers in recent years. They create quality products at affordable prices.
XP-Pen manufactures professional graphics tablets, pen display monitors and Stylus Pens.
Whether you're a beginner, a professional graphic designer, or a photographer retouching headshots in photoshop the best XP-Pen tablets are listed below and consist of various models.
1. XP-Pen Deco Mini7w Wireless

XP-Pen Deco Mini 7w is currently one of the most value for money drawing tablets in the market.
The tablet is available in two variants – wired and wireless ( via 2.4 GHz wireless receiver ). Xp-Pen Deco Mini 7 is the wired version, whereas the Deco Mini 7W (wireless) works in both wired and wireless modes.
This digital drawing tool comes with a 7 x 4.37 inches active drawing area and 9.3mm thick. The tablet feels more on the premium end and has a nice surface-like feel to it.
The battery-free Stylus has 8192 levels of pressure sensitivity with tilt function support, a silicone grip, and 10 durable pen nibs. Now you can forget about having to charge your tablet before use!
It has 8 customizable express key shortcuts along the top of the tablet that can be customized as you see fit. For example, you could map the ‘undo' or ‘export' command to an express key on the tablet.
It connects to your Mac, Windows, Linux, Android or Chromebook via USB and is fully compatible with such photo editing software as Gimp, Photoshop, Lightroom, Affinity Photo, Paint.Net, and Photofiltre.
This tablet is a perfect starting ground for any photo editor or digital artist. Its small size is ideal for travel or limited desk space.
2. XP-Pen Deco L & Deco LW Bluetooth

This is one of the most advanced pro-spec tablets XP-Pen has ever introduced which has a very slim profile with a stylish design.
XP-Pen Deco L & Deco LW comes in four gorgeous colors to fit your personal style: Black, Blus, Green, and Pink.
Additionally, the manufacturers have provided you the option of selecting between plain ( Deco L ) or Bluetooth ( Deco LW ) featured models.
Its 10 x 6 inches drawing area enables you to have more space to edit your photos and create your drawings.
This Stylus uses the new X3 Smart Chip, It draws smoother, more accurate lines, and the initial activation got upgraded significantly force to just 3g as it takes less pressure to initiate a line.
The eight buttons are entirely programmable and can be customized to control whatever function you want to in whatever apps you use.
The tablet enable superior pen input action for Windows, Mac, Linux, Android and Chromebook devices.
This tablet is very well suited to be used as a photo editing tablet, with its support for the most-used photo editing software Adobe Photoshop as well as several other photo editing softwares that photographers use.
3. XP-Pen Deco Pro MW & SW Bluetooth
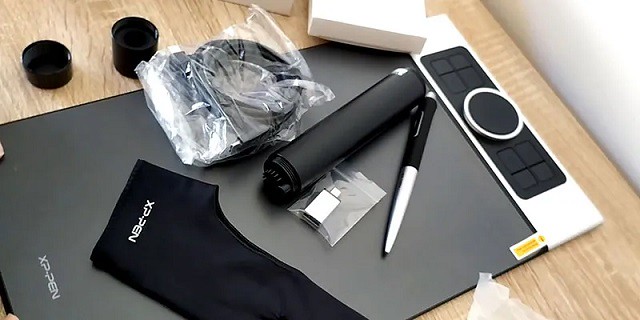
This drawing tablet is the best non-screen tablet from XP-Pen!
Slim, stylish design. aluminium build, and it feels extremely durable.
It provides wireless capabilities in models Deco Pro SW & MW that have Bluetooth support.
The drawing tablet comes in two sizes, i.e., small and medium. The active area for small and medium variants is 9 x 5 inches and 11 x 6 inches, respectively.
It's easy to configure the 8 Shortcut Keys and 2 innovative dial wheels to your preferred workflow setup.
It comes with a battery-free stylus PA1 with an impressive 8192 pressure sensitivity.
Moreover, the tilt function support makes the digital stylus draw as natural as a normal pencil.
When you use the pen at a slant angle, it changes the behavior of the strokes from a normal line to shaded ones.
This tablet for photo editing and color grading may become an indispensable device for professional designers.
4. XP-Pen Artist 12 2nd Gen

If you need a budget drawing tablet with a built-in screen that offers a premium experience, XP-Pen Artist 12 2nd Generation might be for you.
The Artist 12 2nd comes in four interesting color options, including Black, Green, Pink, and Blue.
The XP-Pen Artist 12 2nd Gen features a gorgeous 11.6-inch display plus a Simple and stylish body, light and portable.
Its 1920x1080 FHD IPS-display boasts 16.7 million colours and a colour gamut of 94% Adobe RGB, allowing you to view and edit your images in crisp, lifelike detail.
The lack of parallax combined with a fully laminated display was very appealing to designers and photographers.
Artist 12 2nd is equipped with the latest X3 chip, this chip makes the pen more sensitive to your strokes by increasing IAF sensitivity.
It also makes the overall experience more realistic as the X3 technology reduces the response distance to 0.6mm. That's two times better than the regular XP Pen and most active pens on the market.
Finally, the eight additional shortcut keys allow you the flexibility to quickly access commonly used functions.
5. XP-Pen Artist Pro 16TP

That high-end tablet features a beautiful 15.6-inch 4K UHD display, delivering images on a new level of detail and clarity.
Its IPS display provides class-leading color accuracy of 92% Adobe RGB, allowing you to fuel your creativity with vibrant colors and stunning visuals as you edit.
XP-Pen Artist Pro 16TP is manufactured with matte, anti-glare screen surface that are easy to use in bright light.
The display is laminated so there's no gap between the pen tip and the line it creates.
It has an additional multi-touch feature and gesture support.
Battery-free stylus with a digital eraser at the end: XP-PEN advanced PH2 passive pen was made for a traditional pencil-like feel.
The pen has 8192 levels of pressure sensitivity with 60 degrees of tilt, which allow you to create fine and hard strokes with ease.
What all this means is that the Artist Pro 16TP is the best premium 4K XP-Pen tablet there is right now. And while that may or may not be overkill for your photo editing needs, it is a very, very nice tablet.
6. XP-Pen Artist 22R Pro

The XP-Pen Artist 22R Pro tablet is an absolute powerhouse for all photographers.
Enjoy 21.5 inches of space to create your masterpieces when you use this impressive tablet.
With a color accuracy of 88% NTSC and a FHD resolution of 1920 x 1080, this tablet fully meets the boldest expectations.
It include a PA2 pen which has 8,192 levels of pressure sensitivity and tilt recognition, allowing for ultimate creative control and instant reproduction of your movements.
This stylus offers an integrated and ergonomic grasp. The pen is battery-free and doesn't require charging since it's a EMR tablet.
It includes 2 red dial wheels and 20 hotkeys. The touch ring can be adjusted to canvas zooming, page scrolling (zoom in/out), and brush adjusting.
The 20 shortcut keys allow you the flexibility to quickly access commonly used functions.
This tablet also comes with a stand that helps to prevent the screen from shaking.
7. XP-Pen Artist 24

XP-Pen Artist 24 offers the ability to sketch and edit directly on its built-in screen.
The 23,8″ display is a great size, as it will make you feel like editing on a sheet of large canvas.
The Resolution is 2K resolution, 2560 X 1440, which means you have amazing details while drawing even with such a big display size.
Colour reproduction is excellent with support up to 94% Adobe RGB. So this tablet is definitely fit for high end print production work where you need to compare printed proofs.
Moreover, XP-Pen has included a great PA6 battery-free stylus that you can easily set up to mimic multiple pens and brushes in a vast amount of colors.
The pen utilizes first-class accuracy and pressure sensitivity to make you feel like using a real pen. This is very important for photographers.
The Artist 24 proves to be a great editing tool for photo-editing with software like Photoshop, GIMP, or Affinity Photo.
The Artist 24 has a lot to offer to anyone who uses it. Although this device is perfect for students and beginner photographers, it is also an excellent choice for professionals.
Conclusion
Drawing and graphics tablets are very useful for creatives. Whether you are a photographer, designer or artist, the XP-Pen drawing tablets could be the device you need.
The drawing tablet has to be connected to a Windows or Mac device. However, you can also connect some special models to your Android smartphone or tablet via an OTG adapter. For this reason, it could be portable to use on the go.
I use my XP-Pen Deco Pro graphics tablet for all my Photoshop stuff because it makes my work so much easier and fun and just gives me that great feeling of human to pixel connection (similar to how painters feel the connection to their brushes, painting surface and paints).
As an artist this just goes a long way, at least for me. Masking, making selections, painting etc with a graphics tablet is an amazing experience. I love it!
I'd love to hear from you guys, so let me know down in the comment section what you use, what your experience is, how these devices have benefited you etc. Of course questions are more than welcome!
-
Best budget graphic drawing tablet for digital note taking
Donnerstag, 23. Dezember 2021 - keine Kommentare

Note Taking, though it sounds simple, is a task without which many things will go haywire. Whether you are a student, a businessman, or just anyone attending a seminar, you are bound to make notes for future reference.
Note Taking has traditionally been done using paper and pen. But with the advancement of digital technology, there's a shift of population from pen and paper to laptop or a digital device. It is also a skill for which you can be expected to get paid.
Gone are the days when notes and pens were mandatory; now, laptops or digital tablets with stylus are preferred to take notes.
A perfect device for note-taking does not really require expensive and top-notch specifications. However, a few basic specifications and configurations are essential.
When you think of a device to take notes, it must be something convenient and easy to carry. It must also have a decent battery life not to have to look for a plug point instead of writing.
Stylus pens have gotten increasingly more precise in the last few generations of tablets, and can pick up even the finest lines you put down. For digital artists, designers, students, editors, even anyone putting together a presentation for the office, these are an invaluable tool for boosting productivity and making your work look great.
Benefits of Digital note-taking
Digital note-taking has a lot of advantages over its physical counterpart. Firstly, less paper is used therefore it is better for the environment.
Anyone who is in school has probably experienced having mountains of notebooks piling up. Not only do they require hundreds of trees to be cut down, but also take a lot of space, which can be avoided by simply having a laptop and a drawing tablet.
Digital notes are also easier to search, making studying or projects easier.
Moreover, all your notes for every subject will be in one place for convenient usage. Even if you don't have your laptop with you, you can still view them by uploading them to the Cloud.
So you don't lose important information when a traditional paper notebook or sticky note accidentally ends up in the trash or goes missing.
Note Taking apps support Handwriting with stylus

Note Taking apps let you capture your ideas and stick them somewhere useful. That way, no matter what you need to know and no matter where you are, you can pull up the information you need.
There are literally hundreds of note-taking apps on the market. A lot of them are free, or at least provide a free trial.
If you are searching for the app to make note with your stylus for tablet, then OneNote, Evernote, Google Keep, Notability, Goodnotes, Xournal++, and Squid is the most appropriate option for you.
Portable standalone tablet with stylus for note taking

The thought of writing down every word on your tablet with a screen keyboard appeared tedious.
The solution is a tablet with a stylus with installed note-taking apps, high-efficiency technology, and advanced intelligent styluses.
If you're looking for the perfect tablet for taking notes, ipad air, ipad pro, Microsoft Surface Pro, Samsung Galaxy Tab, Huawei MediaPad Pro, and Xiaomi Mi Pad Pro are the best choice.
Some tablets, like the Samsung Galaxy Tab come packaged with compatible styluses so you can get to work right away, while others like the Apple iPad Pro, surface pro require additional purchases for peripherals.
Tablets make it easy to take notes on the go and provide almost as much computing power as a laptop. But It's more expensive than the laptops.
Graphic drawing tablet for note taking

If you think an iPad is kinda pricey as of now and you're looking for a budget-friendly tablet with digital pen to achieve your dream handwritten digital notes on your laptop then you can try the graphic tablet.
Also often called a drawing tablet or a pen tablet, “graphic tablet” is really a blanket term for a touch technology that uses a stylus that, when used to draw on the tablet's surface, will translate the strokes from your tablet on to your computer.
There are two different types of tablets for drawing, pen tablets and pen display monitors . Pen tablets are simpler drawing pads that need to be connected to a PC with screen monitor to display your work. While pen display monitors allows you drawing directly on the tablet screen.
Both Mac and Windows are able to properly support handwriting recognition and indexing. Being able to index an dynamically search your handwritten notes and diagrams is a unique and spectacular advantage when you're dealing with months' worth of scatter-brained thoughts.
The drawing tablets offer support for Windows and Mac platforms, some newly models now compatible with selected Android and Chromebook devices.
A drawing tablet usually comes with a stylus, which is closely related to a pen in shape. They are generally much easier and more comfortable to hold in your hand than a mouse, and they allow for an incredible degree of precision in your work.
The kind of precision that writing utensils bring, compared to fingers, is a chasm of difference. That is the appeal of using a stylus.
Most digital pens of drawing tablet come With EMR technology, the stylus will never die and never need recharging. It's designed to feel comfortable in the hands, with a natural feel in the way it writes.
Thousands of individuals use Drawing tablet for NON-artistic purposes. Think note-taking, CAD, medical imaging, teaching, presentations, annotating, signatures, people who can't use mice due to repetitive strain, etc.
Not only is this device perfect for note taking, it is also excellent for many other intensive applications such as graphic design and digital art. Most people will have no problems with the performance, so we highly recommend that you go for it.
graphics tablets such as XP-Pen brand have up to 8192 different levels of pressure sensitivity. With 8192 levels of pressure, you'll not only be able to take advantage of note-friendly applications such as Notability (Mac) and OneNote (Windows), but programs with dedicated graphic tablet support (Photoshop, Sketchbook, etc).
With a stylus, you can tilt the pen, and move your hand and wrist into a natural drawing position. This allows you to have much more control over the strokes that you make. You can literally sketch with your computer.
4 Best drawing tablets for note taking
You can easily write your thoughts on OneNote and other note taking apps with digital pen tablet, write papers on Word and organize your files, among other productivity tasks.
The drawing tablet enables you to have one powerful laptop that runs everything. Whether it's for painting, sketching, whiteboard writing, online classes, taking notes, annotating PDF/PPT documents or productive zoom meetings. Having a drawing tablet next to your Laptop can help you a lot.
If you just want a graphics tablet for note-taking, no Ipad, I say buy a xp-pen tablet, you don't need some expensive wacom tablet if all you're gonna do is take notes, it would be a total waste of money to buy the expensive tablet just take notes.
XP-Pen provides a cheap and great alternative to Wacom when it comes to drawing tablets for note taking.
1. XP-Pen Star G430S / Star G640

There's not a whole lot to this XP-Pen Star G430S / Star G640 tablet but it's a great entry-level device.
With an active surface measuring just 4 x 3 inches / 6 x 4 inches it's not great for really detailed work but combine the high resolution 5080LPI with a pen that supports 8192 levels of pressure sensitivity and you can still create quite sophisticated work.
The pen is comfortable to hold and its battery-free which delivers a high-quality e-writing experience. The feel of pen on the surface is surprisingly good for such a cheap device, with just the right amount of drag, and the accuracy is spot on.
If you're serious about your art or design work you'll want something bigger but this compact, lightweight option is just fine for people starting out. and It can be carried around and used on the go!
2. XP-Pen Deco Fun XS / S / L
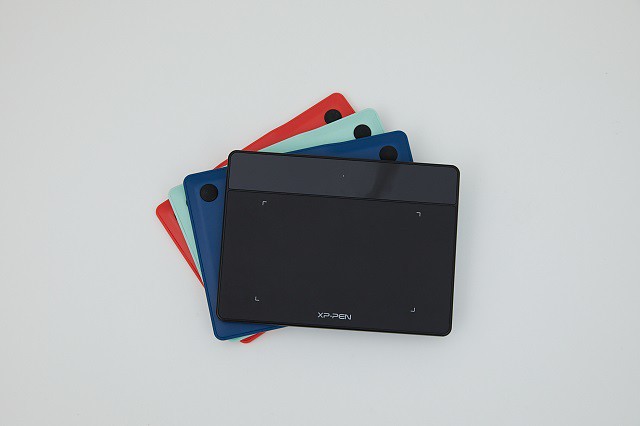
XP-Pen offers the following 3 sizes in it's “Deco Fun” line: 4.8 x 3″, 6.3 x 4″ , 10 x 6.27″. Available in four colors: Classic Black, Apple Green, Space Blue, and Carmine Red.
The battery-free pen has a 8192 pen pressure levels and 60 degrees tilt sensitivity which is comfortable to use and feels like a pen on paper. Deco Fun XS Version doesn't support the tilt function.
This tablet is simple to set up, you don't need any external power adapter, just plug it in the USB port of your PC using the USB cable provided and you are good to go.
Valid for Chrome OS, Windows , macOS, Linux and Android operating system. You can use this device with your favourite note taking apps like OneNote, Evernote, Google Keep and Xournal++.
XP-Pen Deco Fun XS / S / L tablet itself doesn't have any customizable buttons. However, the pen has 2 buttons that you can customize for tasks such as scrolling or erasing.
3. XP-Pen Deco Mini4 / Deco Mini7
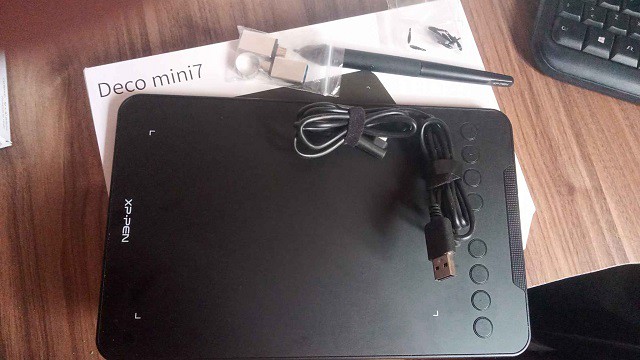
XP-Pen Deco Mini4 / Deco Mini7 is a great budget device and has a compact size ( 4 x 3 inches / 7 x 4.37 inches active drawing area ) which is perfect for limited desktop areas.
It also has 6 / 8 customizable Expresskeys for keyboard shortcuts such as undo, copy/paste etc.
As for the pen, it has 8,192 pressure levels and “tilt recognition” to provide a natural drawing experience ( Deco Mini4 Version doesn't support this tilt function ). The pen also has programmable buttons for easy access to your favourite shortcuts.
XP-Pen Deco Mini4 / Deco Mini7 tablet works with Windows, Mac OS, Linux, Android and Chrome OS devices. ideal for online tutoring, distance education, zoom meetings, editing of documents, photos, videos etc.
If you'd like to minimise the cables trailing across your desktop, the Deco Mini7w Wireless version is a great option. It connects via 2.4Ghz radio-frequency connection rather than a USB cable.
4. XP-Pen Artist 12

Artist 12 tablet is the cheapest pen display model XP-Pen has produced yet. It has a 11.6 inch FHD display with 72% NTSC Color gamut.
Meanwhile, on the display you get six customisable buttons and a touch bar. so you can program a greater number of shortcuts in your display tablet.
The battery-free pen has 8192 pressure levels and a digital eraser at the end. Moreover, this pen uses software to act as multiple pens and brushes in a full range of colours, with superb accuracy.
One can easily sketch or paint directly on screen, draw diagrams, annotate documents, enhance photos and videos with ease using this tablet.
Note that, XP-Pen Artist 12 is not a standalone device. You'll need a USB port, HDMI port on your PC to connect. it can get power from the laptop or from power socket.
If you need a screen fully laminated, tilt senstivity, more sharper with better colour accuracy. you can have a look at XP-Pen Artist 12 2nd Generation or Artist 12 Pro version tablet.
Final Words
Note-taking tablets allow you to jot down ideas and questions quickly, holding a stylus gives you far more control over what you are doing.
If any of the above-mentioned tablets tick the boxes on your list, you are good to go.
Getting used to using a non-screen graphics tablet can be challenging, so don't be disheartened if you aren't getting it perfect first time round. It takes time and practice and once you try out a few of these tips, you might find that you improve a bit quicker.
This article should help you to find the best tablet and stylus to make your note-taking and your life that much better.
-
Top 12 Best Free Note Taking Apps & Software for Students
Donnerstag, 18. November 2021 - keine Kommentare
Note-taking is one of the best habits anyone can instill. The mere act of writing whatever you learn in lectures, seminars, and even life in general, can have a profound impact on your life.
Taking notes manually on a book can for lectures or organizing ideas and important things can be quite difficult. Sometimes it isn't easy to modify them or even carry them at our convenience, so having a digital version will be a good option, but what's better than having the option of taking notes and having a digital copy of it.
Note taking is one of the most common needs of individuals as well as teams. which can be something you do for yourself, or something you do with and for others.
There are many note taking apps & software available for Android, iOS , Chrome OS ,Linux, Windows and Mac. Some are dedicated to making simple notes whereas others have extensive features that let you create powerful lists and reports.
Mobile apps have become increasingly popular over the past few years, and note-taking are no exception. More people are now aware of the convenience and portability offered by note-taking apps.
Note-taking apps also offer a paperless way to keep track of ideas, which is great for the environment.
It's now easier than ever to get the benefits of writing on paper without sacrificing the organizational features of digital apps.
You can even use a drawing tablet ( Wacom, XP-Pen.... ) which come with a stylus that allowing you to more accurately and naturally take notes by hand, draw, sketch and write in a note taking application.
To help you choose the ideal app for you, here's the list of the best note-taking apps. Whether you look for a simple app or an all-inclusive tool, there's something of interest for everyone.
This type of application helps to keep the ideas when your head can't, especially, if you don't have a piece of paper within reach. whether for inspiration, ideas, business insights, or even reminders.
With the right note-taking app, you can make notes about anything and sync them to all your devices.
These more advanced apps can work in multiple forms, from trying to replicate the word processing experience, to imitating blank notepads in digital form and so allow for handwriting and sketching.
Additionally, some note apps also include the ability to add images, audio, even video, to your notes, and even share these directly with colleagues and working teams.
1. Evernote

When it comes to note-taking apps, Evernote may come to your mind first.
It's one of the most powerful options around and can handle notes in almost any format you want. You can add text notes, audio clips, images, PDF documents, scanned hand-written pages, Slack conversations, emails, websites, and anything else you can think of.
Evernote takes things a step further with its search functionality. If you upload an image of a sheet of paper, a business card, a menu, a sign, or anything else with text, Evernote automatically processes the image to make it more readable—and then processes the text to make it searchable.
One of its best features for gathering research is the Web Clipper extension (supported in Chrome, Firefox and Safari), which lets you save entire webpages - including text, images and PDFs - with a single click.
Evernote even works with handwritten notes, though with the huge caveat that your writing must be neat enough that a computer can read it.
Using Evernote, you can store everything from personal thoughts and ideas to business projects, and know they're always safe and secure, and easily accessible whenever you need them.
Rated as one of the best apps for taking notes, Evernote auto-syncs across all your devices, and you can invite anyone to collaborate on whatever is on your mind. This versatile note taking app has a range of solutions that fits your needs.
Additionally, audio from your meetings can also be recorded and attached to the meeting note, which is an excellent way to ensure people who couldn't attend the meeting will stay in the loop.
No option to record audio and video directly from Evernote; Images cannot be rotated or cropped in Evernote. No Markdown support. Markdown isn't just for note-taking; it's for faster writing, too.
Available For: Android, iOS, macOS, Windows, Web. A free version is available. Also there are two paid-for versions: Evernote Premium for individuals, and Evernote Teams for Business. The premium version starts at $7.99 per month.
2. OneNote

OneNote integrates with Outlook and the other MS Office apps like Outlook and Powerpoint. It also handles Excel, Word, and other MS Office attachments better than the other note-taking tools featured here.
The notebook-styled user interface makes it the go-to note-taking app for educators, students, and business people. which organizes all your files and notes into different sections and pages.
Each page in One Note feels like writing on a real piece of paper. You can start writing anywhere on the page, add images, audio files, videos, highlights, notes, to-do lists and much more.
Store your study notes, organize them depending on different subjects, add meeting notes, make to-do lists, or collaborate with friends and peers using One Note's highlighting markups, and annotations features.
It even has a web clipper to add content from around the web and save it directly to your OneNote notebook. That web clipper is good, but it's not as intuitive as Evernote.
It's a powerful tool that enables you to do anything you want with your content. You can draw, add notes, create memos, journal, add sticky notes. All content can be personalized – bold text, italics, strikethrough, lists, link, files, and photo attachments.
This app is conveniently hooked up to the cloud so that you can take notes on your laptop and mobile device without losing information.
Compatibility: Browser, Windows, Mac, Android, iOS. It's free, The only slight catch is that you get just 5GB of storage. If you want more, you'll need to take out a Microsoft 365 Business subscription.
3. Google Keep

Part of Google's productivity suite, Keep, is Google's answer to OneNote and Evernote.
Google Keep is the simplest note-taking app on our list, both visually and how it operates. The only downside is its lack of organization features.
There are cross-platform web, iOS, and Android versions, and a handy Chrome extension for saving quick notes and links.
Think of Keep as your place for storing digital post-it notes, with each note dotted around the interface as if they were laid on a table in front of you.
Google Keeps allows users to add notes, audio, photo, shared to-do lists, etc. in one place.
Notes can be given labels, pinned to the top, given a color, paired with reminders and collaborated on in real time.
This note-taking app allows users to quickly filter and search for notes by color and other attributes like lists with images, audio notes with reminders, or shared notes.
Additionally it also offers speech-to-text functionality so you can dictate notes on the go rather than have to write. There's also the ability to set up check boxes for lists to work through.
If you use Google Keep, when you open Gmail / Google Docs / Google Calendar / Google Drive in your browser, there's a little lightbulb icon in the right sidebar. Click it, and you have quick access to all your Google Keep notes.
Most people don't take notes just for the sake of it. Instead, they're done to serve a purpose: keep and set location-based and/or time-based reminders to make sure you never miss a thing
4. Notability
Notability is a powerful note-taker to annotate documents, sketch ideas, record lectures, take notes and more.
This app is available only on the App Store for iPhone, iPad, and Mac.
The app offers a delightful writing experience, yet it also makes it easy to embed images, annotate PDFs, and even record voice memos.
Sketching and drawing in Notability is easy and downright delightful. Being able to doodle and quickly sketch out illustrations is one of our favorite things about taking notes on paper.
Notability does an excellent job of emulating this experience, while also allowing you to do things you can't do on paper such as resizing and moving your drawings.
In addition, Notability includes a variety of flexible layout options. This allows you to, for instance, have a slide or reference material open on one side of the page while you take notes on the other.
And beyond the layout of individual pages, you can also organize your notes using digital “Dividers” (which is perfect if you're used to taking notes in a physical binder).
With iCloud support, your notes are always available on iPad, iPhone and Mac. It also gives you plenty of options for exporting and sharing your notes, including Google Drive, Dropbox, and AirDrop.
Sadly, not all of Notability's functions are free. You will have to pay to create and choose from stickers, convert handwriting to text, and support of mathematical conversions.
5. GoodNotes
GoodNotes ($7.99), like Notability, also has an Editor's Choice Award on the Apple App Store, and it functions quite similarly to Notability, with just a few distinct differences. It's not quite as smooth when writing or sketching, not have audio recording function, but it does have a more robust framework for organizing things.
GoodNotes is impressive and beautiful. It's the obvious choice for anyone who appreciates smart organization and customization options. Plus, you can choose from several built-in note layouts and templates, as well as import your own.
It supports palm rejection, typing and stylus writing, PDF annotation, left-handed users, and can even convert handwritten words into typed text. It also offers wide stylus compatibility, accommodating those who don't prefer the Apple Pencil.
GoodNotes has a shape recognition tool that detects when you draw a shape and makes it look nice and neat (because, let's be honest, nobody can draw a perfect circle). It even works for underlining or highlighting words, so you won't have to worry about them being crooked and making the existing words unreadable.
A great feature is the multiple window feature GoodNotes offers. This feature lets you work on different tabs simultaneously while using a split-screen.
You have the latest GoodNotes version on all your devices (iPad, iPhone, Mac). The notes are also synced via iCloud, and can be backed up to your choice of cloud providers, including Dropbox, Google Drive, or Box.
6. Notion

If you're looking for a note-taking app with personal and collaboration features, then Notion is an amazing option. Unlike most apps, it provides a powerful, database-driven note-taking experience for its users.
Notion bills itself as an all-in-one workplace for notes, writing, project management, collaboration, and more.
It aims to consolidate all the tools writers or creatives might use as their writing app of choice, to-do lists, and even project management tools.
One of the main features that make Notion stand out is its team functionality and real-time collaboration features. It allows your teams to share, add comments, assign tasks, and even set reminders.
Notion allows you to write in on a clean, uncluttered workspace, create your own personal wiki, plan using multiple views, and create spreadsheets and databases to record everything you do.
The app allows users to create customized private or shared workspaces where they can then add versatile "blocks" that act like text snippets, bookmarks, images, toggle links, files, code snippets, discussion sections, and more. And now that it's free for students and teachers to access premium features ( sign up with an academic email address ), many more people will have a good reason to give it a try.
No offline support. Currently, you need to have an internet connection to use Notion.
It's available on Windows, Apple Mac, iOS, and Android. Free for personal users; free trial for team users with a 1,000 block limit; from $10/month/user for teams with unlimited blocks.
7. Simplenote

If the only kind of notes you intend to make are text-based, then you don't need a feature-rich app. Simplenote by Automattic (the same company behind WordPress) is a free note-taking app that syncs to all your devices and comes with no storage limit, but it only supports text.
It's easy to use, lightweight, free, and totally reliable. If you don't need an app that can save images, scanned documents, sketches, and other multimedia, then Simplenote is a very good option.
Simplenote is geared towards those who want to capture and organize text notes. Unfortunately, you can't keep or store webpages and clippings in Simplenote.
Tagging and search tools ensure users can find what they're looking for and notes can be shared or published to others working in the same team or on a project. Simplenote backs up previous versions of documents so it's always possible to revert to an earlier one.
The app doesn't support styluses, PDF annotation, or other power-user features found in other apps.
There are Simplenote apps for Windows, Mac, iOS, Linux and Android. You can also access Simplenote through a web app. It syncs across all your devices for free.
8. Workflowy

WorkFlowy is a simple but powerful app best for structuring your ideas. It allows for creation of transparent lists with subitems, titles, and a description.
In the lists, you can include such items as #hashtags, @mentions, date, note, and check the items from lists. These functionalities are helpful in the search option as they let you quickly find searched notes.
To use WorkFlowy, first, you need to create an account. Moreover, it automatically syncs between your phone, tablet, and computer.
Workflowy takes the idea of an outline to an extreme. Rather than create smaller cards for each of your notes (like a notepad), Workflowy drills further and further down into an outline, creating a hierarchical structure right from the start.
Workflowy offers extreme flexibility. Novelists use to plan books; managers can create quick tasks and checklists to pass onto their team. The bulleted structure within Workflowy is ideal for complex project organization.
Workflowy is available On the web Not only in native apps Windows, Mac, Linux, Android,and iOS.. This service is free and has a monthly limit of 250 new lists and items.
A Pro plan — Remove that limitation and add more customization options, Dropbox backup possibilities, and premium-level support — runs for $ 49 / year, or $ 48 / user. Team placement, Includes management features.
9. Standard Notes
Standard Notes is a free, minimalistic, open-source, and fully encrypted note-taking application.
Standard Notes takes security seriously and has powerful search features. Everything you write is encrypted by default and only you can access it.
The user experience is well-thought-out and logical with menuing and settings that are clear. The web-based version performs very well.
It allows you to compose any kind of note, from rich text to Markdown, code and spreadsheet support, themes, expanded backups and cloud storage support.. Standard Notes is faster and lighter than most note taking apps available today.
The only downside is its lack of in-app image hosting. It can't host in-app. You have to save your images elsewhere before you can save it in the app.
Some of its best features are offered through powerful extensions. But unfortunately, these are available only in the premium version.
Its other best feature is multi-platform accessibility I.e. it works on Web, Mac, Windows, MacOS, iOS, Android, and Linux.
10. Joplin

Joplin is an ambitious app that attempts to replicate an open source, decentralized version of Evernote. That gives users a Markdown formatted note-taking interface organized by notebooks and using your cloud storage services as the sync backbone.
Users can import content from Evernote through .enex files, as well as Markdown content. Sorting and search filters help keep you organized, and there's even an option for end-to-end encryption of your notes. Joplin is also capable of exporting to multiple other formats including HTML and PDF.
One great feature of Joplin is the tag feature. If you've ever wanted to organize notes into multiple categories per note, the tags feature is for you.
The notes are searchable, can be copied, tagged and modified either from the applications directly or from your own text editor.
Joplin can sync your notes between devices through Dropbox, OneDrive (One Drive Business not supported), NextCloud or WebDAV.
Joplin is the best free and open-source note-taking app available, as long as you don't mind managing storage yourself and forgoing a handful of features found in more powerful apps.
Joplinapp application is available for Windows, Linux, macOS, Android, and iOS . A Web Clipper, to save web pages and screenshots from your browser, is also available for Firefox and Chrome.
11. Apple Notes

If you're firmly entrenched in Apple's ecosystem, you don't have to look too far for a great, free note-taking app. Notes is best if you're an all-Apple person.
Apple Notes (variously called Notes or iCloud Notes, depending on how you're accessing it) is built into macOS and iOS, and can also be used through your browser. It is free and easy to use.
Once you create a new note, you can add text, attach images, scan documents, draw or handwrite, add checklists, format things into tables, and more. You can add multiple different things to a single note.
It even features an in-built document scanner that can help you save some time every now and again. Its powerful search function will allow you to quickly locate notes and attachments. Share things easily with editing permissions or as view-only.
If you have an iPad or iPad Pro, Notes works with the Apple stylus.
Apple Notes offers solid organization and formatting features, though it lacks Markdown support.
Plus, everything you create is automatically backed up to iCloud, and you can even create voice notes using Siri while you're on the go.
12. Zoho Notebook

Zoho Notebook is a beautifully designed note-taking app which is available across iOS, Android, Mac, Web, Windows & Linux.
Take notes, add files, create checklists, sketches, record audio, and capture moments and all your notes are instantly synced across your devices and to the cloud. You can insert tables and customize colors, filter and search cards, and more.
A safe and secure note taking app for sharing and collaborating between friends and co-workers. 100% free and ad-free across devices.
The mobile app has a built-in sketch feature that you can use to jot down diagrams or notes with your finger or a stylus.
In addition to note taking, Zoho Notebook is also a great app for real-time collaboration. It makes storing and sharing information easy, quick, and manageable.
Like OneNote and Evernote, this note-taking app also has its version of a web clipper. Clip text and images and save them to the same Text Card. Take notes from your browser, or save the whole article. Users can also share their notes through SMS, email, iMessage, and AirDrop.
File cards are stored under Zoho Docs and are allotted a maximum of 5 GB of storage per account. Those who want additional storage can pay for it for a monthly fee.
Conclusion
All of the above note-taking apps will get the job done. And as with most recommendations, you have to figure out what works for you.
Your choice boils down to personal preference and how you like to work or write. Do you want a note-taking app that syncs with your productivity apps?
Or would you simply like a place to record your ideas quickly? And is cost and cross-platform functionality important?
If you want to take lots of handwritten notes with a stylus, OneNote, Notability and GoodNotes maybe the 3 best note-taking app for that overall.
I hope that this list will help you decide on your note-taking app, whether it's on this list or not.
Of course, to benefit from taking notes, you need to make it a habit.
So what are you waiting for? Go try and let us know your experience.
-
7 Best Graphic Drawing Tablets for Architects and Designers
Freitag, 22. Oktober 2021 - keine Kommentare
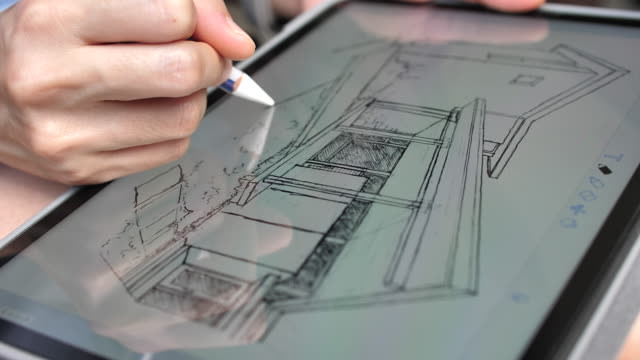
Are you an architect that works with AutoCAD you need more control over your free-hand drawings?
Are Graphic Tablets useful for Architects? Does it handle all types of tasks?
Contemplating getting a mobile tablet computer for as on on the go drawing but can't decide which fits your workflow, budget or specifications?
Architecture is one of the fields of activity where computers have given professionals a lot more precision, the ability to work faster and more efficiently.
Computers are a necessity in today's world. It encourage creativity through the use of apps that help in creating digital art like drawing and painting.
If you have a smoothly working laptop with architecture softwares such as Revit, 3dsmax, SketchUP, Archicad, Autocad, Rhino, etc. you may want a drawing tablet that comes with a digital pen to work with it.
As architects, we tend to draw a lot, sketch everything we see in our way, even if it is just drawing trees, people, or just doodling down what seems to be buildings.
But, what if we want to do all of this and put it digitally right away?
There are two ways of doing this, scanning all of your sketches and importing these into photoshop or illustrator software, or doing these sketches directly on a graphic tablet.
The AutoCAD ( also support some other architecture programs, You need to check first ) software fully supports drawing tablet, which enables you to quickly sketch an idea or easily modify parts of your drawing.
what is drawing tablet? and the types?
A graphics tablet is an optional electronic input device for computers, generally used by architects, engineers, artists, and others who want to correctly edit pictures.
Graphics tablets come with a stylus or pen with removable tips and have pressure sensitivity, allowing artists to have more brush stroke variation as determined by how hard they push the pen to the screen.
The Drawing tablets for Architects and Designers work best for those who do a lot of sketching, concept design, rendering or, illustration.
Also, for those used to sketching with a pencil and paper, you will be able to easily pick up the basics of using drawing tablets while advanced users are introduced to a world of deep functionality.
These drawing tablets come in three forms:
Pen Tablets

It includes two main components, i.e., a flat, rectangular pad on which to pull and a stylus applied to locate shapes on the pad.
Simple drawing pads that connect to a computer and are typically less expensive than other options. you will need to see the pc's screen to visualise how your drawing comes out.
They're perfect for beginners or established artists looking for an inexpensive option. Nowadays they tend to be wireless with an internal battery.
Pen displays

As traditional artists usually love the feel of drawing on paper, so the designers have come up with a way to recreate that feeling.
Feature a screen that you draw on but must be connected to a computer to supplement the necessary amount of power. They cost a bit more, but being able to draw directly on your art instead of staring at a computer monitor with your hand on a separate pen pad is really convenient.
A digital drawing tablet with screen allows you to blend your creativity with technology. With a screen that feels like paper-like-texture, you can have a more natural experience drawing.
if you have a slightly higher budget, you should consider choosing display tablets.
Pen computers / All-in-one tablets
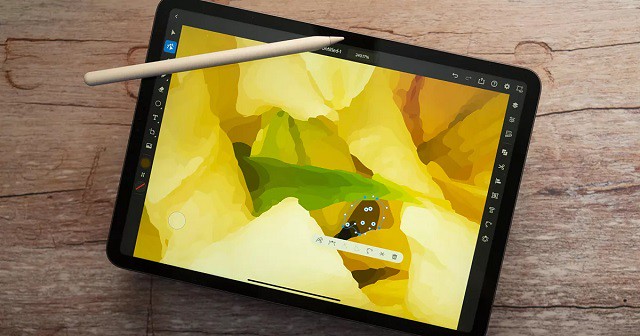
Standalone machines that feature HD displays and don't need to be connected to other devices to function. This is often what you'll see high-end professionals working on.
These are the most expensive tablets. One of the biggest advantages of these tablets is that you don't have to attach them to the computer to see your drawings. Furthermore, they are lightweight, making them one of the most portable devices.
What you'll want to keep in mind are the following things:Your screen size requirement, battery life, use case, and what operating system you prefer for use.
Since drawing tablets interact with computers, it gives you access to more intensive architecture software than a mobile app can provide.
Drawing tablets can also have massive displays making it easier to work on the finer details of your work.
However, the trade-off here is that drawing tablets aren't nearly as portable since they either need to be connected to a computer or can be too bulky for easy mobile use.
What Are the Uses of Graphics Tablets in industrial design?
It is almost difficult to describe the use of graphic tablets in a single sentence since they are used instead of a mouse in various ways. They are a necessary tool adopted across a pile of multiple industries and artistic niches.
Graphic tablets use the human hand's fluid motion and physical positioning to its most magnificent power. Utilizing a graphic tablet is as convenient and straightforward as using a pencil, pen, or airbrush.
In industrial design, architects & engineers spend hours in the head of computer screens to build that ideal design. This may increase the need for persuasive drawing devices with unique features to induce their visions to life. The hardware and congenial software are steadily advancing. With the height of the list of new products, it is possible to discard your traditional screen and mouse and move entirely to a graphic tablet.
The one who does many illustrations, concept design, sketching, or rendering work might find a graphic tablet most useful.
They use graphic tablets because the use of a digital pen feels more natural to hold and work. This empowers them to create and design more smoothly and speedily.
Benefits Of Using Graphic Tablets For drawing architecture
One of the great things about having a drawing tablet is that being a architects, you can increase your productivity a lot.
By getting a drawing tablet, you're going to be able to do just what you're doing with pen on paper right on your computer screen.
Architects and designers can rely on it for their ideations and sketches with the help of the pen that comes with it.
The stylus makes the creation more effortless and convenient as everyone is used to keeping a pen or pencil in his or her hand.
Through a stylus, the tablet is used to create complicated shapes and allows a more natural drawing motion than it is possible with a computer mouse.
You're going to be able to draw nice straight lines exactly as you want and waste less time redoing them to look right.
you can zoom in and pinpoint the stylus just where you like it. Your creations will now look 100% like you want them to and you have complete power over the stylus and drawing tablet.
The drawing tablets use pressure detection technology ( This is a unique feature of a drawing tablet and the app used for the purpose ) to trace current images which can storing in a digital format for uses like archiving or retouching.
Writing or drawing extensively with mouse can lead to repetitive stress injuries and even carpal tunnel syndrome. Many Architects and designers suffer from these injuries. Choosing graphic tablets instead of mouse helps in avoiding all these injuries.
The tablet have Functional keys around the active area can be programmed to create shortcuts. This saves time by offering quicker access to the most-used command functions.
If you're excited about the value of getting a drawing tablet, you're going to enjoy working with one!
The 6 best drawing tablet for architects
Plan on getting a new tablet for AutoCAD, SketchUP, Archicad, Revit, 3ds max, photoshop, etc?
Tablets are essential devices when it comes to architecture and construction because without them, making changes to drawings can be a time-consuming task. And so, they make things easier for you.
Wacom drawing tablet models are especially ahead in the industry. But from my experiences, it's true that XP-Pen's products have been getting better over the years to the point where their products could directly compete with Wacom's products, and their price, compared to Wacom's, is relatively cheaper, which means you could possibly get more value with the same budget.
If you are an artist and looking for a compact and powerful drawing device, you must have come across Apple iPad Pro and the Microsoft Surface Pro.
In this article, we list the 6 best tablets for architects, architecture students and construction drawings.
1. Microsoft Surface Pro 7
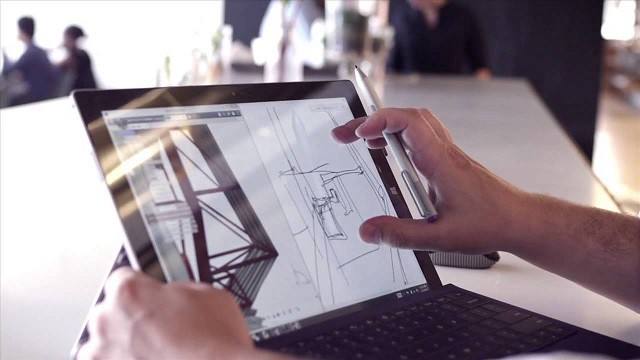
Microsoft Surface Pro 7 is a tablet and a laptop at the same time. In other words, you get the best of both worlds.
Because the ability to detach the display from the keyboard makes it a tablet, and putting it back transforms it into a laptop.
So unless you will be doing some serious rendering, then the Microsoft Surface Pro 7 is a solid option for architecture.
The performance varies because of the different configurations. The most powerful has an Intel Core i7, 16GB RAM and 1TB SSD. Whiles the base model has an Intel Core i5, 8GB RAM, and 128GB SSD.
The display is bright and beautiful making it easy to be used outdoors. And the build quality is better than the previous version – Surface Pro 6. But, the weight and thinness are still the same.
The stylus of the Microsoft Surface Pro 7 is one of the things that makes it great for drawing and making changes to the plan. However, it is sold separately and that includes the keyboard.
Its Color Gamut is 97 percent of sRGB ( 72% NTSC / 79% Adobe RGB ), very close to the Standard Gamut. Battery life is decent about 8 hours on average. Good enough for a day's work.
Overall, the Microsoft Surface Pro 7 is one of the best tablets for architects and construction drawings. It's lightweight and has enough performance to handle architecture software. Highly-recommended.
2. iPad Pro

Brilliant 12.9-inch Liquid Retina XDR display with ProMotion, True Tone, and P3 wide color. which is bright, sharp and has great viewing angles. 5G for superfast downloads and high-quality streaming.
New features include a near edge-to-edge display, a lot more storage space, a 12 megapixels camera for insanely sharp pictures and a 35% faster processor. Apple M1 chip for next-level performance. That means this iPad outperforms many laptops speed-wise.
The iPad Pro 11-inch is compatible with the new second generation Apple Pencil. If you use a stylus a lot – to draw and do more detailed work – the new Apple Pencil has some updates that might interest you. It's technically more advanced meaning it's even more pressure sensitive and will react in absolute unison with your hands movements.
You can also charge it with a magnetic connection, which means it automatically recharges while you're not using it. No need to plug it into your iPad to charge it, which gives it a clear edge over the first generation of Apple Pencils.
Battery life is superb easily able to last over 10-11 hours. However, the stylus pen, keyboard and trackpad are not included in the package. So, you have to make a separate purchase.
A lightweight device that you can take along to construction sites and architectural projects. which lets you easily bring your technical drawings and view their details with the highest accuracy wherever you need to. The Apple iPad although pricey offers much better value and performance than most drawing tablets.
3. XP-Pen Star G640S
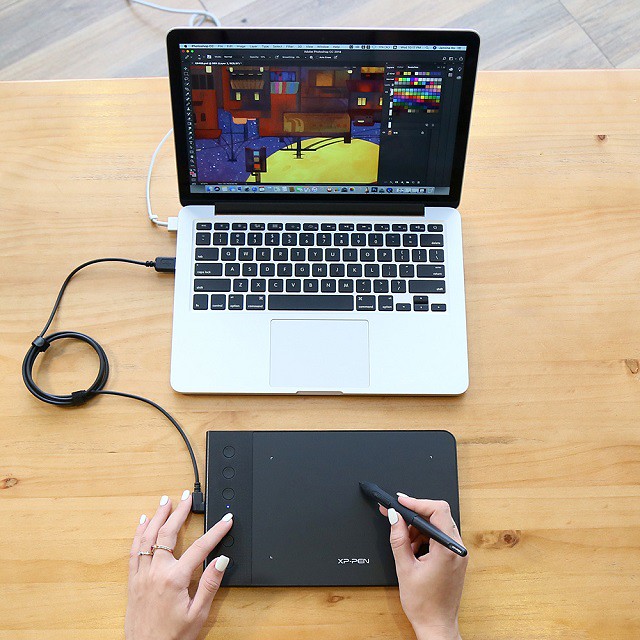
The XP-Pen Star G640S is one of the cheapest option, and with a 6.5×4 inches working area, it's also one of the smallest and lightest. That means it's easy to stick in a bag and take on the go.
It has 8,192 levels of pressure sensitivity, which matches that of much more expensive models, and promises to work with Windows, Android , Chromebook, Linux , Mac Operating system and a wide variety of graphics software.
It comes equipped with 6 customizable physical keys and 20 replacement pen nibs. The stylus does not need charging which ensures no disruptions in the middle of work.
XP-Pen Star G640S is ideal for drawing, editing, sketching, animation, and digital signatures.
Because of its size, it's definitely a starter tablet, but if you're just looking for something to begin, then this might be a good product to start.
The Star G640 offers the best drawing pad option for any architects and engineers looking for a portable, decent-priced tablet.
4. XP-Pen Deco 03

Experience a more natural way of working on your computer with a 2.4 GHz wireless connection.
The drawing tablet has a larger active drawing area than Star G640S in this list at 10 X 5.62 inches and 8mm thick.
The tablet comes with six built-in expresskeys and a red scroll wheel to help improve your workflow and speed.
The battery-free stylus included comes with two shortcut buttons and 8192 levels of pressure sensitivity, that provides natural looking, accurate and efficient strokes.
The drawing area has a glossier finish than other tablets available, but there is still a slight paper-like surface that imitates the feeling of drawing with a pen and paper.
For those on a tight budget who cant yet afford a Wacom Intuos tablet, the XP-Pen Deco 03's performance and features are way beyond what you can expect to pay for it. With plenty of shortcut keys, precise levels of pen pressure and a textured drawing surface.
Its sleek design plus its A4 size large working area is the perfect choice for architects, engineers, and students using CAD, 3D sculpting programs, and other software.
5. XP-Pen Artist 13.3 Pro
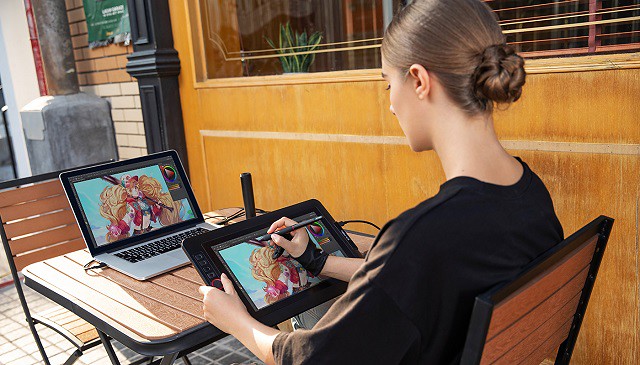
The 13.3-inch screen that comes with an anti-glare film. the XP-Pen Artist 13.3 Pro's Fully laminated Screen seamlessly combines the glass and LCD which reduces the parallax.
With its rich 16.7-million color display (6-bit) , 1920x1080 FHD resolution and 88% NTSC ( 120% sRGB / 91% Adobe RGB ) gamut, the Artist 13.3 Pro certainly runs the gamut of quality graphics and colors.
The pen is sensitive and can detect pressure on the screen, allowing you to have great control, which is highly important for any professional architect.
It also supports a 60-degree tilt brush effect, letting you apply just the right strokes to your CAD drawings.
Designed for either left-handed or right-handed use, the Artist 13.3 Pro also has 8 customizable buttons and 1 red roller wheel to make drawing easier than ever.
Whether you're a beginner, a casual artist, or a professional, the XP-Pen Artist 13.3 Pro is the best drawing tablet option for an easy yet professional user experience.
6. XP-Pen Artist 22 2nd Generation

Its 21.5 inches large display helps you to access any software's dashboard and artboard more perfectly. A larger screen allows you to more easily draw fine details .
The drawing tablet provides precise accuracy with colors and more vibrancy compared to older models ( Artist 22E Pro and Artist 22 Pro). The display offer realistic color accuracy up to 90% Adobe RGB ( 86% NTSC / 122% sRGB ). which means you can accurately reproduce even the most subtle shades.
Its PA6 battery-free Pen has 8192 pressure levels and 60 degrees of tilt function that creates smooth and natural lines.
The graphics display tablet supports USB-C to USB-C connectivity. This makes it easy to connect it with other devices that support USB-C input.
Artist 22 2nd Generation comes with a stand that can be adjusted as per the working position.
Users particularly love how crisp and vibrant this drawing tablet's display is. Simplify your workflow by getting this well-built drawing tablet for architects and engineers.
7. XP-Pen Artist 24

The larger model 24” comes with a 2K ( 2560 x 1440 ) QHD resolution and can display 94% of the Adobe RGB ( 90% NTSC / 127% sRGB ) color space.
The PA6 digital pen has been engineered with Battery-Free Electromagnetic Resonance (EMR) technology.
Stylus does not need charging and ensures smooth lines with 8192 pen pressure levels, 60 degrees tilt recognition and a 233PPS report rate.
Its adjustable stand that comes with the XP-Pen Artist 24 device has an ergonomic design to provide comfort while working.
This is the perfect high end tablet for cad drawings and fast SketchUp. you can create plans and technical drawings with the utmost precision and efficiency.
Conclusion
Choosing the right graphics tablet for your projects is the key to get good quality digital artworks.
The drawing experience (pen to screen) is much more natural.But if you are just starting out, a screenless tablet will work fine for what you want to do.
I couldn't exactly say which model is the best for you as architects' needs vary heavily from a person to another. For me, I put the most weight on the color accuracy and the responding speed of the display because the nature of my work requires high color accuracy (lots of printing and digital displaying). Others may put weight on the pen's performance due to their drawing styles, which require highly responsive actions.
Digital drawing tablets are a godsend for all the architects out there as it has eliminated all the hassle of endless large canvases or pages. They have also enhanced the accuracy of their designs, along with boosting their efficiency and productivity; even on the go.
Since these devices are solely designed for the purpose of drawing, you get a true and enhanced convenience to bring all your visions and creativity to life.
If you're an architect or a student of architecture; or even if it's to recommend the best tablet for architects to your friend or relative, this write-up is just for you.
Let me know in the comments below what are your thoughts on a Graphic Tablet and contribute to this community with your experience using one.
Source Link: https://www.xp-pen.com/forum-2817.html
-
Best Drawing Tablets For Animation 2021 – A Must Have Tool For Animators
Freitag, 17. September 2021 - keine Kommentare
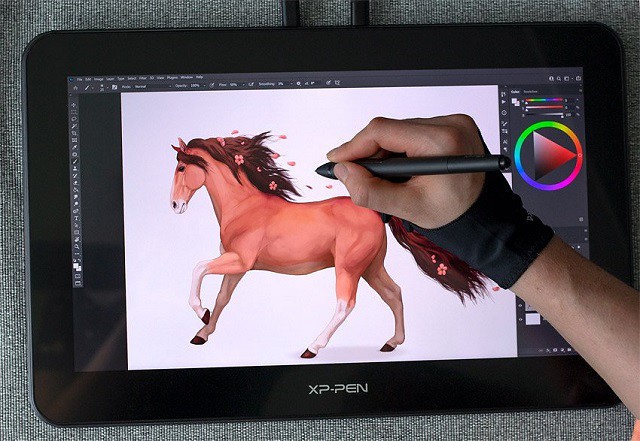
The original meaning of animation was ‘the state of being alive'. Animation is all about getting a group of individual images that change subtly but progressively and chaining them together.
Most 2D animation is done in Adobe Animate CC (almost every cartoon on disney, cartoon network, and nickelodeon is animated this way) or Toon Boom Harmony. Usually it is hand animated, but sometimes (very, very rarely now) they use rotoscoping.
Most 3D animation is done in Maya or 3DS Max (usually maya). Sometimes it is hand animated, but usually they use motion capture of some sort.
Tools used are usually drawing tablets, for 2D animation in Adobe Animate it's similar to hand drawn animation with parts overlapping other parts, animation cells, and frames. For 3D animation you use bones (the character/actor's limbs and body movement) and a few other things.
In terms of animation, a drawing tablet is an extremely various instrument and you do not have to look too far inside an animator's instrument field to seek out one.
Whether or not you're employed inside a 2D or 3D surroundings, when creating animations, a drawing pad can be utilized for all manner of duties from preliminary sketching and storyboarding, although to complicated scene creation and animating full frames.
Interestingly, you get to do these right from a digital screen. Doesn't that sound pretty fun-filled and convenient?
Many artists and illustrators have started to show their passion using a drawing tablet with a screen. Be it for unleashing their creativity or art jobs, the best drawing tablet can serve them in manifold ways.
Any digital animators who understand and value their trade will admit that animation graphics tablets are incredibly useful and powerful. They are a must-have for anyone looking to simplify the tedious animation and drawing processes.
While the power and usefulness of tablets are undebatable, not all the models are similar in design and capability. Therefore, your pick will depend on your skills and your objectives.
Benefits Of Using Drawing Tablets For Animation

Mostly because it's faster. Way faster. If you've ever worked with a 3D software like Maya or 3D Max you know that you spend a lot of your time looking at the character model and moving its body parts around.
Doing that with a pen feels so much more natural than a mouse, it's like touching the model with you hands. You get more precise with your tweaking and you move around incredibly faster.
Absolute placement is the principle of drawing tablets, which is where the location of the stylus on the tablet appears at the same spot on the panel.
There are 4 corners of the screen on the tablet so you can travel around faster. Using the stylus, similar to moving the mouse around to get your cursor where you want it, takes less time. In an instant, you will be exactly where you want to be.
Working with a mouse can be tiring while using cartoonist's software since your wrist is flat and you can only work with harsh dragging gestures that include your whole side. Typically, the mouse is imprecise and clunky in your palm, and after extended use, your palm begins to cramp. A mouse is perfect for browsing the internet, scrolling, or doing basic jobs, but a drawing tablet for animation helps you to complete detail-intensive things more easily.
When you have a drawing pad, you don't have to get rid of your mouse. They work well together, so it makes sense to have both of them. Certain tasks are more mouse-oriented and others are simpler to complete with the stylus, it all depends on what you do.
Using drawing tablets for cartooning will also help to provide more clarity in the designs and figures. Since it's just like using a pen or a pencil, you can draw outlines or curves lined up very specifically. No more wondering when things start going to happen when you use a mouse for digital cartooning.
Shortcut keys are also a great feature that comes with most of the drawing tablets. You can customize the shortcut keys as per your requirements!
The drawing tablet may also be used in all applications; it is not exclusive to Photoshop, Illustrator, Clip Studio Paint or any other software that might be used by animators.
A Drawing Tablet Opens Up The New Empire of the Imagination

Once you get up to speed, learning digital cartooning drawing techniques is another enjoyable way to improve your artistic production. Think about cartooning art, interactive painting and animation using a dedicated drawing tablet, pen displays and apps. There is no limit to how you will show yourself. All that's needed is some creativity and a desire to place a pencil on paper or rather a stylus on tablet.
A drawing tablet normally comes with a stylus that is closely similar to the shape of a marker. They are usually much simpler and more convenient to keep in your hand than a mouse and allow an amazing degree of precision in your work.
Drawing tablets for animation and digital cartooning have up to 8192 different degrees of exposure to pressure. Whereas Mouse only has two degrees of sensitivity to the pressure; clicked or not clicked. This gives tablets a huge advantage over mouse , particularly for thorough digital painting. When using Photoshop, the sensitivity of the pressure spreads to the brushes as well. This makes it much easier to mix colours, incorporate effects, and apply cartoonist's tools.
With a stylus, you can rotate the pen and shift your hand and wrist to a normal drawing position. This helps you to have a lot of control on the strokes you're making. You can digitally paint with your stylus within Photoshop, and your work would look more realistic, simply because you have a natural range of hand and finger dexterity. If you want your digital cartooning to come alive and look organic, realistic, competent, then the drawing tablet is the perfect tool for your design work.
What tablet do animators use?
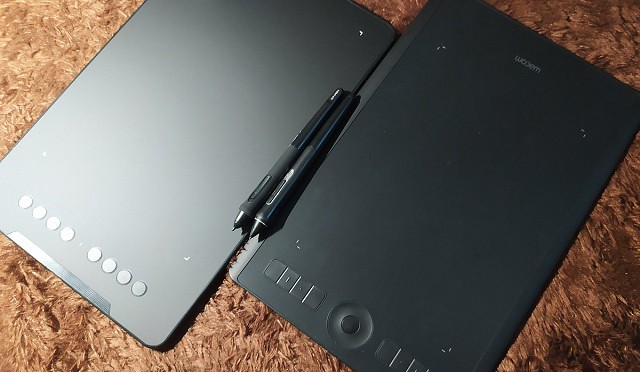
Drawing Tablets are now available in several sizes, ranging from lightweight, more compact ones to bigger options for creative digital cartoonists.
The smaller tablets are lightweight and simple to bear. They can be conveniently thrown into a suitcase or briefcase.
A stable animator's tablet needs to be responsive and simple to deal with. Some animators desire a transportable pill that may transfer with them on the go. Others need a big tablet for house use.
One of many greatest elements to think about is pricing. This will likely have the most important impact in your choice as a result of good digital tablets aren't low cost.
Wacom needs very little introduction, but for the sake of formality they are a Japanese company that specializes in making interactive pen displays, pen tablets, and styluses.
They've been around since the ‘80s, and over the years have grown to dominate the drawing tablet industry. They have produced legendary product lines, including the Intuos and Cintiq . Be aware, though, that their products are more expensive than other brands.
XP-Pen is one of the main manufacturers of drawing tablets, interactive pen displays and handwritten input digitizer products . They have been around since 2005, though for the first 10 years they only served the Chinese market.
However, in 2015, they took on the global market by launching their graphic tablet on Amazon. Over time, more and more of their products have been marketed internationally, and have received a warm welcome.
their tablets aimed at those who want the premium features of Wacom graphics tablets, but don't have the budget to afford one.
5 Best Graphics Tablets for Animation
Animators want as a lot precision as attainable to make correct marks, alter frames, and to maneuver by way of rapidly.
For this reason show tablets actually are the only option. In the event you're extra of a hobbyist then a easy graphics tablet could suffice.
However in the long term artists who work digitally sometimes transfer onto show tablets. They're higher high quality and simply really feel simpler to make use of.
1. XP-Pen Deco Pro

XP-Pen Deco Pro is available in two different sizes ( Small - 9x5"active area and Medium - 11x6"active area ) and two connection models ( with or without 4.2 Bluetooth connectivity ).
Large A5 or A4 working area allowing you to get creative without worrying about the space constraints.
With the Deco Pro Bluetooth model, you can enjoy the convenience of wireless creating with built-in Bluetooth.
The tablet has 8 shortcut buttons and an innovative dual wheels that lets you easily pan around and zoom in and out of your drawings quickly.
the Stylus is lightweight and battery-free, the device is capable of recognising 60° of tilt and 8192 levels of pressure in pen. You can use this device with any drawing software such as Photoshop, Paint Tool SAI and many more.
2. XP-Pen Artist Pro 16

If you are a professional artist, XP-Pen Artist Pro 16 can be a great choice. It has powerful 8192 levels of pen pressure and 60 degrees of tilt sensitivity.
It comes with a 15.4-inch compact IPS 1920 x 1080 (16:9) resolution screen, which provides a great viewing experience. And, the tablet is equipped with full laminated screen technology which ensure the minimize parallax .
The tablet has an amazing gamut color of up to 99% Adobe RGB which provides various natural colors on the screen display.
The Artist Pro 16 is the first XP-Pen's display tablet with the X3 Smart Chip stylus which increases 10-fold the sensitivity of the initial activation force ( IAF to under three grams ) that recognizes even the lightest pen strokes.
The Stylus have a digital eraser at the end. And we can physically flipped the tool over to use its eraser end to scrub out mistakes.
In the center of 8 customizable keys, there's a Dual dials. which you can use as per your choice.
Different amazing features of Artist Pro 16 makes it one of the top graphic tablets . This screen drawing tablet will work very smoothly and it will provide a great user experience.
3. XP-Pen Artist 22R Pro

XP-Pen Artist 22R Pro is a 21.5-inch drawing tablet with 1920 x 1080 display resolution.
120% SRGB will provide good color accuracy and improve your visual experience with the tablet.
Totally outfitted with 20 specific keys and 2 red dial wheels , animators can absolutely customise their workspace, aided by the adjustable monitor stand that effortlessly alters the tablet's angle.
PA2 battery-free stylus comes with 60 degrees natural tilt recognition and 8192 levels of pen pressure that helps to achieve realistic drawing experience.
With this large size display drawing tablet, you will get a comfortable experience while working.
4. XP-Pen Artist 24 Pro
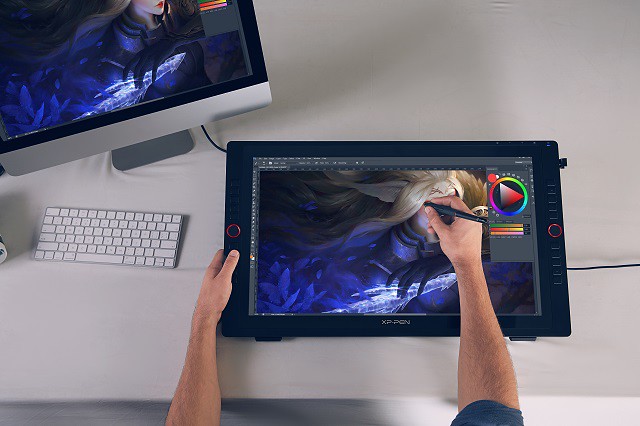
For animators and creators looking for a graphics tablet, but still want a professional graded product, then the XP-Pen Artist 24 Pro is a worthy option.
with a grand drawing surface of 24-inch , you can Create directly on a large canvas with premium color performance.
The combination of 90 percent Adobe RGB colour accuracy, 2k ( 2560 x 1440 pixels) Resolution, and a 16.7 Million colours produce a true-to-life visual experience.
The Battery-free Stylus has low pen latency, tilt support, and pressure sensitivity provide artists with a more precise control and a natural pen-on-screen experience.
There are 20 shortcut keys and 2 red dial wheels available on the tablet that will allow you to customize keys as per your need.
It has fantastic build quality, accuracy and precision. This XP-Pen tablet is a great option if you are looking for a large screen tablet that is feature-rich.
5. iPad Pro
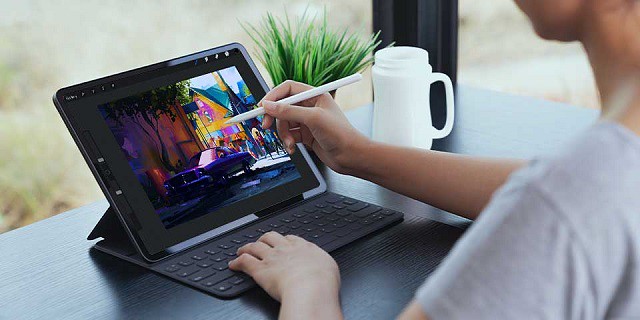
Ideal for animators as well as regular users, the Apple iPad Pro comes replete with powerful features and a stylish body.
The 2021 refresh of the iPad Pro comes with the M1 processing chip, which was previously only found in Macs. This enables apps to run faster than ever.
with its luminous 12.9-inch liquid retina XDR display, creating incredible works of art is easier.
The Apple Pencil 2 makes for smooth , intuitive and impressive drawing, especially when combined with the Procreate app and some amazing Procreate brushes.
With the addition of a Magic keyboard, it can be converted into a laptop. but you'll have to fork out more money for the Apple Pencil 2 and Magic keyboard.
If you wanted portability you should've took the iPad Pro. Also 12.9-inch is a really good size for carrying arround (I always carry it with me).
Conclusion:
Overall, as you can see, the advantages of using a drawing tablet for animation, cartoons outweigh the benefits of using other devices. They will make your life as a digital cartoonist so much easier, particularly when you're working in Toon Boom Harmony , Moho or OpenToonz!
Stylus pens will make you feel more natural and you will be able to get more information about your projects. Shortcut keys and pressure sensitivity functionality will carry the job to a different level, and you'll be able to do more in less time!
Developing drawing skills while being a digital cartoonist takes time and practice, but it can inspire your creativity much as it did in childhood. To achieve that point, it's worth taking the time to learn the fundamentals of how to catch the human face and how to draw flora and fauna. From there, you can build up character illustration, comics, manga and animation, or whatever style you find suits your aesthetics.
Do let us know if you've been using any other tools for your creativity in the comments section and we can write about the same in our upcoming articles.
-
Top 5 Best Cheap XP-Pen Digital Art Drawing Tablets for Beginners
Mittwoch, 11. August 2021 - keine Kommentare

Some of the best drawings you can see today weren't created with a pencil, they were made purely on a computer. It's almost unbelievable to look at some of the drawings you can create without ever having to pick up a piece of paper.
By using a drawing tablet and computer program you can select from all sorts of different tools and settings. Choose from endless brushes including watercolour, calligraphy and even chalk. Then there are the limitless colour selections on offer.
Drawing tablets can be used for most creative and content production needs such as illustration, photography, 3D modeling, animation, graphic design, etc. Most professional programs on those fields offer advanced pen support and can recognize and use pen pressure and even tilt function.
Touching the tip of the pen on the tablet surface is the equivalent of a click, while pressure and pen tilt can be used to vary stroke width, opacity, effect intensity, and other attributes. There are buttons on the pen that can be programmed for right click or other commands.
All of the drawing tablets are compatible with Windows and Mac OS systems. You can connect it to your PC or Mac and transform your computer into a drawing canvas.
If you are a graphic designer or digital artist working with a tablet is more efficient and comfortable than a mouse, especially when you use it for longer period of time. You can make illustrations and vector art in software like illustrator or digital paintings in photoshop.
They are also used for making 3D sculpted models in softwares like zbrush and blender…
Other than that there are many other uses…like if you make educational tutorials and use for online teaching then you can use the tablet to write handwritten notes. In office they are used for taking digital signatures.
The best part is, it's incredibly easy to learn how to use a drawing tablet. In no time you'll be drawing like an expert.
Looking for the Best Drawing Tablet for Beginners? If you're new to digital tablets then you'll probably be confused about all the features.
Drawing tablets, also known as pen tablets or graphic tablets, are input devices that can be used to substitute or complement a mouse. They're very popular in the graphic arts field and are considered by some as an indispensable aid for any creative professional.
While there are some technical differences, most graphics tablets work in the same way. The drawing area of the tablet creates a magnetic field, and the pen draws on this to produce its own magnetic field, which is tracked by the sensors in the tablet. Through this, the tablet knows where the pen is, the velocity of its movement and how hard the tip is being pressed against the board. It can even detect the angle at which the pen is being held.
There are two main types of tablets: displays and non-displays.
The display tablets show a screen on the device and you draw directly onto the screen.
Non-display tablets are more “traditional” drawing tablets where you draw on a black area while staring at your monitor. The strokes are recorded on the tablet and they translate into whatever software you're using(Photoshop, Krita, Clip Studio Paint).
If you're starting digital art for the first time, you should try an affordable electronic drawing pad first to see if it meets your needs. And graphics tablets with screens aren't necessarily preferable, because they're prohibitively expensive. Granted it is much easier to draw on a display tablet.
Although the drawing tablet has a screen, don't forget that it's not a standalone device. You'll still need to connect it to your computer for it to function.
Advantages of using Drawing Tablet
Many digital artists get by just fine using only a mouse or trackpad. Nothing beats having a stylus in your hand, however.
A tablet gives you complete control over every stroke, allowing you to work at length without fatigue and to condition the muscles in your hand.
Holding a pen is also much more ergonomic than using a mouse, and most users with repetitive strain injury (RSI) or tendonitis suffer less pain when using a tablet.
The pressure sensitivity, the accuracy, and honestly the natural feel of using a tablet just makes it way easier than using a mouse to try and achieve the same effects. Even a cheap tablet will make your life easier.
Graphics Tablets Price and Brands

Price varies on factors ranging from, number of pressure sensors, bit/nib options, custom stylus's, number of mappable hotkeys, and perhaps most importantly size, and brands.
So what is the best tablet brand? Wacom, Huion and XP-Pen all have a range of products for the digital artist. If you want the absolute best then a Wacom is the way to go.
The Wacom tablet is generally regarded as expensive. If you want a drawing tablet from a premium manufacturer, but a Wacom would break your budget, the XP-Pen is here to the rescue. Put simply, it is a Wacom, but at a smaller price.
XP-PEN is a professional and reliable manufacturer of graphics tablets, pen display monitors, stylus pens, and other intuitive interface devices.
Nowdays the brand wacom , Huion and XP-Pen are all offers battery-free pen with each Drawing tablet. The pen doesn't need batteries, so it's lightweight, perfectly balanced and comfortable enough to use as long as you like.
What to Consider Before Buying drawing tablet without screen
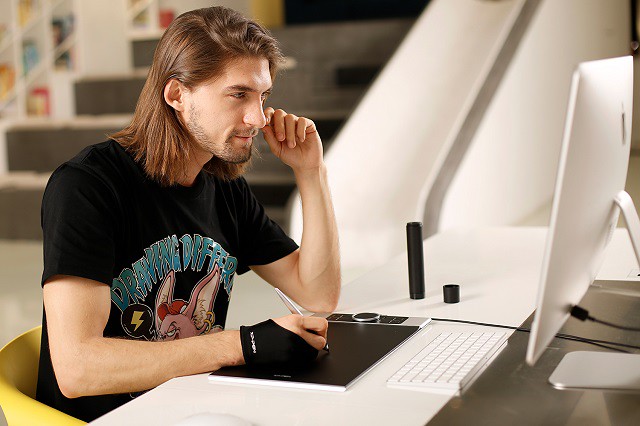
If you feel the need to, you can learn about the fundamental differences between different kinds of non-screen drawing tablets and other useful information.
1. Size of the Active Drawing Area: The active area is where you draw, sketch , edit and it's mapped exactly to your display. The active area should not be confused with tablet size. The tablet usually contains the toolbar and the various menus.
Tablets usually come in sizes where the active drawing area ranges from slightly smaller than an A6 page to slightly larger than A4.
working area sizes should be relative to your screen size and resolution. The smaller the tablet surface, the less hand movement will be necessary to move the cursor on the screen.
Having a tablet too small for your screen leads to a jumpy cursor and makes fine selections difficult. A tablet too big for your screen feels slow, requiring more hand movement, and may tire your arm muscles quicker.
Drawing tablets come in a range of different sizes, and this component is a very personal one. Some artists prefer a large surface area for their creations, while others like to have a compact and travel-friendly option.
2. Pressure Senstivity: It's possible to find a drawing tablet that ranges from 2000 to 8000 pressure levels. Generally speaking, the higher the sensitivity, the easier it'll be to manipulate while you're drawing.
These sensitivity levels allow a greater connection to occur between your tablet and the stylus. If you end up with a particularly sensitive product, you'll be able to create thicker lines as your press down harder on your pen.
3. Tilt support: Higher-end tablets also offer tilt sensitivity, where they can track the angle of the pen and use this to vary the thickness and intensity of the line – ideal for sweeping brushwork or interesting calligraphy effects. The manufacturers will usually specify the level of tilt sensitivity; 60 levels means it can track 60 different degrees of tilt.
Required to correctly simulate the shapes of natural brushes, making it a must-have feature for illustrators working in programs that simulate natural media. Tilt gives much more natural results in those cases.
4. Resolution: If your work involves designing highly detailed images, a higher LPI index is what you should look for. A higher LPI implies significant sharpness and greater detail.
The resolution of a tablet is measured in LPI or lines per inch which is a means for measuring print resolution that utilizes halftone screens. Halftone comprises dots that are similar to DPI resolution (dots per inch) in digital printing.
Current pen tablets offer really high resolution and even the regular XP-Pen Star can handle large resolutions with excellent cursor precision.
5. Reports per Second: Reports per second or points per second refer to the number of times a tablet notifies the computer every second your pen or hand is on the surface of a tablet.
A faster or higher points per second imply the tablet is better and more responsive while a gadget with slower or lower points per second implies a poor and less responsive device.
A drawing tablet with a high response can create smoother lines while low response gadgets create jaggy lines.
6. Shortcut Keys: Hotkeys are also crucial when it comes to choosing a drawing tablet. Most of these gadgets incorporate functional keys that are programmable in accordance with your needs.
Some models will include keys around the graphics area and have keys on the pen. tablets that have these functional keys will help save time, making it possible for you to utilize shortcuts and reach your favorite settings.
7. Wired or Wireless Connect: Wired drawing tablets do not give you the freedom of movement that wireless tablets do. The choice between a wireless and a wired tablet depends totally on your requirements.
That's fine if you're keen to avoid cable clutter or work with a laptop where ports are in short supply but you'll either have to keep the tablet stocked with batteries or plug it in for an occasional recharge.
8. Stylus: The stylus is a digital pen. Its purpose is to create a real pen/pencil-like experience for the designer. There a majorly two kinds of styli: battery-operated styli and Electromagnetic Resonance or EMR styli.
An EMR stylus uses less power and has a thicker point for drawing. Battery-operated styli, on the other hand, have a thinner point, which increases their level of accuracy.
What to Consider Before Buying Pen Display Monitor
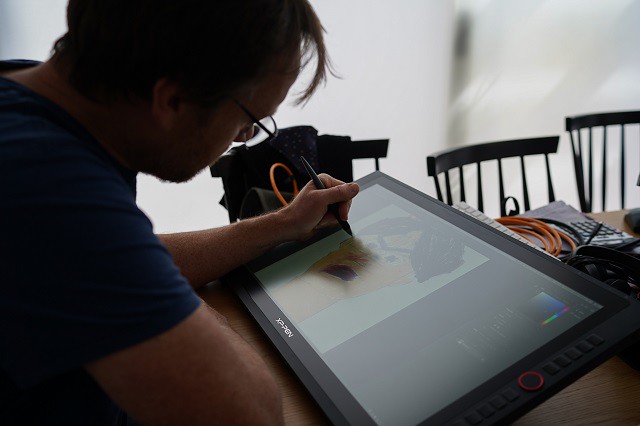
Pen displays are coming in at the high-end of the market and these effectively combine a graphics tablet with a secondary screen.
The big plus is that you can see what you're working on as you're drawing on the drawing surface – a bit like when you're drawing with pencil or ink and paper.
Also, you can have reference images or toolbars open on your main screen, then keep the tablet screen clear for working.
1.Screen Size and Aspect Ratio: The screen size is the physical measurement diagonally of the screen in inches. 1 inch (also written as 1") is equal to 2,54 cm
screen aspect ratio is the ratio of its width to its height. Every screen has an aspect ratio associated with it. A few of the most common aspect ratios we see today are 4:3 and 16:9.
the 16:9 ratio is considered the international standard format for television, cinema, and major online streaming platforms.
2. Screen Resolution: Screen resolution is a measure of how your monitor or screen displays an image; it essentially refers to the clarity of the content on your screen.
Resolution usually shown as something like “1920×1080”, which means there are 1920 pixels across and 1080 pixels down.
the most commonly used 16:9 resolutions across pen display tablets:
HD 1280 x 720
FHD 1920×1080
2K QHD 2560×1440
4K UHD 3840 x 2160
5K 5120 × 2880
8K 7680x4320If you are looking at two screens of the same size, the content on the one with the higher resolution will appear sharper and clearer.
At very low resolutions, images might look “pixelated” or have jagged edges, because there are not enough pixels to provide a crisp, clear image.
3. Screen Color Gamut: gamut refers to the range of colors available in a given monitor, or application. Note that the range refers to the difference between the colours, not the number of colours. The 3 most commonly known quantifiable color data might be sRGB , RGB and NTSC.
sRGB is “standard Red, Green, Blue”, and is the industry standard pretty much entirely, throughout the world, for everyday application. It's got a smaller range of colours than Adobe RGB. It's used in almost every app, web browser, and design tool you use every day, and has the bonus of helping maintain consistency over all platforms.
Adobe RGB allows for a higher range of colours, or colour gamut, over the same number of colours.
Obviously, the higher colour range is desirable for print and production, allowing you to be far more accurate with your colours than you can with sRGB. It can also be converted to sRGB down the production line, making it a little more reversible than the former.
Another common standard of colour space is the NTSC gamut – 72% NTSC = 99% sRGB. Therefore, a display that can reproduce more than the standard 72% NTSC will deliver even more vivid and true-to-life colours.
4. Panel Type: The panel determines how good your monitor is. the three main ones is TN , VA and IPS.
TN panels (Twisted Nematic) are the cheapest ones and the most widely spread because of their affordable prices. Sure, they have fast response time but the colors and viewing angles are quite poor on this panel which will distort your perspective on your designs.
VA panels (Vertical Alignment) are the midrange choice though they aren't very popular. Price-wise they are significantly more expensive than the TN ones ( they are way better than TN panels ) , but when it comes to their performance, they aren't good enough to justify their price.
IPS monitors (In-Plane Switching) are your best choice when it comes to price versus performance. They are usually a bit more expensive than VA panels but the difference in performance justifies it. You'll get accurate color rendition, great viewing angles and a faster response time.
5. Contrast and Brightness: Contrast ratio is the ratio between the maximum and minimum brightness, or in other words, the ratio between the brightest white and the darkest black. For example, a contrast ratio of 1000:1 means that the brightness of a completely white image is 1000 times greater than the brightness of a completely black image.
Projectors with a high contrast ratio, such as 3,000:1, have darker black levels than projectors with lower contrast ratios, such as 1000:1. A higher contrast ratio also produces images with more saturated colors since the difference between black and white is greater.
Brightness is a measurement of the amount of light the LCD monitor produces. It is given in nits or one candelas per square meter (cd/m2). One nit is equal to one cd/m2. Typical brightness ratings range from 250 to 350 cd/m2 for monitors that perform general-purpose tasks. For displaying movies, a brighter luminance rating such as 500 cd/m2 is desirable.
6. Viewing Angle:When you look at an LCD monitor from an angle, the image can look dimmer or even disappear. Colors can also be misrepresented. To compensate for this problem, LCD monitor makers have designed wider viewing angles.
Manufacturers give a measure of viewing angle in degrees (a greater number of degrees is better). In general, look for between 120 and 170 degrees.
7. Parallax: When drawing on a graphics tablet, the stroke doesn't always appear directly under the pen as viewed by the user. Parallax is the distance between your pen tip and where the stroke appears on your tablet's screen.
The thicker the glass, the further away your pen will look. That can cause a slight discrepancy in what you draw, so you'll need to get used to it.
The lower the parallax, the better your drawing experience. Some tablets like XP-Pen Artist Pro have laminated screens, which can almost entirely prevent any parallax.
8. Matte vs Glossy Monitors: The screen texture refers to whether the screen feels matte, smooth, shiny, etc. Many tablets try to replicate that authentic pen-on-paper experience. By creating a little friction between the pen and screen, you get more feedback as you draw. It all comes down to personal preference!
5 Best XP-Pen Drawing Tablet for Beginners
Have you ever wished that you could get professional photo editing or graphic illustration results at home?
These five tablets offer a variety of professional tools that can edit, create, and upgrade your digital photos and illustrations.
From skilled users to beginner editors, these tablets can get you started and make your projects come to life.
1. XP-Pen Star G430S / Star G640

The small tablet has a drawing area of 4 x 3 inches ( Star G430S ) / 6 x 4 inches ( Star G640). It's thin, light, and portable, which are all important factors if you want to carry it around. The included pen is battery-free and has 4096 levels of pressure sensitivity.
It's compatible with Photoshop, Adobe Illustrator, and much more. XP-Pen does include some extra nibs in the box for the pen.
This tablet has a smaller active area, which is ideal for playing OSU. it allows you to improve your gameplay. You'll have better accuracy and faster responses!
The XP-Pen Star G430S / Star G640 drawing tablet is the cheapest good drawing experience you can get. if you're on a very tight budget, this will get you started off till you can afford a better tablet.
2. XP-Pen Deco Fun XS/S/L

XP-PEN Deco Fun series are available in three sizes XS ( 4.8 x 3 inches ) / S ( 6.3 x 4 inches ) / L( 10 x 6.27 inches ) and four colors: classic black, space blue, apple green, and carmine red, to meet your personal preference.
the battery-free pen designed with EMR technology adds to your convenience of editing or drawing whenever you want. Its 8K pressure sensitivity and tilt recognition ( XS version not support tilt function ) delivers advanced performance and realistic pen-on-paper feel.
Apart from drawings, you can also use this drawing tablet for whiteboard demonstrations, document annotation, photo editing, and more. compatible with your Chromebook.
XP-Pen Deco Fun is designed to make learning easier. Use the digital pen and tablet with your computer to draw , write formulas and interact in online classes in a more natural way.
3. XP-Pen Deco 01 V2 / Deco Mini7 / Deco Mini7W ( wireless)

If you've already made some progress on your journey as an artist, and are looking to upgrade to something a little more professional, then the XP-Pen Deco 01 V2 / Deco Mini7 / Deco Mini7w is a great option. It has great build quality, accuracy and precision.
The tablet comes with a bigger working space ( Deco 01 V2: 10 x 6.25 inches , Deco mini7 / Deco Mini7w: 7 x 4.37 inches ) , so you get more area to draw and design.
Coming to the features, the drawing tab has 8 programmable shortcut keys, so you can erase, adjust the brush size, and can do a lot of things just with a click.
The Stylus feels nice in your hand and will wow you with how responsive it is. You won't notice any lag as you draw, and it also has tilt recognition.
You get an OTG connector inside the box for connecting the XP-Pen Deco 01 V2 / Deco Mini7 / Deco Mini7w drawing pad with your Android Phone /Tablet.
4. XP-Pen Artist 12 Pro / Artist 13.3 Pro / Artist 15.6 Pro

The display drawing tablets aren't really aimed at beginners. But lots of people are much more comfortable with the idea of stylus-to-screen drawing and painting.
The 3 tablets of XP-Pen Artist 12 Pro (11.6 inch ) , Artist 13.3 Pro ( 13.3 inch ) and Artist 15.6 Pro ( 15.6 inch) are consistently a best seller ! all of which are the best display tablet for beginners with a simple design, a built-in stand, and a very simple setup process.
All the specs are incredible with a 1080p fully-laminated display, 88% NTSC color accuracy ( Artist 12 Pro : 72% NTSC ) , 8 express keys, Red dial and a battery-free digital pen designed to last for years of consistent use.
The stylus performs very well which has a tilt function of +/- 60 degrees, and is equipped with 8192 levels of pressure sensitivity.
the XP-Pen Artist Pro series is more than capable of creating professional art. The drawing monitor has a quick reaction time that does not inhibit you in any way.
5. XP-Pen Artist 22 (2nd Generation)

A drawing tablet without a display won't appeal to everyone. There's nothing like seeing your artwork in full and vivid color on the screen you're drawing on. And the XP-PEN Artist 22 (2nd Generation) is one of the best drawing tablets with a screen that won't break the bank.
Despite being affordable, this tablet doesn't disappoint. It has a display with an excellent resolution ( 1920 x 1080 ) and a wide color gamut ( 86% NTSC, Adobe RGB≥90%, sRGB≥122%). So, your illustrations will look vibrant and realistic on this screen.
The 22inch FHD screen gives you a lot of screen space, so you can see the minutest details of what you're drawing.
The battery-free pen is amazing to use ( Artist 22 Pro and Artist 22E Pro comes with a P02S Rechargeable stylus ) – responsive and smooth. Tillt recognition also allows you to control the line thickness.
You can draw with precision and shade with ease, thanks to the 8192 pressure levels.And with a ≥ 220 PPS report rate, it's speedy with no lagging or delays.
Before you buy this tablet, make sure that your computer has HDMI and USB-C ports. Otherwise, you'll need to buy an extra adapter for your tablet to work.
If you want to upgrade from a non-screen graphic tablet, the XP-PEN Artist 22 (2nd Generation) is an excellent choice. It's also ideal as a first drawing tablet monitor due to its great features and low price.
Conclusion
A drawing tablet will open up new opportunities for creativity and self-expression. You can enjoy digital art as a hobby or even a new career path.
There are plenty of options out there for you if you're just starting your journey as a digital artist and are looking for a proper graphics tablet.
All of the above options are great to start off with, and will help you launch your career. The important thing is to take that first step. Until next time, happy drawing!
Don't forget to share these recommendations with your friends if you like it. Still, if you are in doubt then do leave a comment down below I love to solve all your queries.
-
Do you use a graphic drawing tablet for pixel art?
Donnerstag, 22. Juli 2021 - keine Kommentare
Thanks to remakes and remasters of retro video games, pixel art has made a return to the spotlight. Although new video game graphics have reached a hyper-realistic level, it still can't beat the charm of pixel art. Which is why game developers and artists alike turn to pixel art tools to create throwback video games and artwork.
Pixel art is a discipline like any other, which means it takes time and practice to learn how to do it well. It helps to have a background in other visual arts, but it's not required, though it will then take longer to learn properly.
If you want to do pixel art professionally (as a freelance artist for example) you'll most likely need to learn about animation as well since most jobs will have you animate characters for a game.
It takes up the same concept as any other forms of art. For the most part, failures will be made and few successes to it, especially when someone is starting out. The great thing about pixel art is that you can use whatever style and size you desire!
Finally, even if you're very skilled, pixel art pieces can take a lot of time. Good pixel art is hard to make. It takes years of practice to get good. This is partly because pixel art is a very minutious discipline, but also because you'll end up redoing a lot of the same sprites over and over as revisions are needed due to the game changing.
It IS however very rewarding. Seeing your animated characters come to life in an interactive environment is very satisfying after you spend so much time and effort creating them!
Do you want to try your hand at creating pixel perfect artwork? Then these pixel art tools will help you get started.
Best pixel art software
art software that allows you to draw on a computer will be your best ally for making pixel art.
While there's great dedicated tools for making pixel art, you can use any drawing program to follow along.
Here's a list of software commonly used for pixel art:
Aseprite: Great professional editor with many time-saving features (paid).
GraphicsGale: A classic, used in many games. It's a little complex, but full of great features (free).
Piskel: Free online pixel art editor (free).
Photoshop: Powerful image editor not intended to make pixel art but you can set it up to use it (paid).
GIMP: comes with all the tools you'll need to make professional pixel art. best known as the “free alternative” to Photoshop (free).
my favorite software is Aseprite, but you should use whatever your're most comfortable with.
Aseprite is incredibly powerful, packed with features and yet simple to use. The main advantage of Aseprite is that you can export gifs (you can't in the free version of GG).
You can also get the free trial for Aseprite, but keep in mind it won't save your files, which I guess it's OK if you are just practicing.
You can use Photoshop or GIMP for pixel art, but in my opinion these are best relegated to very particular kinds of operations. Using a dedicated pixelart app for most of your pixelart stuff saves time setting up and avoids showing options that are ultimately pretty irrelevant to pixel art -- of which there are many. Some features -- like tile autocompletion -- are only found in pixel-art specific apps.
Best device for pixel art

Thanks to the computer, it is now possible to draw without limits and without having to spend hundreds of dollars in drawing materials consumed at a high pace.
There are many different ways to draw on a computer. While starting out with no specific hardware other than your laptop, investing in computer drawing pad tablet seems to be a must for those who want to improve their design process and draw more accurately and quickly than with a mouse.
A pen tablet is more ergonomic and better for your hand and wrist over long periods (trust me on this one). they have helped me in the past when I have RSI niggles.
It is much quicker navigating the screen when mapped “correctly” ( I think it is called corner to corner mapping) your hand starts to remover where certain button are on the screen and you can just move to them almost instantly. Selecting multiple things is also made much easier.
Big advantages to the tablet are, pressure sensitivity, it feels as if it were a pencil on paper, which is so lovely to work with.
A graphics tablet is worth it for pixel art, but I recommend also experimenting with non-pixel-art (eg CG or ink, with MyPaint, Krita, or Photoshop) -- tablets are very versatile, building up your skills in other areas will help your pixelart skills, and experimenting is VASTLY quicker with a tablet than basically anything else I've ever tried.
Shopping for a drawing tablet can be a bit overwhelming. The pricing is confusing, and important features like pressure sensitivity and latency aren't always easy to understand.
It can be intimidating to see all these expensive big screen displays by Wacom, or products by Apple. But You can get away with using a cheaper tablet when it comes to pixel art since you don't really need a super accurate pressure sensor!
The cheap drawing tablet will allow you to get a feel for digital art and begin building up your skill before you spend too much.
If you bought an iPad and decided you didn't like on-screen drawing, you'd be out a bit of money; likewise buying an expensive non-screen tablet and deciding you prefer on-screen.
A drawing tablet helps if you are already skilled/more comfortable with using a traditional pencil/paper and can be useful for drawing large scenes where you can do broad strokes.
personally I think it Depends on the size of art you're drawing. I prefer using a drawing pad for sizes 64x64px and above, otherwise a mouse works just fine for anything smaller than 64x64px. The mouse is definitely better for detail work, so use that to your advantage to clean up the sketchiness.
Advice on Graphics Tablet
Recommendations for drawing tablet? There are cheaper alternatives to wacom . Doesn't matter the brand, just check the reviews. I always recommend XP-Pen since I use their tablets daily and they never failed me. If you're looking for a premium drawing tablet at an affordable price, then the XP-PEN may be your best bet.

For starters get XP-Pen Deco or Star (see which size is best for you) - those are drawing tablets without screen, meaning you draw on them but look at your PC monitor, similar to a mouse but you have more control with drawing.
You can get a pretty cheap tablet, like a XP-Pen Star G640 for around $40 on Internet. It is pretty thing, but it works really well, and if you don't have a lot of money, it is a good start.
If you want drawing tablet with screen, meaning you draw direcly onto the screen, get XP-Pen Artist.
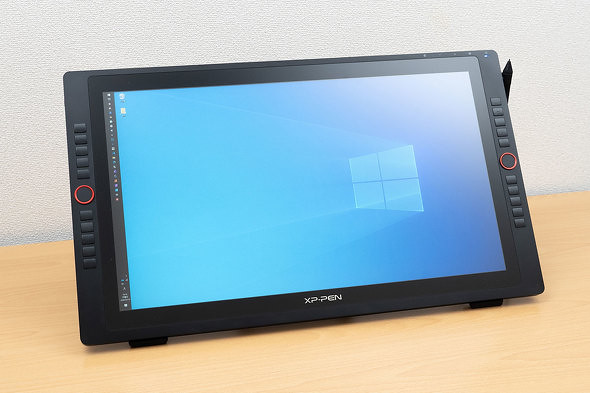
I have XP-Pen Artist 24 Pro which is a huge drawing tablet so when i draw high resolution pixel art or 2D animation or drawing in general I use my tablet. I find it works really well, especially for pulling lines.
The tablet has a screen with 2K resolution , battery-free stylus, 2 roller wheels and 20 hot keys, which I really like. The colors are good, and the pressure sensitivity is amazing. It is on the large side, but XP-Pen makes five different sizes of screen tablet, so if you're interested, you can think about which one works best for you, I have the 24 inch one, the others are 11 and 22 inches I believe.
Best of all, it is way less expensive than most screen tablets (Their older versions are a little cheaper, and of course the smaller one is quite a bit less and the larger quite a bit more).
I prefer to draw directly on the screen . I begin my sprites by drawing the lineart on a canvas about four times larger than the final sprite size. Then, after I shrink the lineart to the desired size and clean it up, I fill in the colors and shading.
I am used to digital drawing and painting, so when working with pixel art, it seems very "natural" for me. Of course, with this, it can get a bit messy, and you'll have to clean up your work. If you're working with Aseprite, there is an option to clean up your work a bit called "Pixel-perfect". I prefer just erasing pixels I'm not using.

Conclusion
You don't need anything fancy to make good pixel art, and you can do fine even with just a good mouse and free software.
If you're already used to a mouse then continue with it, a lot of artists use mice and there's no real draw back (I use a mouse myself).
Ultimately just use whatever you are most comfortable with and you should be fine.
The artist makes the art, not the tool. But your tool, as an artist is actually your body.
-
Hands On Review of the the XP-Pen Deco Fun: XP-Pen's Most Affordable Drawing Tablet
Freitag, 11. Juni 2021 - keine Kommentare
With a graphic tablet you can draw on your computer! Your screen will turn into your canvas.
If you do any type a graphic design, digital design, digital art and marketing graphics there will come a time that you will need some new equipment to take your skills and abilities up a notch. I highly recommend XP-Pen products.
Graphics Drawing Tablets for PC have come a long way in recent years. Gone are the days where the only game in town was a Wacom Intuos. Now, there are options to suit all budgets – from powerful, feature-packed pen displays with high-resolution touchscreens, to mid-range and cheap drawing tablets that balance price with power.
XP-Pen was founded in 2005 and in my opinion, whether you're interested in painting, drawing or photograph retouching, it is the company you should consider when looking for a graphics tablet.
Recently, XP-Pen introduced a new addition to its Deco family: the XP-Pen Deco Fun with XS, S, L three sizes and four different colors. Since I've been a XP-Pen tablet user for many years, I couldn't wait to get my hands on it.
The first thing I noticed was that XP-Pen now offers a bewildering selection of entry level and mid range tablets.
These “entry level” tablets are the XP-Pen Deco Fun Series. Prices vary because their sizes vary by tablet. They feature a smooth drawing surface and Android compatible with Android, Chrome OS.
For my tests, I bought the whole models of the Deco Fun range.
Unboxing the XP-Pen Deco Fun

When I first got it I was really excited because I'd seen on Youtube all the unboxings and the interior of the box is really nice!
It's a beautiful box for storing your tablet in! Underneath the tablet is a compartment for the cable, that connects it to your laptop, and the manual.
Once you buy it, you'll get:
– The actual Tablet .
– The pen with buttons .
– 1 Pen Clipper and 10 extra nibs
– A booklet containing information on the tablet
– a USB connecting cable
Models
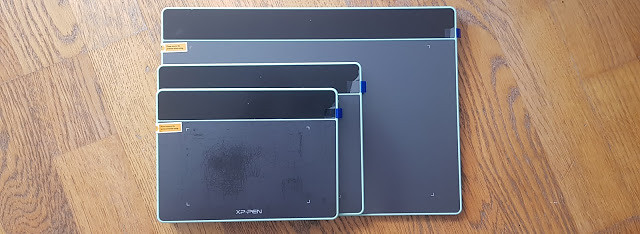
There are three versions of the Deco Fun. The price depends on the size you get too, obviously the bigger, the more expensive.
Extra Small ($29.99) — This tablet works well for those looking for an ultra-portable design as it measures 182.4 x 134.7 x 10.5mm.
Small ($39.99 ) — This size is my personal preference at 210.5 x 159.8 x 12.9mm. This matches my laptop well and easily fits in the bag for on-location work. Its large enough to use comfortably at a desk.
Large ($49.99) —This size works best for illustrators or those with a large work area. It measures 315 x 222.9 x 12.5mm.

Info & Features:
Here is some information and features about the tablet:
– The tablet has no buttons on the side to customize .
– There are additional 2 buttons on the pen.
– you can connect the tablet with its USB-C to USB-A type cable.
– The XP-Pen Deco Fun has also great pen pressure sensitivity.
– It has about 3 sizes and four colors ( Classic Black, Space Blue, Apple Green, Carmine Red ) to choose from.
– The small and Large Size tablets do have tilt feature.
– tablets supports Window , Mac , linux , Android connection and is widely compatible with Chromebook devices.

The Deco Fun is a simple entry into pen and tablet-based photo editing and illustration on a budget. While not as large as pricier options, and serving only as a map of the screen and not an actual screen, the Deco Fun' pressure sensitivity simplifies and speeds up many types of brush-based work.
Here's the official website for the XP-PEN Deco Fun: https://www.xp-pen.com/product/905.html
Install the Driver
Getting used to the tablet also involved getting the hang of how the pen worked on the tablet's surface. Much of this was made flexible via the tablet driver.
Once you have your tablet, you need to install all the drivers so it all works properly, which is a very simple task to do and shouldn't take up a lot of time.
Just Go to the XP-Pen official site drivers page. Click Download next to the latest driver that corresponds to your computer's operating system. Follow the prompts to finish the driver installation.
The Driver will help you to make relevant modifications on pen pressure to helping it feel akin to an actual pencil.
Tech Review

The tablet surface corresponds to your computer monitor; moving the pen over the tablet is analogous to moving your finger on a track pad — the movement is in your hands, but your eyes remain forward, looking at the monitor. While it sounds less intuitive than drawing directly on the screen, in practice it feels natural.
Made from smooth black plastic similar in feel to the Touchpad on a Laptop, the XP-Pen Deco Fun should look right at home on most desks. The majority of the tablet is taken up by that work surface, which measures 6.3 by 4 inches on the small model .
Four rubber pads underneath provide grip to carry the tablet steady while you're working. While constructed from plastic, the Deco Fun feels well-built for the price. I did find that with enough use, the pen will leave tiny scratch marks in the surface of the tablet .
Use the Deco Fun feels like the you tried to type without looking at your hands. Watching the screen instead of your hand while drawing feels strange, at first, but that odd feeling slowly fades the more you use the tablet system until it feels just as easy as typing.
In fact, employing a separate tablet and monitor — versus drawing directly on a screen — may even be a plus, as your hand doesn't physically block your view of your digital canvas.
My experience with it
Digital Painting experience
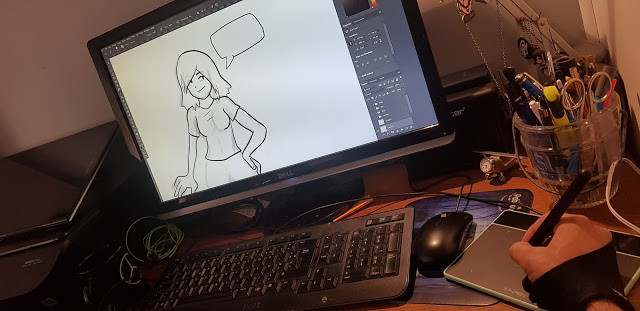
After installing the XP-Pen Deco Fun, I began exploring the digital medium landscape by trying out the paid software offer of Photoshop CC , alongside various other different free software including Medibang Paint, Gimp ,Krita, etc.
The bundled software ( ArtRage Lite ) doesn't do much for me . I think it's better to buy a Deco Fun and then buy whatever software you want to use with it.
The drawing surface is awesome: slick and smooth with no skips or lag. XP-Pen has always made quality tablets so there's no surprise that the pen responsiveness is spot-on.
The product does have its downfalls, The real difference between this tablet and its predecessors (and other tablets in XP-Pen's lineup) are the customizable hot buttons down the side of the tablet.
you can using it replaces drawing paper, pencils, watercolors, and just any other art tool you could think of!
A lot drawing programs are free, so once you get a tablet, you are essentially ready to go.
Since tablet stylus acts just like a pen, paintbrush, or whatever you want it to be, the table itself senses pressure. The biggest edge the Deco Fun has over a mouse is the pressure sensitivity.
More pressure creates smaller, darker strokes, while less pressure creates a line as large as the selected brush with more edge gradient. The pen doesn't mean you never need to choose a brush size, shape, or edge again, but the pressure sensitivity allows you to urge that maximum brush size or just a fraction of that selected brush with light pressure.
This makes it so that when you press hard, the lines made are thicker and darker, just like in real life. You can easily draw and color like you would on regular paper, except with more tools that you couldn't use in real life.
Use Deco Fun Graphic Tablet to Edit Photos

The main benefit to a tablet when photograph retouching is not as obvious as you might think. The precise movements compared to a mouse are nice but actually being able to change pressure on the pen is equally as useful, especially if you are dodging and burning.
While the Deco Fun is the most time-efficient when using the pressure sensitivity, the tablet-based editing feels more natural for a number of other uses. Using the pen to tap out blemishes with the healing tool was slightly faster than using the mouse, but it also felt more natural and, frankly, helped me in making a tedious task a bit more enjoyable.
If you think you'd be better/faster with a tablet, you should seriously consider getting one. Illustrators, cartoonists, animators, photographers doing retouching/editing by mouse would all benefit from a tablet.
I use the pen stylus even for video editing. Period point blank, holding a pen is going to be more accurate and efficient rhan holding a mouse for any computer task you can think of, at least for me.
Works with Chromebooks

This entry level tablet connects to any Chromebook with a USB cable and then you use the included stylus to draw like you'd normally draw! I've used a similar product from XP-Pen before to draw out math equations and it worked really well.
Supported on Chrome OS 88 and later, and Kernel version 4 and later(including 4.4, 4.14 and 4.19).
If your Chromebook has a touchscreen, the lag on some of those can make drawing accurately nearly impossible.
There are plenty of drawing apps for Chromebooks . You could use this for art (obviously) but also for students who want to show their math work.
This most likely has very little lag and the price makes it very affordable to boot.
Also when you buy the deco fun tablet you will get the three-month trail of Explain Everything whiteboard app ( just like Google Jamboard , Openboard and MS Whiteboard ) license .
Just download the app on your device to use to draw and open the board in a browser to screen share (or just send them the share link to view) and they can see what you draw.
I've been using the xp-pen with OneNote and PowwrPoint and it's worked great. You get used to coordinating the pen with the screen pretty quickly. it's great for online courses .
Support connect to your Android phone or tablet!

you need to download a driver to your pc and connect the tablet to update the tablet's firmware . after that its suppoused to work as intended.
It doesnt work with bluetooth it has to be connected using usb otg ( not come with , you have to buy one by yourself ) .
I connected my XP-Pen Deco Fun to my Samsung Galaxy (my phone came with a special adapter) and it technically works. However, you can't see where the pen is but you can still click and draw.
inixPint X this one support pen pressure and Sketchbook are my favorite apps . also with also medibang paint and adobe sketch ( idk why those 2 dont support pen pressure , But you can still draw. ).
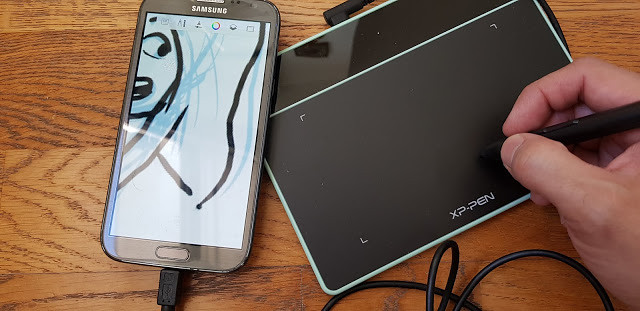
Conclusion
The XP-Pen Deco Fun is the perfect tablet for anyone to start their journey in the digital medium. The added bonus of the free software, and relatively cheap prize makes it a perfect comic for the budget artist.
If you're looking at buying a Drawing Tablet, I definitely recommend getting a XP-Pen Deco Fun. For a beginner, it's perfect, not difficult to use and great results.
I'm thrilled with it and happily using it to sketch and paint in Photoshop.
If you do a lot of retouching, photography editing or even drawing, you should buy one, in my opinion. It's a solid product with minimal problems.
If you draw a lot, I would consider a XP-Pen Artist 12 Pro Drawing Tablet With Screen . I do not think you'd benefit from a screen with photograph retouching, so I do not recommend getting the more expensive model if you're only interested in photography.
-
15 Best Free & Paid photo editors for beginners and professionals
Mittwoch, 21. April 2021 - keine Kommentare
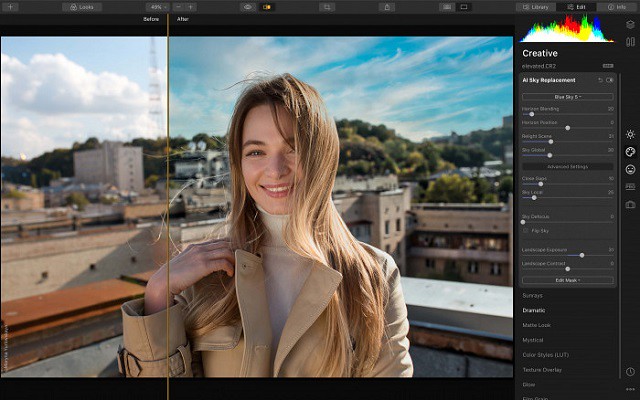
Every moment in life is special, So we all want to capture those beautiful moments. “You not just click the moment we create a long-lasting memory”.
Either you are clicking the shot by mobile camera phone or a DSLR, everyone needs a few changes in look so, if you really care how your photos look, you need to import them into your PC to organize them and then go through all the click and select the best and perfect them with Photo Editing Software. Do changes for professional or personal use.
If you're a photographer looking for the best photo editing software for pc, you're not the only one.
After all, taking pictures is only half the battle – whether you're shooting on your phone or the latest mirrorless camera, we all need to edit our photos to make them look amazing.
In the right hands, the best photo editing software can take a dull image to something that can amaze your friends, or even win an award.
Editing software is essential for getting the most out of your image. Capturing the scene is only one step towards a perfect image. You'll want to tweak the exposure, contrast and/or other areas.
As a city photographer and architectural photographer, by post-processing, you'll be able to edit a number of exposures in parentheses, highlighting the sunshine or shade particulars you need as properly.
Commercial photographers select a formidable approach to vary the black and white layer into smooth gentle.
An artistic merged have a look at the picture is feasible by picture modifying. By altering the layer of curves to brightness, photographers have an effect on the distinction and saturation of the picture, for a greater mixing impact.
Almost all photographers shoot in RAW, however it can't be printed till it has been edited. By altering the color, lightening / darkening a picture, it may be printed.
With photo editing apps, photographers can change the distinction, coloration, hue, saturation, coloration, coloration, and extra. You can in truth take away the blur elements, undesirable objects from the scene; the shifting objects may be rectified to create an ideal click on.
Adobe products shine when it comes to editing photos. But, it's not the only credible photo editing software out there. In fact, there are plenty of photo editing software available on the market to explore and choose from.
Whether you need something simple for basic edits or you're someone that requires advanced features to edit your images like a pro, there's a free or paid photo editor for you.
This is our concise list of the 15 best photo editing software for photographers of all levels. We have done a full review of the photo apps & picked the top ones.
Each of these programs can perform the basic tasks of enhancing your photos to make them look amazing and some of these include advanced features similar to Photoshop that should satisfy your image creating and editing needs.
Top Photo Editing Software for PC and Mac from Beginners to Pro
1. Adobe Photoshop CC
Platforms: Windows,MacOS | Price: Paid

At the very top end of image editing is Photoshop, which has no real rival. It is one of the most popular photo editing software tools on the market. Photoshop is the primary tool for its legions of fans across the world, including designers, artists, and illustrators.
Its layering, masking and retouching tools still set the standard by which others are judged, while the power of its layer-based editing system can handle the most complex of creative projects.
Anyone who knows anything about photo editing and graphic design will have used one of the various Adobe Photoshop versions.
Photoshop offers similar tools to any other software in this realm, but to the nth degree – there are often several ways for performing the same function in Photoshop, be it changing a background colour, cloning elements, frequency separation, or any of the myriad other photo editing tasks.
Then there are the special effects and healing tools that only Photoshop can accomplish – AI-assisted tools like content-aware scale and fill . Being able to recreate a scene that doesn't already digitally exist is a powerful feature for photographers .
This latest version increasingly relies on Sensei, Adobe's highly touted artificial intelligence engine, to facilitate a host of impressive features. The most high-profile of these include Sky Replacement, new Refine Edge selections. Plus, Neural Filters help simplify complex workflows.
Even though Photoshop can be difficult to master, it's not necessarily difficult to learn. It's pre-made workspaces, in-app tools descriptions and clear tools icons help make learning the program more manageable. Don't try to dive in all at once! A piece-by-piece approach to Photoshop will likely be the more successful route.
Adobe Photoshop CC is available only as a subscription service .For $10 per month, you get the Photography plan, which offers Photoshop, Lightroom and Lightroom CC for the desktop and 20GB of online storage. For $20 per month you get the same Photography Plan with 1TB of online storage.
If you're wondering why Adobe has two lots of photo-editing software on the market, it's because they do different things. Lightroom is mainly a RAW developer and photo organising tool, while Photoshop is the software that you will need for more complex adjustments, working on layers, masks and channels.
There are no image browsing or cataloguing tools in Photoshop itself, but since Lightroom is included in the same Photography Plans as Photoshop, that's not an issue. On its own, Photoshop is powerful but limited; with Adobe Lightroom it's half of the world's most popular image editing double-act.
2. Adobe Lightroom
Platforms: Windows,MacOS | Price: Paid

Adobe Lightroom is another powerful editing software by Adobe. Ideally, it is perfect for photographers who want a more straightforward yet capable tool to edit their images.
Lightroom is an all-in-one image cataloguing, raw-processing and editing program and the perfect partner for Photoshop. If your main work is photo enhancement rather than manipulation, you might not need Photoshop at all.
Unlike Photoshop's complicated and intimidating user interface, both Lightroom Classic and CC offer a more intuitive and user-friendly interface for image editing.
Some of its excellent features include: customizable sliders, gradient and brush adjustments, presets, blurring tools and other professional filters. Plus, you can use it with multiple devices and to help you keep your photos organized it uses face detection. All things considered, with this wide range of functional features and its easy-to-use interface, you can create just as remarkable photos with Lightroom.
Lightroom have a library of pre-made editing solutions called presets. These presets make it easier than ever to achieve a specific look in your photos. Simply find a preset package you like via Lightroom's preset marketplace or online, then apply it to one or more of your images for a flawless edit.
Of course, presets work wonderfully for batch editing your photos at a break-neck pace. And, you can even design your own custom presets. With Lightroom's presets, you have the opportunity to continually expand the software's editing capabilities.
Not to mention, many third-party plugins and applications have integrated with Lightroom to make using the program even easier. Envira Gallery, for example, includes Adobe Lightroom to WordPress integration that allows you to easily sync your Lightroom photo galleries with your photography website.
Another great thing about Adobe Lightroom, that many people praise it for, is the organizing capability it offers – you can add tags and sort your photos in your own style.
Unlike Photoshop, Lightroom is built to handle entire photo collections at once. You can import, sort, and edit your files all within the same simple interface.
Lightroom is the fact that it supports nearly all formats of RAW files, no matter the camera you're using, so this can be a factor to consider when choosing one of these tools.
Lightroom is one of the best photo editing software for pc that allows you to retouch full resolution images. This tool allows you to view, download, or add photos on the web. It offers a wide range of layouts.
3. Corel PaintShop Pro
Platforms: Windows | Price: Paid

Corel PaintShop Pro is a capable and one of the most inexpensive photo editing software tools out there. Some photographers call it an Adobe Photoshop alternative, but it lacks Photoshop's most advanced flagship features, including Camera Shake Reduction, 3D modeling, Faces Liquefy, detailed typography, among others.
Photographers who value simplicity will really like Corel PaintShop Pro . That being said, do not let its simple approach to photo editing fool you as it does not make its editing capability any less effective.
This software boasts everything you require to enhance your pics from AI enhanced presets to graphic design templates to options such as blur and fix. Plus, if the wide range of brushes, color palettes , textures and backgrounds do not float your boat, do not dismiss the software just yet as brand new features are being added continuously.
Now boasting numerous powerful AI-Powered tools that go well beyond free Photoshop alternatives, PsP has become a fully-featured graphics manipulation tool that provides excellent value for money.
In many ways, Corel PaintShop Pro is a powerful program, and It's easy for novices to grasp, and has some additional tools, such as 360-degree photo editing. It's also touch-screen compatible and has a new streamlined workspace. Corel has even made the tool icons large and distinct so that they're easy to select on a touch device.
You can preview, organise, and streamline your photo editing workflow in the Manage workspace, which also allows you to add keyword tags to your photos, create catalogues, make batch edits to multiple images at once, and review metadata and file information.
If you need to extend its capabilities, Paintshop Pro supports various 64-bit plugins from Adobe, Topaz Labs, Nik Collection by DXO and many more. You can even import and export PSD files to work across platforms.
PaintShop Pro is a fantastic option that represents a unique amalgamation of Lightroom and Photoshop in one. Like some other software, it requires a one-time fee, which starts at around $60 to get a life-time license. For that price, you gain access to dozens of textures, backgrounds, and brushes to choose from. And, app updates add new features all the time.
This software is comprehensive and powerful enough to help you with any tasks, but remember the fact that you'll have to pay for most of the features offered. They have multiple payment plans, and with those come more and more options you can use – so this can be a little tricky. Other than that, there's only one more thing that can be a major drawback for some: it is only Windows supported. Think it through before making a choice.
4. Affinity Photo
Platforms: Windows,MacOS | Price: Paid

If you're looking for a pro photo editor like Photoshop, Affinity Photo is an excellent choice. Affinity Photo is sold at a budget price point, but it has the tools and the features and the power to compete with Photoshop head-on.
Serif has focused particularly heavily on the retouching market, with cloning, healing and retouching tools, an Inpainting tool for automatic object removal and a dedicated Liquify persona (workspace) for localized image distortion effects.
That being said, Affinity Photo's primary focus is photography, so it lacks a few of Photoshop's extra features (like 3D editing).
Other than this, Affinity Pro's main difference with Photoshop is how the tools are organised. It uses “personas” instead of workspaces and that might take a little getting used to for folks used to Photoshop.
It comes with layers, masks, smart objects, colour management, and both CMYK and RGB editing, as well as decent Raw file conversion. its filter effects can be applied ‘live' and its HDR tone mapping and workspace tools are excellent.
From focus stacking and panorama stitching to HDR merging and digital painting, it has just about everything you could want in a photo editor.
Like Photoshop, though, it's focused solely on in-depth, technical image manipulation. It doesn't have its own browsing and cataloguing tools and it doesn't do instant preset effects. Affinity Photo will bring the tools, but you have to bring the vision.
For just $50—or cheaper if there's a sale—Affinity gives users a surprisingly complete set of Photoshop-like features. but subscription-free, via a single extra-low payment.
As far as the learning curve is concerned, much like Photoshop, the tools in Affinity Photo are quite in-depth and will take some time to explore and learn. Luckily the interface is quite logical, and if you've used Photoshop before the tools will make sense.
5. Capture One Pro
Platforms: Windows,MacOS | Price: Paid

Capture One is a RAW image editor made by the camera company, Phase One. If you are a photographer who is mostly interested in enhancing RAW images, then this is a better option than Adobe Lightroom.
Capture One works both as tethered capture and editing tool for studio photographers with a 'sessions' based workflow and as a Lightroom-style image cataloguing, searching and non-destructive editing tool. It works in a single window rather than in Lightroom-style ‘modules' and has a highly customizable set of ‘tool tabs'.
One of the key differences is its layers-based local adjustment system which makes it much easier to see and edit your changes to your work, and this now includes 'parametric' linear and radial gradient masks which you can edit later. Capture One's conversions look smoother and sharper than Lightroom's.
Its raw conversions are sharper and less noisy than Adobe's, but it doesn't support such a wide range of camera raw formats or as large a number of lens correction profiles. It doesn't have Adobe's mobile apps and online synchronization options either, but it does offer professional-grade ‘tethering' tools for studio photographers capturing images via a computer.
Capture One Pro also has a better system for applying local adjustments, using adjustment layers and masks. It's expensive, but very, very good.
This RAW image editor boasts some features that set it apart from the other software solutions available. For starters, if you need to work with big volumes of photos that are more than 20 megapixel RAW files, you will be impressed with its speed. What is more, to help you work more efficiently, the interface boasts some great customizability which means that you can change the keyboard shortcuts and layout to suit your preferences better.
If you often work with layers, you will also love the fact that it does not become slower when you have too many layers. Plus, it lets you make several adjustments per layer.
Some of its other fabulous features that will help you to work more efficiently are its sophisticated color editing and annotations. Its sliders make it much easier to tweak the granularity, while the annotations feature lets you jot down ideas to ensure that you can collaborate smoothly with other photographers and designers.
You do need a relatively powerful computer to run Capture One Pro smoothly. The only real strikes against it are the fact that there's no HDR or panorama options, the steep learning curve, limited plugin support compared to other software, and the price.
The full-fledged version retails at close to $300. There's also a subscription option at $20/month ($15/month if you prepay for a year) – considerably more expensive than Adobe's Creative Cloud Photography Plans.
6. Gimp
Platforms: Windows,MacOS, Linux | Price: Free

GIMP is a free, open-source photo editing software that's easy to download and install on your computer. It has multiple features which help you with retouching photos, photo composition and picture enhancement. It also includes a built-in file manager.
If you're a photographer, graphic designer or illustrator with a limited budget, GIMP offers many powerful features that with other software you'd have to pay to use.
The user-interface takes some getting used to and isn't as refined as Photoshop, but as with any editing software, once you're familiar with it, movements become second nature.
Once you launch the program, you'll find a dedicated window that displays the image. You'll also see two floating docks: One with the toolbox and another for managing layers, paths, brushes, and more.
It's also completely customisable, with dialogues allowed to float anywhere on the screen. You can customize not only the tools available, but also your workspace's color, widgets and widget spacings.
All the essential image editing tools are there: noise reduction, cropping, colour adjustment, gradients, brushes, curves and image enhancements.
For blemishes, there is the clone stamp, healing tools and you can even apply changes to isolated areas.
When using a large display, or two monitors, you'll have an expansive workspace to edit your images. Icons in the toolbox represent specific tools, like Scale, Pencil, Paintbrush, Bucket Fill, Airbrush, Smudge, and more. You can apply numerous filters, too, such as dropping a shadow, adding a neon effect, adding a glass tile, removing devilish red eyes, and so on.
It can handle all the usual file types, including RAW, JPEG, TIFF, PSD, GIF and more.
Because GIMP is open-source, there's a very active community of users who have created plugins to add even more functionality to the program. However, despite a more user-friendly interface than past versions, Gimp offers almost nothing in the way of guidance, which makes it much more difficult to learn than other photo-editing software.
This free professional software for editing photos is another excellent Photoshop alternative for beginners. It boasts a variety of features that can assist novices with digital photo retouching and composition. With the help of features like vignette and corrective mode, you can also take your photos of any file format to the next level.
Gimp is good for starters and professionals with limited requirements. However, it is not an ideal option for pro-level editing work.
7. Paint.Net
Platforms: Windows | Price: Free

Paint.Net is an easy and convenient image editor with a clear and well-ordered interface. It offers you tons of Layers and filters, Plugin support but when compared with the GIMP, It is less powerful than GIMP.
With Paint.Net you can make some basic editing without deep changes and professional retouch. The software will come in handy for Social media marketing Specialists and Photography lovers who need to put pictures in order fast.
Paint.Net has a similar Adobe Photoshop interface. Tools like a magnifier, crop frame, color picker, and brushes are placed on the bar on the left side, history of editing and layers to work on - on the right side in different windows. All image editing functions are available in the Adjustments menu, including tools of Hue / Saturation and Curves.
These tools are usually used by professional photographers and photo retouchers. In this program, you can overlay layers, mix them, for this you need to choose a "Layers" palette tool. You can return to any stage of photo editing.
The name doesn't sound all that fancy. Although it sounds like Microsoft Paint, it is a dedicated photo editor. Albeit a basic one. It is easy for beginners as it has layers, unlimited history, and special effects.
Editing with Paint.Net is very fast and easy, even on older systems, despite the fact that it lacks some advanced tools. It is free, but unfortunately for Mac users, it is exclusive to Windows.
Sometimes it is important to work with a YouTube photo editor that does not include very many complex features. While going with this software, You see it's a quick, easy to work with and help you to create new look images.
8. Photofiltre Studio
Platforms: Windows | Price: Free and Paid
Photofiltre is not a widely known photo retouching program which won't cost you a penny, but it has plenty of features that casual photo editors will find useful.
As its name suggests, PhotoFiltre offers plenty of terrific filters and tools for enhancing images. There are filters for adjusting brightness, contrast, increasing and decreasing saturation as well as sharpening or blurring images.
It has a host of artistic filters, too, including textures, watercolor, pastels, sepia tone, black and white, night and sunlight effects and emboss. It even has a puzzle effect.
The program doesn't offer layers, though it does allow you to put text over an image. Many don't use layers anyway so, for them, the lack of this feature is no loss.
Whatever filter you apply it can be undone. It also can be faded. So if the original effect is too strong, you can reduce the amount via the Edit menu.
PhotoFiltre includes an Image Explorer, which is accessed through the Tools menu. Open any image folder on your hard drive and its contents are shown along the bottom of the window. Simply double click on a photo to open it and begin editing.
You can do automated batch processing of any number of photos. Select the Source and Output folders and file format such as JPEG, GIF and TIFF. Next select the image size and if you want a frame automatically added to the images. The size and color of the frame can be adjusted.
During the batch process, brightness, contrast, saturation and Gamma correcting can be applied to photos. You can apply a few filters such a sharpening and scanlines, and rotate or flip images. The batch process is fast and easy. Since not all photos need the same amount of processing, do a test run to see if the results are to your liking.
An advanced version of PhotoFiltre , called PhotoFiltre Studio, is also available for a nominal fee. Unlike the free version, PhotoFiltre Studio has layering capabilities. It is shareware and can be tried for a 30-day period.
9. PhotoScape X
Platforms: Windows, MacOS | Price: Free and Paid

Photoscape X is an incredible photo software editing program that people from all around the world can use; it's compatible in a number of different languages.
Using Photoscape is ‘easy and fun'. it allows you to easily edit photographs taken from their digital cameras or even mobile phones.
Although the Photoscape editor does not have a lot of advanced editing tools, the app is best used as a quick editor. It contains essential tools that allow you to apply filters, frame, crop, add text, draw, clone and so on.
Photoscape is stuffed with a lot of features while retaining its ease of use. It has just about any tool you might be looking for – white-balance correction, color correction, brightness and contrast, etc.
The app's features include a raw converter, file renamer, batch processor, viewer, color picker, screen capture tool, and print layout tool.
It even has a GIF animation, and will convert your RAW images to JPG. You can also customize your toolbar into the features you use most, combine and split images, and make slideshows.
Original photos can be edited using the one and only Magic Color with Photoscape X. Plus, over 240 features and over 1,000 patterns are easily accessible. It also boasts some really cool Instagram-like filters, frames and vintaging options.
The only real downside to Photoscape is that it runs ads for other “recommended” software – the price you pay for “free.”
PhotoScape is one of my favorite tools for post-processing, mostly because it has a friendly UI and quick editing features. It is one of the better free photo editors out there, and it's well worth checking out.
10. Darktable
Platforms: Windows, MacOS , Linux | Price: Free and Paid

Darktable is an open-source photo-editing application that allows you to enhance raw images. It also happens to be one of the only free image editors that doubles as a space to store and organize your photos. This app enables you to automate repetitive tasks. It also allows you to manage color with no hassle.
You can add tags to images, rate them, organize them into folders, and mark them by color. It also allows you to create and save your own presets, making one-click editing a breeze.
The interface is almost identical to Lightroom's, with the ability to quickly toggle between your photo library and editing tools. The main photo editing workspace is clear and straightforward, with a well-designed and friendly interface for something that doesn't command a price.
You view your files in the ‘lighttable' tab, with editing taking place in the ‘darkroom'. Under ‘other', you have map, print, slideshow and tethering modules, all of which load near-instantly.
There are some very powerful tools to be found. For example, lens and perspective corrections come as standard. also, there are surprising additions such as tethered shooting, selective colour correction, snapshots, multiple moveable masking options, and a completely customisable workspace. You can even add third-party modules.
You are not restricted to jpgs, as Raw files are easily and automatically converted. Darktable also offers non-destructive editing, allowing you to convert back to your original image quickly and easily.
DarkTable tends to fall short in accurate camera profile matching. Still, contributors do a great job in offering support for new cameras and lenses – the automatic lens correction is particularly impressive, and rivals any paid software.
There aren't enough tools for professional photographers, and Darktable can get buggy and crash if files are too large. While the tools offered are similar to those in Lightroom, it does fall short in its ability to handle professional color manipulation.
Although it doesn't offer all of the advanced tools of Photoshop, it does a great job as a free Lightroom alternative. It's a good starting point for beginners. There are no adverts or annoying, locked premium features.
Online Photo Editors List
From adjusting just the basic brightening of the image to the more complex adjustments like taking wrinkles and lines off of our faces and correcting our smiles and our bodies.
We live in a fast paced world of social media today and are in constant need of finding ways to edit our images. It's always convenient if we can find something that is online so we don't really need to download too many apps on our systems.
I have put together a list of web based editors that are easy to use and will help you get your basic image adjustments done to perfection.
11. Pixlr
Platforms: Web browser-based | Price: Free and Paid

Pixlr is a free photo editor that's 100% online. This is great for people who are wary of downloading free programs onto their computers. This works with HTML 5 rather than flash, so no unnecessary downloads on your end. I chose this editor because it works seamlessly with machines that do not have a lot of space (example: Chromebooks).
Pixlr offers a Chrome App that connects to Google Drive. No account is necessary to use Pixlr; you only need to create one if you want to use the Pixlr Library with free cloud storage.
The crowded toolbar reminds us of Photoshop. This photo editing tool includes most of the common photo editing tools such as: magnifying glass, lasso, dropper, pencil and paint brush. It also features a red eye removal tool and a color palette which you can use to fix the color of your image. To add more versatility, you can work with layers.
With the retro vintage editor, you get access to three settings. Each of the settings has a side scrolling list of effects you can use to customize your image. However, whether you use the vintage or basic photo editing tool, you can come up with a high-quality image.
With it, you can create clean canvases, on which you add your photograph. I was impressed by the number of tools that this photo editing software has to offer, everything from standard options, to unique effects and layering features.
A handful of filters such as HDR, glamour glow, and vignetting offer quick and easy ways to improve your photographs. With this photo editor, you can make finely detailed changes to colors, saturation, and vignette effects. On top of these, sharpening and blurring your images is a breeze.
When you go to Pixlr's website, you can choose to use Pixlr Editor or Pixlr Express. Pixlr Editor enhance your image with Free Photo Editing Software features that are similar to Photoshop like cropping, resizing, and changing the colour of the entire image. while Pixlr Express suited for applying filters, texts, and other overlays effects to a photo. The desired Extension can be applied to save your edited image as JPG, PNG, BMP, TIFF, and PXD (layered Pixlr image).
Pixlr offers a free version. However, it is cluttered with ads, which is a major distraction for any photo editing professional. Pixlr is right now offering substantial discounts on its pro subscription plans. You can get a monthly subscription at $5 and quarterly at $12.
12. Photopea
Platforms: Web browser-based | Price: Free and Paid

Like Pixlr, Photopea is a photo editing program that works completely online. This means you won't need to worry about downloading any software onto your computer.
Photopea supports numerous file formats, including PSD, XCF, CDR, etc. making it great for photographers, graphic designers, and graphic artists.
This one could win the hearts of many, as it is internet-based and completely free. If you give Photopea a try, you'll see that it is super similar to Photoshop in many ways.
Of course, Photopea doesn't provide all the functions that are present in Adobe software. But its feature set is extensive enough to satisfy users, especially those, who aren't willing to spend much on the subscription.
The Photopea offers a wide variety of image editing tools, including advanced features like spot healing, a clone stamp healing brush, and a patch tool. The software supports layers, masks, smart objects, layer styles, filters, vector shapes and masks, and more. A full rundown of Photopea's tools is available on the app's website, as well as tutorials for select basic activities.
Unlike Pixlr, Photopea doesn't offer an image library. If you close your browser without saving, you'll lose your work.
It is one of the best photo editing app for PC that works for both vectors as well as raster graphics. It is equally suitable for complicated procedures like web-page design, making illustrations, editing pictures and simpler ones like changing the size of pictures.
Photopea is free, but in exchange you'll notice a lot of ads around the interface. If these are too distracting, you'll need to pay $9 a month to get rid of them. At this price, you could nearly be paying for an Adobe subscription.
13. Fotor
Platforms: Web browser-based | Price: Free and Paid

If you're looking for a tool that simplifies the photo-editing process, then you will definitely love Fotor. This application can be used with no knowledge. It allows you to drag and drop images. It's one of the simplest tools that you could ever use that doesn't forfeit in terms of editing options.
Do you want to tweak your color balance, brighten the image or simply crop your composition? With Fotor it's easy-peezy. A few other editing options include the possibility to add borders, frames or effects such as scratchy pencil or the look of paper.
some of its main features include: design templates, filters, HDR effects, and portrait retouching. Alternatively, if you are looking to create a bit more informal design, there are countless shapes, fonts and stickers that you can play around with.
This online photo editor and collage maker also comes in a full-fledged desktop application. Moreover, it supports RAW photo conversion, which is a valuable feature for free software.
The software also comes loaded with image enhancing tools, including numerous filters to create stunning images. Its user interface is quite simple to use and offers stunning one-click filters, which can enhance your images instantly.
In case you don't like the software's interface, you can simply customize it and swap things around by changing the theme.
The cloud-based software allows you to save the incomplete designs for future editing. That way, you can start from where you left the work. All you need to do is upload your images onto the website and you can start editing, creating designs and more.
For the free photo editor, you are limited to working with 4000px images. This resolution is something most enthusiast or hobby photographers won't have a problem with but can become a hindrance to larger images.
This well-known cloud-based software boasts more than 300 million users already. Fotor is the ideal tool for photographers who don't have a lot of experience with post-processing, or who want to preserve the original quality of their digital imagery. But it will not satisfy you if looking for professional photo editing or adjustments.
14. Befunky
Platforms: Web browser-based | Price: Free and Paid

Befunky is very good online photo editor with lots of stunning picture editing options. It's used for making basic photo enhancement and color correction, create collage and graphic design. This app enables you to crop and resize photos with ease.
There are 10 modules for image editing, which are organized in the form of a side panel. I like that you can create layouts of your works, import images, customize them as you wish, and then change the layout without overloading the pictures.
It works especially great with collages. Create a simple collage is very easy. There are hundreds of great photo collage templates, but the problem is that most them are closed for free use.
If you have a specific area that needs retouching, the tool has a variety of options for taking your image to the next level. It's simple, easy to use, and performs well in your web browser.
BeFunky also has another cool feature, called Graphic Designer, which allows you to create brochures, posters, social media posts, and even your own templates, right in the app. While it may lack certain professional features, such as editing layers, can't open RAW pictures. you won't find a more efficient option for getting high-quality, creative images in little time.
The best feature, though, is the AI image enhance button that does a pretty good job for you in just one click.
However, most of the features are chargeable, so you will have to spend some amount of money to use all of them. But you will be able to do the basic editing of the image, with features like crop, resize, rotate, exposure, beautify, smoothening and blur, free of cost.
This is a great option for beginners, but for more advanced users, the functionality and capabilities won't be enough. Moreover, the free version of the image editor comes with more than 30% of limited tools and constant intrusive advertising. I would choose this software if I could access art effects free of charge, since they are fantastic.
15. Canva
Platforms: Web browser-based | Price: Free and Paid

Canva is a free photo editor that runs in your browser and is perfect for turning your images into other business assets like social media posts, brochures, presentations, and more.
This online design tool offers a ton of powerful editing features, including a drag-and-drop design tool and millions of stock photos, vectors, and illustrations.
You won't find advanced tools here. For clone brushes and smart selectors, you'll need to look elsewhere. But, you will find sliders covering an array of adjustments.
With Canva, you can easily edit photos using preset filters or get advanced tools like tints, vignette effects, sharpening, brightness adjusting, saturation and contrast, and more.
I was amazed at how easy it was. You can edit right from the browser! Upload your image, play around with the filters, and download your photo. It's really that easy.
Whether you simply want to crop or straighten a photo or want to get creative with textures, fonts, badges and stickers, Canva can help. Some of its other features include vignette, photo blur, a speech bubble maker, an image transparency tool, photo frames and design grids.
Though, if you do not know where to start, be sure to visit the Canva Marketplace where you can find more than 8000 templates. Its basic features are available free of charge, but the more advanced features must be paid for. If you need to edit on the go, you will be happy to know that you can download it to your smartphone.
If you want to build a consistent presence around your entire business—from product photos to marketing assets—Canva's got you covered.
This web browser free editor software is a perfect place for changing your images into gifts, either for yourself or family and friends. Cards, posters, and invitations are easily created if you don't opt for social media stylings.
There are upgradable options other than free software. Canva for work comes in $12.95 and gives you access to thousands of stock images and unlimited storage. All of which is handy for your business.
Do I need a graphics tablet for photo editing?

When I first started editing photos in Photoshop, I used a mouse on my desktop and laptop for everything, from drawing complex masks to painting contrast into the sky. It worked, but it was difficult to do accurately and caused a whole load of hassle. It took me some time to make the leap and go from using a mouse to using a art tablet for photo editing, but once I switched to a Photoshop tablet, I have never looked back.
My first run-in with a pen and tablet for Photoshop was in 2018 with a XP-Pen Star G640 Tablet. I can still remember getting it. It felt awesome to use but was also very difficult to get used to. At first, I used it for everything because, well, I could! After a while, I realized the pen and tablet are just tools for post-production and it doesn't need to be used for everything. There are two main tasks I use my pen for while I edit.
Before I discuss what I use them for, let's take a look at why I use them.
The pen and tablet is kind of like a mouse with one very special characteristic that makes it stand out, pressure sensitivity. When you are using a brush in Photoshop with a mouse what you click is what you get. What I mean is, whatever brush presets you have set, the brush will respond with. Sometimes that means you will get a harsh line and the only way to make it less abrasive is to lower the opacity. However, you can only have one opacity set at a time, right?
Wit a pen and tablet things are a little different. A Pen and Tablet will use your hand's pressure on the tablet to respond with the appropriate opacity, flow, or size. So, the softer you brush with your pen, the smaller or lighter the stroke will be. The harder you press, the darker or larger the line will be.
As you can see in the photo above, with the mouse, what you click is what you get. With the Pen and Tablet, you have a lot more versatility and all with the delicate stroke of the pen on the tablet. This give you a ton of control when you are editing your images.
I primarily use the pen and tablet for two things in Photoshop, Masking and Dodging & Burning.
You may have heard of a pen and tablet before. The term Wacom is almost synonymous with the pen and tablet. However, other brands such as XP-Pen also offer a wide range of options with an equally wide range of features. Where they differ significantly is price. xp-pen tablet is about at around a third of that of the same wacom model.
The entry level XP-Pen Star G640 has only 6 by 4 inches of the active working area , but this will still be sufficient for most home users and those starting out with their photo editing, making the Star G640 the best beginner drawing tablet. I would recommend the small size as sufficient for most users, although there exists of all sizes from A7 to A3.
When looking for the best pen pad for Photoshop, you need to make a personal decision on whether you want a drawing tablet with a screen or not. You definitely don't need a graphics tablet with a screen, but they can improve the accuracy of your Photoshop work, depending on your technique. If you do want one, you will be looking at a significantly increased cost, although it is possible to get a relatively cheap drawing tablet with screen, such as the XP-Pen Artist 12 Pro , if you are more budget limited.
The XP-Pen Artist 12 Pro is an excellent budget drawing tablet with screen. Technically, the pen pressure and accuracy are on a par with Wacom, although in real-world practice the Wacom tablets come out on top. There are many more models in the XP-Pen Artist series if you have more to spend and are looking for a larger screen.
Conclusion
There are many photo editing software's on the web ,depend on what type of photo editing you usually do. Whether you are a professional or beginner, you can use any of these photo editing tools.
Choose the tool that not only appeals the most to you but is also very easy to use and enables you to achieve desirable results.
Now that you have a good understanding of the top paid and free photo editors out there, it's time to get testing! If you don't want to spend money on a photo editor, start with a free one or a free trial, then take it from there.
Not all software is meant for everybody. For example, Adobe Photoshop needs months/years of practice to become an expert.
However, other software like Canva, Fotor, etc. are browser-based, and they need you to be familiar with their layout. Of course, you needn't be a design expert to get going with any of these.
We hope this article will help you pick the best photo editing app for your computer. Check the pros and cons and go to the official website to download the chosen software!
this article was just my opinion. You should try them out and judge for yourself. Hard work pays off and results will come in no time! Happy Editing!
Leave any questions or suggestions below !
-
12 Best Free & Paid 2D Animation Software for beginners and professionals
Montag, 29. März 2021 - keine Kommentare
The animation industry is much in demand since a decade. It is because animation serves many purposes. It simplifies the message you want to convey, holds people’s attention better than other types of content and educates and entertains at the same time.
2D animation software have gained a lot of popularity and are being used in a wide range of projects. Which can help you out in making funny cartoons, illustrations, explainer videos, or informative shorts.
You will be amazed to know that 2D animation is rooted deep in the history of movie-making and has now become a wild thing. 2D animation software also comes handy to make illustrations for games and mobile apps.
2D animation software is often required for the creation of complex animations and are used by professionals like game developers, cartoonists, architects and artists. Some of the main features that are looked for in a good 2D animator are motion & animation, production environment, proper input & output system, character creation and stage & SFX.
Creating exciting and intricate stories has become an interesting and fun activity with the advent of so many 2D animation software.
You can unleash your imagination and build interesting and funny characters, and more. You can then use your creations in presentations, advertisements, or simply add them to your website.
Are you scavenging for the top 2D animation software for PC? Then you are in the right place. This article will be covering some of the best 2D animation software with their pros and cons to help you find the one that suits your needs.
Some of them are free and some of them are paid. But before choosing a 2d animation software you need to know about the important features of those softwares.
Top 10 best software for 2D animation
There is nothing called Best animation software. It highly depends on what you want to do and achieve. Sometimes it also becomes a personal preference. There is a number of animation software to do different jobs.
1. Toon Boom Harmony
Platforms: Windows, Mac OS | Price: Paid

When it comes to digital production, you can count on Toon Boom Harmony as it is considered as the gold standard in the field of 2D animation.
You can create art and emotion in a variety of styles with this end-to-end animation software. Whether you prefer to have a cutout or paperless animations, Toon Boom Harmony can be the best choice to set the trends for top-notch and award-winning animations.
It is designed for 2D animation but has 3D control over the stage, allowing you to see and manipulate objects on multiple layers in a 3D environment. On top of this there is control over cameras which other software packages do not incorporate. It has the best of both worlds when it comes to hybrid animation tools.
The latest in shading, lighting, and special effects can give more life to your series and characters. It has three packages naming essential, advance, and premium.
Toon Boom Harmony is one of the best paid animation software. It might be expensive for beginners. However, it has a perfect interface, intuitive controls, streamline environment and is used by professionals the world over to produce some of the best animations on the planet. Some examples of this are, Family Guy, Archer, South Park, Rick and Morty, SpongeBob, Bob's Burgers, Simpsons, and Clarence just to name a few.
Toon Boom Harmony features of Advanced color pallettes and painting options , Cut-out animation tools and Conventional paperless animation . It is best suited for narrating a story through 2D images, creating an art piece, or creating a message for your audience.
It is professional software that contains vector and bitmap tools to create art, 3D imported models, and best suited for creating multiplane scenes with z-depth. It may take some time to master the learning curve of this software; it is worth it.
2. Adobe Animate cc
Platforms: Windows, Mac OS | Price: Paid

This software, once known - not that long ago as Adobe Flash and before that as Macromedia Flash has been around for almost 20 years. This gives you a wonderful collection of learning resources from online courses, DVD's, web videos, books, and entire sites devoted to animating in Flash.
It is very easy to use. A variety of layouts for every screen size and monitor setup. The timeline and stage are easy to navigate, making it simple to create walk, run and other cycles, and then embed them in other videos to allow for reusable animated sequences. Pressure sensitivity when drawing with a graphic tablet, and the ability to scrub through the audio when synching dialogue.
If you need to create vector graphics and animation, Animate is the right tool for you. Excellent vector brushes in all sorts of styles for being able to create a large variety of characters.
We can use Animate CC to create a variety of animated content such as animated cartoons, advertisements, games, and other interactive content to publish on platforms such as HTML5 Canvas, Flash Player & Air, WebGL, or custom platforms such as Snap SVG. It includes an option to add certain actions without having to actually code. More Possibilities in the Future.
Animate CC has the new ability to export a project as an .oam file, making it possible to directly import your work into Adobe. Creative Cloud membership allows access to all latest features and fixes as well as other software you might find useful .
Adobe Animate offers support for video and audio embedding, ActionScript scripting, rich text and raster graphics.
The final work that you can create using Adobe Animate stands out from others because you can achieve high-quality results through frame-by-frame animation that lets you create more expressive characters.
Animate is one of the best 2D bone animation software. For more realistic effects, it includes bone tool animations so you can add bones to your characters.
This 2D animation software can bring banner ads and cartoons to life by the terrific feature that it offers. Artists can create animated avatars and doodles quickly and effortlessly as compared to other tools available. Intuitive layout, so that even the common user can easily get used to it . This is among the cheapest and cost-efficient tools available in the market.
3. Moho
Platforms: Windows, Mac OS | Price: Paid

Moho was formerly known as Anime Studio and offers everything you need to create eye-catching animations for presentations, games, illustrations, storyboards, etc. It's a proprietary vector-based 2D animation software for animators. You can easily import and export vector files in this application.
It offers two version, the Debut and the Pro . The first one doesn’t have all the functions that the Pro version has, plus the Debut version is a bit more restricted in terms of possible length and image size. The debut is for hobbyists and beginners while the pro offers working professionals its most advanced tools.
Moho is more of a “purpose built” tool that is heavily focused on rigging and animation of characters (though it does have a frame by frame workflow as well.) . It allows you to create unique textures and effects for the characters. You can expand your animation toolkit, which will improve the quality and workflow of your projects.
It has many great and intuitive 2D-vector drawing tools. You can even fade the color of your 2D vector into another color and into a fourth and fifth color easily, while its being animated.
Adding and layering soundtracks or vocals is easy to do in it as well. You can easily fade them in or out. now it offering the brand-new freehand drawing capabilities, bitmap options.
It has a complex bone system for rigging and even supports the Unity engine. You have an option to use multiple layers for carrying out complex animated tasks. And, its amazing bone-rigging capability lets you skip frame-by-frame animation, as it enables you to add skeletons to characters easily, saving you a lot of time, while creating a sequential timeline.
There are several good videos online on how to work with the software focusing on scene setup, character creation, and audio synching. The only thing that is a drawback is that it has quite a steep learning curve. The tools are not as intuitive as other software packages, the timeline is not as easy to work with and manipulate and if you have ever used another environment there is a lot of unlearning you will have to do to move over to this package. However. For the price if you are just starting out it is a great go to.
4. TVPaint
Platforms: Windows, Mac OS , Linux, Android, AmigaOS | Price: Paid
A french animation software, TVPaint is the all-in-one 2D animation software you’ll ever need. it simulates animating traditionally, with pencil and paper. It has been used to create many animated and otherwise movies.
It's based on bitmap technology. No confusing vector art or tweening or keyframes vs regular frames. If you want to animate traditionally and redraw every frame, use TvPaint.
Thanks to this technology, you can animate natural renderings (gouache, watercolor, oil painting, crayon, pen…) traditionaly (image by image). TVPaint doesn't impose a graphical style nor a workflow. Feel free to mix animation on paper and digital animation, do rotoscopy, use different software or simply make your project with TVPaint entirely.
You will get all the essential tools and feature to animate efficiently without the paper stage. Navigating across the images in the timeline like image marks or bookmarks is handy with this 2D animation software. The flip-flop feature enables the user to customize the preview of the animation by conveniently setting up the shortcuts. The out of pegs can be used to adjust the Light table display through rotating, moving, and scaling. You are going to love this tool with improved features.
Tvpaint enables you to modify live camera parameters like tint, luminosity, hue, etc. This tool enables you to manage the layers and images. You can make storyboards and view them instantaneously as animatics. You can touch up images with a drawing tool . It allows you to combine many FX (effects) within the FX stack. You can use a graphics tablet to handle the opacity, size, jitter, and angle of brushes in real-time.
But not everybody has an extra thousand dollars to spend on TvPaint, so I think you should look at multiple programs before choosing one. This software is for professional animators and studios.
5. OpenToonz
Platforms: Windows, Mac OS, and Linux | Price: Free

Opentoonz is most certainly an amazing free 2D animation suite if you want to get into REAL 2D (frame by frame ) animation. It won’t hold your hand like other expensive software and you won’t have a simple time creating silly potato heads that can talk or stick men jumping over buildings. It is aimed at animation ARTISTS - people who can draw, animate and create.
So OpenToonz is a new free, open-source animation program that has been used by Studio Ghibli and on shows like Futurama and Steven Universe. Studio Ghibli is the Japanese anime film studio responsible for movies like My Neighbor Totoro, Princess Mononoke , Spirited Away and Kiki’s Delivery Service.
You can also plug-in SDK effects and change picture styles using artificial intelligence. This includes changing picture styles, affected incident light, wavy distortion, digital painting,compatibility with raster and vector etc. As an animator, you can freely add any specialised effects to OpenToonz, thereby creating stunning animations.
A fun fact about OpenToonz is that it has a high level of customization. The software has a wide range of keyboarding shortcuts to use for easy access in rendering and animating your projects and has an impressive variety of animation effects including lighting effects and picture styles. Some of the features include onion-skinning and frame-by-frame animation, so you don’t have to redraw your work at every frame.
Just like the paid version, OpenToonz is great to use. It combines both traditional drawing and 2D animation and has many features (dynamic palette, tweening coloring, bitmap tools etc).
OpenToonz features extremely powerful drawing tools which help in scaling and modelling of animation features. It’s very efficient when it comes to frame-by-frame animation and along with features such as tweening and tracking; the frame integration is almost seamless. Scripting is another convenient feature added to its list. Particle Systems are another of its added features which help in minute and intricate animation tweaks.
It is compatible with 4 types of scanning. It allows you to save settings of scanning. To animate a drawing, you just have to scan it. users can modify the source code to add specific features to this simple animation software. So, once the user has got enough knowledge and expertise about this tool, he can bend and mold the toons to his whim. But for beginners, getting started with this software can be a little bit daunting.
However, the downside of Opentoonz is that the design of its user interface is outdated compared to other 2D animation software in the market. Regardless, users would still have an exhilarating experience.
6. Synfig Studio
Platforms: Windows, Mac OS, and Linux | Price: Free

Synfig Studio is an open-source, free timeline-based, and 2D vector graphics computer animation program. Synfig Studio is a real back-end and front-end application, that allows you to design your animation in front-end and render it in backend at a later time even on another computer, without having to connect the graphical display.
Synfig Studio allows users to create powerful animations without having to graph and sketch frame by frame. You can create animations with the help of bitmap and vectors in Synfig Studio and all this can be done just by adopting.
Synfig was designed to look like and work similar to Adobe Animate , so if you've used Flash in the past, you will quickly learn the Synfig workspace. It includes a number of advanced animation tools, including vector tweening, layers and filters, and bones. Synfig gives you a lot of power – and it's all free.
The best thing about Synfig is that it provides more than 50 layers you can choose from to create simple or professional animation. It does not impose any limitations on you. these layers are of various types; geometric, gradients, filters, distortions, transformations, fractal and a few others.
Synfig has basic features for syncing your animation with soundtrack using Sound Layer. Linux users can get all benefits of full-featured audio editors through the JACK integration.
By Synfig Studio, you can transform any vector image into another form as it offers powerful tools to give you full command over your vector artwork. Calculating the frames has never been so handy. You just need to set the key positions, and Synfig will calculate the in-between frames automatically.
You can also enjoy some pro features that are surprising in this free drawing animation software. For instance, Synfig offers support for gradient routes with which you can shade your drawings, manipulate vector lines, use a grid, use onion-skinning and choose from a variety of blend methods for your drawing.
Overall, Synfig is a great application for those who have a little experience handling animation software. The community behind this animation program is one of the best, with hundreds of tutorials and videos to learn from.
7. Pencil 2D
Platforms: Windows, Mac OS, and Linux | Price: Free
If you are into traditional hand-drawn animation, then maybe Pencil 2D is a great software to start your animation project. This free software lets you use both raster and vector graphics and you can switch easily between the two types of artwork. It started as a simple "pencil test" at first and developed into animation software.
Pencil 2D is a cross-platform tool and lets you focus on animating even when you are on the go. Since the software is completely free and open source, users can have access to the source code and add features. No matter if you use it personally or commercially, the features can help you out in every project.
The user interface is simple and intuitive, letting you create your compositions in color, with a pencil, pen and brush tools. Anyone with little to no experience using animation software — even total newbies — will be able to tell at a glance what they can do with the software.
The tool features layers, a timeline with a simple keyframe manipulation system, onion-skinning, colors, pressure sensitivity, workspace toolbars and panels that you can rearrange to fit your animation needs and workspace.
Animators will appreciate the clean, uncluttered timeline where it is quite easy to add new keyframes on different layers, duplicate, change the frame rate and work quickly to create animations with minimal fuss.
It's focused on traditional frame-by-frame animation so every frame is made from scratch. It comes with a manual to learn how to use the program adequately. The program is lightweight and doesn’t use large amounts of RAM, so almost any computer can handle it. It can be used by a graphic tablet and pen.
This best free 2d animation software is lightweight as there are not many tools present in it. It does not support shapes tools due to which it becomes impossible to create or draw shapes. advanced animators may not find that the features are robust enough for their preferences.
Pencil 2D is true to its name, as it fully supports 2D animation only. If you are looking to learn basic cartoon animation principles, Pencil might be a great choice. Moreover, you can easily produce good quality drawings and animations with this free 2D animation software.
8. TupiTube
Platforms: Unix-like, Windows, Mac OS | Price: Free

TupiTube is one of the best free 2D animation software for beginners which created by Maefloresta Inc. It's free and open-source , compatible with phones, tablets, and PCs. It was created by two animators to encourage the animation industry in Latin America. It’s free and open-source, so you can download it to see if you like it.
It’s basically an amateur animation very popular among kids, students, and teachers. Schools and colleges are a market for Tupitube. Its simplistic design and UI is very easy to use for beginners. It also a virtual assist feature to help with the animation process.
Tupitube can help create a range of animation features. Hand-drawn animation feature is the most commonly used followed by Cut-Out animation. Even though it might appear amateurish, Tupitube does have advanced functions such as Rotoscoping and Stop-Motion animation.
It offers features like basic tools for vector illustration, support for tweening of positions and colors, a library panel to organize files, and different formats for exporting. The goal is to eventually reach a professional level for more advanced users.
TupiTube does seem to be focused on hand drawn/traditional animation i.e. the kind where you draw each frame yourself. It comprises of basic illustration tools that are easy to understand for beginner animators. Pencil, color, tweening tools, exposure sheet, import SVG image file and export animations are the key features.
If you have no experience of animation software at all TupiTube is probably a good place to start. The software is aimed at complete novices from children to amateur animators. It’s likely that you’ll be up and animating something very quickly.
From what I’ve seen you could probably use TupiTube to create good quality animation for a web series etc. but that’ll depend on how confident you get with it, and pushing the boundaries of what it can do.
9. Blender
Platforms: Windows, Mac OS, and Linux | Price: Free

Blender is a free 3D Animation software and we can also make 2D animations. Blender is a free animation software that has been able to get a lot of love from its community of various kinds of professional and business owners. It has a wide range of tools that allow you to create 2D, 3D, or even mix 2D and 3D objects in your video.
It has a jaw-dropping rendering feature that allows you to smoothly process layers, characters, background, and other objects in the video. Along with that, you can use its amazing video-editing tools for cutting, slicing, adjusting layers, and more.
As of Blender 2.8, the grease pencil system has been revamped into a full 2D animation tool. we can create the story, script, storyboard and animatics using the grease pencil as a primary tool.
Through its open architecture, Blender provides cross-platform interoperability, extensibility, an incredibly small footprint, and a tightly integrated workflow.
This tool allows you to import or export videos in MPEG, QuickTime, and AVI file formats.Keep in mind that you need to spend a little bit of time on learning features of Blender before you can fully harness the power of this powerful software.
10. DigiCel FlipBook
Platforms: Windows, Mac OS | Price: Free + Paid Plan

DigiCel FlipBook was Considered as one of the easiest 2D animation software on the market. It come with Free version ( with a watermark) , Lite Version , Studio Version , Pro Version and ProHD Version for different grades. It was created with the intention of duplicating the animation process in its traditional form, much like Toon Boom Harmony and TVPaint.
As FlipBook wants to keep the traditional aspect and the traditional toolkit of the animation, it does not support skeletal animation. Thus each frame has to be created and drown separately and inbetweening is performed via onion skinning.
The toolkit is raster-based and supports direct digital input of a drawing using graphics tablet and scanning the physical drawing via either webcam or TWAIN-compliant scanner.
FlipBook is easy to use for beginners and pros who want to improve the editing experience. It is a powerful video editor that you can make 2D animation with various functions like syncing sound with animation, scanning cells, and more. Want to add sound, just drag a sound file onto the xsheet.
If you enjoy drawing and you’ve always wanted to create your own Disney-like cartoon, this software will suit you well. It's definitely an old-school approach, but if that's the way you roll, FlipBook is the software for you.
11. Powtoon
Platforms: web browser-based | Price: Free + Paid Plan

PowToon is an interesting 2D animation software developed for business use. if you own a small business or a website and you want to stand out in the crowd, this tool will help you achieve that.
PowToon is a web-based animation software that allows users to create animated presentations by manipulating pre-created objects, imported images, provided music and user-created voice-overs. It allows you to move scenery around, props, move your characters.
The user interface is very intuitive and you’ll quickly learn how to use the tool without even watching dedicated tutorials. it enables you to create 2D animation videos online without investing a lot of time in learning new skills and spending money on video equipment.
It’s a great tool for beginners, with several professional-looking templates to choose from, including animated explainer and infographic-style videos, as well as templates built specifically for product promotion. You can also start from scratch or import a theme from PowerPoint.
Powtoon uses an Apache Flex engine to generate an XML file that can be played in the Powtoon online viewer, exported to YouTube or downloaded as an MP4 file. It supports full 1080 HD quality videos, which means that you do not need to compromise simplicity and price with quality.
The wide range of features offered by the free version of this software can’t be ignored. In fact, this is a one stop solution for all your animation needs. Once you start producing and uploading 2D animated videos with PowToon, you can switch to its paid versions to get more features and publish mind-boggling videos.
12. Animaker
Platforms: web browser-based | Price: Free + Paid Plan
In explainer video industry, the demand for quality video is huge. They need a digital vehicle which can explain their business instantly and engagingly like an elevator pitch.
Animaker is a online simple animated video making app which helps a wide range of users to craft videos of studio standard without much training or external guidance. Everything starts with just a simple drag and drop.
Animaker is much like PowToon in that you set up a storyboard and animate the characters or props in that scene. Animaker's helped over 5M people create awesome videos by themselves! And is trusted by some of the world's leading brands. It’s used by companies like Google, Verizon, and Pepsi.
Animaker provides numerous animated characters, icons, properties, BGs, maps, and charts. It is one of the best 2D animation software that helps you to create an ideal video for your organization, presentation, freelancing projects, as well as personal projects.
The software is cloud-based, and was launched in 2014. With Animaker, you can create 2D and 2.5D videos, animated infographic videos, handcraft videos, whiteboard videos, typography animations, and more. it addding a perfect mix of UI experience, simplicity in video making and equally a well qualified video to be proud off.
The software provides online tools to create and edit video animation. Animaker uses both HTML5 and Adobe Flash to create animated videos that can be exported to Facebook, YouTube or downloaded as an mp4 file. The software is also available as a chrome extension in the Chrome Web Store.
Summary
There is a range of premium and advanced animation software tools also available on the internet which comprise even more features and are heavy duty to carry out many animation simulations in one go. But for most of the animation process to take place, the mentioned software in the blog should be more than sufficient.
The best free & paid animation software really depends on your skill level, your hardware, and the types of videos you want to make.
There is a plethora of 2D animation software, and choosing the best one can be challenging. To connect with your audience, you need some visuals to convey your message effectively, whether you want to increase the sales of a business or want to earn some bucks through funny videos.
Thus, it would help if you recked your brain before making the final decision. It is advised that you should check out the features that the software offers along with the price that you need to pay to use them.
Once started with those animation software, sooner or later, you will notice that, drawing with mouse is tedious. Then you may want to get a drawing pad ( XP-PEN , for example).
Also, tool is just tool. To create professional looking animations, you must learn principles of animation. Only then, the chosen tools may help you.
Regardless, we are all so fortunate to have such a great little menu of animation programs to choose from in this day and age. No matter your preferences as a beginner animator, you can find a 2D animation program for you.
-
12 Best Drawing & Painting Apps for Android or iOS To Unleash Your Creativity
Dienstag, 2. Februar 2021 - keine Kommentare
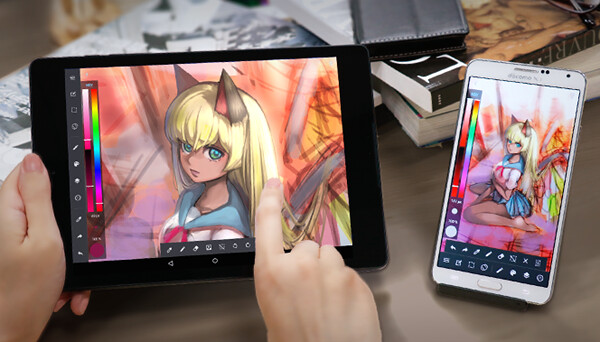
Digital Drawing & Painting are fun . A person uses all his imaginations, innovation and creativity to draw a master-piece that eventually reflects his set of thoughts. Visualizing a certain thing and then picturing it in a canvas is a big art in itself. Drawing a picture freshens up one’s mood, makes a person more positive and lively and therefore this activity is very fun to indulge oneself in.
Becoming a professional digital artist takes years of hard work. Achieving this goal is impossible without spending thousands of hours practicing and polishing your skills. Drawing apps for Android & iOS enable you to keep practicing your drawing and painting skills whenever you have some free time.
There are plenty of drawing apps are available in the market for all kinds of devices. Irrespective of whether you are using an Android device, an iPhone or even an iPad Pro, there are drawing apps for everyone. Drawing apps for Android & iOS devices have come a long way from being a basic sketching app a few years ago to full-fledged drawing software. They come with all the advanced features which you will find in some of the pro level desktop apps.
If you want a digital art drawing tablet to connect to your Android devices as well as computers . some models ( Star G640s,Star G960S , Deco mini7, Deco 01 V2 and Deco Pro ) of the XP-PEN sports great pen pressure sensitivity and transmits your drawings to the connected Android smartphones and tablets using Android OS (6.0 or later). For a dedicated tablet for doodling or professional art, XP-PEN is a reliable brand to being your search.
Here are some of the best and well-known art apps for beginners looking to get into the digital world. These are the drawing apps that are quick to pick up and easy to work with. They have a lot of great resources available and a large community to lean on for support while traversing the learning curve.
The 12 Best digital Art Apps for Android or iOS that artists will love
1. Procreate
Procreate is an iOS-only app designed to fully harness the power of Apple’s popular iPad Pro and Apple Pencil combination. There is a Procreate app for the iPhone with fewer features called Procreate Pocket.
It's a classic and well-known app that won the Apple Design Award. Its wide canvas with touch operation ensures a comfortable drawing experience. The simple UI makes it easy to find features.
It features the ability to use a 4K canvas with over 120 brushes available. On top of that, there are 25 customizable settings for every brush resulting in a nearly unlimited number of combinations. On top of that, there are an absurd list of other features you can use including various import/export settings, 250 levels of undo/redo, optimizations for 64-bit processors, and plenty of deeper functions such as exporting HEX values for color.
From transformative tools to video capture of workflow, multi-touch gesture commands and GPU accelerated filters, Procreate offers impressive performance to artists.
You can create just about any kind of art with Procreate, from oil and acrylic style paintings to pixel art, lifelike graphite drawings, digital illustrations, and so much more.
More than just a drawing app, Procreate combines many of the powerful tools you’d expect to find in a much more robust program like Photoshop. Layers, custom brushes, and all sorts of special effects are available on your tablet.
You can export your ended up work of art as PSD, native.procreate, TIFF, transparent PNG, multi-pages PDF, and JPEG file formats.
Procreate offers impressive performance to artists. It's overkill if you're just looking for something to doodle with, but if you're in the market for a robust, professional-quality art app on an iPad, Procreate deserves a look.
2. Adobe Illustrator Draw

Be sure to check out Adobe Illustrator Draw if you use an Android or iOS tablet. Adobe Illustrator Draw has full layer support, much like its desktop counterpart.
The free Adobe Illustrator Draw is a versatile vector graphics drawing app that can be further enhanced with Creative Cloud integration. It supports zoom as much as x64, so you can easily see all the fine information.
You can mess around with five customizable pens and stylus support for popular devices such as Adobe Ink. support for Adonit, Wacom, Pencil by 53 and Apple Pencil devices. You can also enjoy the ability to create up to 10 layers to create images on the app. Easily mixes photos with drawing layers.
Users can import in assets from Color CC and Shape CC, and can export drawings straight to Illustrator CC on the desktop, or PNG files to Photoshop CC. That allows you to begin a creation whenever inspiration takes you, and then flesh it out fully on a desktop rig.
The app is beautifully laid out with a simple approach to Adobe Photoshop Sketch, though the learning curve can be challenging for those who are unfamiliar with design software. The upside: the app features a robust tutorial platform and community engagement available for all users and skill levels.
3. Adobe Photoshop Sketch

If you’re looking for a free app that combines the ease and simplicity of drawing on your mobile device with the power of Adobe Photoshop, check out Photoshop Sketch. It includes many of the same features as Adobe Illustrator Draw , including zoom support for fine detail, support for various drawing hardware, layers, advanced tools, and more.
The app is quite intuitive because it’s well laid out for use on a tiny screen. You can easily select brushes, color palettes, new tools, and make quick layer adjustments.
With a myriad of drawing tools and customizable toolbar, this app can turn your concepts into incredible and realistic artwork and designs. You can make use of tools that imitate an ink pen, marker, as well as a graphite pencil.
If you’re fond of using a stylus while drawing, Photoshop Sketch can work well with you since it supports Bluetooth styluses such as Pencil, Adobe Ink, and those from Wacom and Adonit.
Photoshop Sketch aims to replicate the analog drawing experience, augmented with a few digital flourishes such as a color picker and an undo history. Users can import in assets from other Creative Cloud tools such as custom brushes and colors, and your creations can also be exported into Creative Cloud as layered PSDs to Photoshop, or flat images for Illustrator.
You can also get rid of the menus completely so you can have your whole screen to draw on. Then bring ‘em back when you’re ready to adjust something.
This is truly a beginners app but it’s also the ideal choice for Photoshop artists who want a slimmer version of their favorite digital art program on the go.
4. Autodesk SketchBook

SketchBook by Autodesk is one of the most powerful and popular drawing apps for Android and iOS. Additionally, Autodesk made SketchBook entirely free. That makes it arguably the best free drawing app on the Android and iOS, with no ads or payments required. Apart from Android and iOS, the app is also available on Mac and PC.
SketchBook stands out from similar apps due to natural drawing experience , clean interface and consists of the unique Copic Color Library. It comes with a variety of drawing tools and brushes, all of which you can customize on the fly, pinch to zoom, a gallery organizer, and support for saving and storing your works to Dropbox or iCloud.
SketchBook also has a Scan Sketch feature, which lets you capture a sketch using your device’s camera, and it automatically makes the background of the paper transparent. This way, you only have your drawing to deal with. Many industrial designers, architects and the like have integrated this handy little tool into their workflow for easy drawing and quick transition into the Autodesk family.
There’s also a screenshot tool that allows other people to view and add notes to your artwork for review. If you wish to create flipbooks or animations, SketchBook has got you covered. Simply click on File > New FlipBook then choose any of the options to enter Animation mode.
Autodesk SketchBook basically works like a sketchbook for your mobile device. You can use this for practice and to work out ideas, but not really to draw your finished pieces in. Sketchbook isn’t meant for fancy finished pieces so it’s not a true painter’s app. But it’s great for quick sketches and working out concepts from anywhere in the world.
The application also lets you export your work as JPG, PNG, BMP, TIFF, and PSD. Lastly, Autodesk SketchBook has complete support for layer features.
In addition, users can create a free Sketchbook account to gain access to more features such as layer and symmetry tools. A premium subscription unlocks more pro tools such as an expanded brush library, and more powerful layer and selection tools.
5. Ibis Paint X
If you’re searching for an app that’s easy and enjoyable to utilize for both kids and grownups, look no more than Ibis Paint. ibis Paint is the of the best drawing apps for Android and iOS out there.
It has some unique features like recording your drawing as video, and SNS features where you can see and learn from videos other users have made.
Other features like fast open GL technology, 335 customization brushes, , 46 screen tones, 27 blending modes, and over 1,000 fonts makes it an obvious choice for people looking for an android or iOS drawing app with lots of plus points.
It does have layer support and you can use as many layers as your device can handle.
Apart from this, there are separate features for those artists who are interested in creating manga. the app works great with concept art, anime/manga, or any type of illustration work.
There is also optional pressure sensitivity and you can load images to trace with the easy tracing mode.
On top of the above functions, Ibis Paint offers stroke stabilization function and different ruler features.
ibis Paint X makes it easy to create beautiful art on a small smartphone screen. You’ll find great linework for drawing on a small screen.
While Ibis Paint X is a free download, an in-app purchase removes advertising, and an optional Prime Membership subscription unlocks extra fonts, materials, and filters.
6. Medibang Paint

MediBang Paint is a free drawing app available for Android, iOS, and PC/Mac computers. The mobile and desktop versions do feel a bit different so try both and see what you think.
The app comes with the features you'd expect from a solid mobile art app, including layers, rulers, a wealth of brushes, and snap guides and tracing aides. also support for 3D Touch on newer iOS devices.
The app makes it easy to create drawings and comic books and is packed with features such as brushes, screen tones, fonts, premade backgrounds, comic panels, and other resources.
It uses cloud storage by default so it’s easy to transition between your devices and continue working on the same piece. This means you can also easily share your artwork with others for collabs.
What’s more, the app has a vibrant community so there are plenty of resources and tutorials online that will help you learn the ropes quickly.
Due to its mild complexity MediBang Paint might not be the best for beginners who have never used digital drawing apps before. But if you have some experience you’ll probably really like it.
The app is free to download on the Play Store and App Store. However, the free version showcases ads from time to time. Purchasing the Remove Ads option will eliminate these interludes.
7. Infinite Painter

Infinite Painter might not have the easy name recall of Adobe, Autodesk or any of our other best drawing apps, but it's garnered a well-deserved cult following among Android users.
The app is free with a 7-day trial, after which premium features are available as in-app purchases. While originally an Android exclusive, Infinite Painter has since made the leap to iPad screens, operating under the same free trial model.
Infinite Painter features 80-plus natural brushes and the ability to create custom ones, infinite layer support, paper textures, a variety of transformation tools and perspective aids, color blending, pattern and gradient tools and more. Works can be exported into PSD, PNG or JPG.
The well-designed layout makes it simple to change brush sizes and color choices quickly. You can also sample colors from anywhere in your paintings.
The minimal layout is designed to keep your drawing space clear so you don’t get lost in menus to find what you need. Infinite painter also makes it easy to see which tool you have selected, because it’s the only one you can really see.
Use layers, create masks, add symmetry tools, and work with selection tools similar to what you’d find in Photoshop. You can even create your own brushes and modify the ones that come with the app. And when you start a painting you can record a video of your process to create your own speedpaint videos.
Infinite Painter is tailor made for sketching and painting on your phone and tablet. Its built-in brushes are incredibly diverse and work like actual paint on a digital screen. It feels very natural for anyone with painting experience.
8. ArtRage
The concept behind ArtRage is to make the experience of painting as real as possible on the Android and iOS . You can experience the mixing of different paints like you are blending them on a real canvas.
ArtRage delivering a set of drawing and painting tools firmly rooted in the analog art of applying graphite on paper or paint on canvas. It features a series of tools that aim to mimic real world painting tools and mediums, such as oil paints, watercolors, a palette knife, paint rollers, etc. The painting engine is designed to mimic the effects of paint thickness, thinner and other real-world behaviors of tools and media.
The canvas textures are beautiful so it looks like you’re painting on actual canvas. You can even customize your paper to get the exact texture and line quality you’re looking for.
As this app also works with layers, you won’t face any difficulty with the blend modes if you know Photoshop. You can also save your strokes for watching later on your desktop.
This is a brilliant program for traditional artists who want to continue working in their style, but with the benefits you get in digital art(ex: undo, painting over layers).
You also get a full set of stencils, grids, and perspective guides to speed up your painting process. You can tell ArtRage was created with artists in mind. ArtRage supports Apple Pencil, Adonit, Wacom and Pogo Styli.
As for the interface and workflow, ArtRage is an easy-to-use application. Even someone who is not familiar with the app can swiftly grasp the gamut of it. It also has built-in quick reference and essential help files, including multitouch support for canvas and object manipulation.
With ArtRage you can create gorgeous paintings and drawings that perfectly emulate working on a desktop computer. Due to all these reasons, ArtRage is hands down one of the best drawing apps for Android and iOS.
9. Dotpict
Are you trying to create a piece of art that is different from the rest? Or are you someone who just enjoys the world of pixel art? Dotpict is one of the best drawing apps for Android and iOS as it offers a different take on drawing. The app is free on the Play Store, the App Store, and has ads. In addition, this artsy app is also partly a game.
You get a solitary brush with a couple of chosen hues. Utilizing this application is somewhat similar to testing yourself. On the top bar you get couple of menus to play out some extremely straightforward assignments. Directly underneath it is the illustration zone.
You get a square canvas with a customizable layout. This is trailed by a lot of various shaded pencils and toward the end we have the push catch. The tools in the app include a brush tool, an eraser, a color picker, a bucket, and a complete color wheel. Just point the cursor to a pixel and tap the big button to fill it with color. Apart from that, dotpict also allows users to undo or redo the steps.
Move a small hand with your finger or stylus, then push your color to create an 8-bit shape. There's a variety of canvas sizes, so you can create anything from a small figure to a whole landscape.
Maybe you just want to browse around and get some ideas on what to do next. Dotpict has a great gallery for you to peruse the creations of similar artists so you can take an idea and turn into something of your own. All of your work is automatically saved, and you can easy share or export it once you've finished.
You can directly save the project to your Photos app or share it within the app or to your social media.
Other than that, it’s not too feature heavy and it stays out of your way while you draw. It’s an excellent app for those who enjoy creating pixel art.
10. ArtFlow

If your Android tablet isn't feeling the love with all of these iPad apps in the running, don't lose heart. Artflow is a beautiful drawing app for Android that features a clean user interface and lots of pro features like layers and custom brushes. It is the perfect drawing and painting app to create paint your dream.
The ArtFlow digital art studio for Android comes packed with features and tools, both in free and paid tiers. ArtFlow's free version is already a solid drawing app, with nine customizable brushes, a symmetry tool, color picker, six-step undo and support for two layers.
A premium version massively expands the tool selection from the free dowload, with more than 80 brushes, expanded history support, the ability to create up to 16 layers, GPU-accelerated paint engine, stylus pressure support and custom palettes. That premium version has more features than any normal user would probably know what to do with, but it's great for seasoned and aspiring digital artists looking for an Android art app.
You can export to JPEG, PNG, or even PSD so you can import it into Photoshop later. To top things off, you’ll have access to Nvidia’s DirectStylus support if you’re rocking an Nvidia device. It’s a solid all-around option for both kids and adults. You can download it for free to try it out. ArtFlow is also free to use if you use Google Play Pass.
11. PaperColor

PaperColor is one of the most versatile photo editing and drawing app for Android devices. It is equipped with lots of professional tools for sketching and provides stunning system UI with easy controls. It includes both drawing capabilities and photo editing functionality with just some tap on your mobile devices.
PaperColor aims to imitate real-life drawing experience as closely as it can. It offers the necessary features that include different brush types, ruler, eraser, etc.
Different types of rulers makes each line you draw is perfectly straight or curved, depending on your needs. The paintbrushes this drawing app offers can imitate graffiti, a pencil drawing, or any type of doodle, as you can choose from a variety of paintbrush styles.
While most apps try to give you a modern, minimal UI, PaperColor lays the pens and brushes out in front of you. It's as close to an easel and canvas as you can get from an Android app.
It allows you to import a picture as the base map and set it to transparent mode. Then you can trace the original image and draw above it. A base map helps you to learn drawing in a straightway.
Moreover, other features include the ability to add text, custom cover, graphics tools, etc. You can add a handwritten signature to each image you create with this app, and share your creations with your friends on social media.
The app is free with no ads and has some in-app purchases. It is one of the best Android art apps that are worth trying for budding artists. Learning the basics of digital drawing and painting is much easier with an app like PaperColor that offers a base map.
12. Corel Painter Mobile

Finally, it's worth considering an offering from another publisher with desktop art package experience: Corel Painter Mobile is aimed at all levels of artist, with options to paint photos, trace, or start from nothing. and it intends to become one of the best drawing tools available for mobile devices.
With Corel Painter Mobile you can draw and develop your artistic work from almost anywhere.
Among the options offered by Painter Mobile, the following are included: Painting and drawing tools that allow us to make interesting sketches and easily color in images; Different sorts of brushes, pencils, and pens.Includes effects to be applied; Possibility to import images from the camera, gallery or Google image searches; Capacity to work with up to 20 layers.
You'll find the usual paint, blend, eyedropper, and paint bucket tools. Free version includes 16 brushes. paid version includes 70 natural media brushes. There's also integration with Samsung's PENUP social art network.
One of the greatest advantages of this software is that it allows you to import files created with the desktop version. Thus, you'll be able to continue working on your projects and show them from wherever you are.
Final Words
Producing digital artwork from an Android & iOS OS device has never been easier because there are so many different apps that enable you to draw or paint from your tablet or Smartphone. The majority of the drawing apps we included in this article can be used just for fun or for professional purposes.
However, your choice of a drawing app for Android & iOS devices depends on your digital drawing and painting skills, since there is no need to opt for an app aimed at professionals if you just want to create doodles.
Because all the features and descriptions of these apps are so clear that you will easily find your most desired app. Which of the twelve best drawing apps for Android & iOS are you going to choose? Also, inform us if you have any questions or confusion about this discussion. Leave a comment and let us know.Thank you for your time.
-
XP-Pen Innovator 16 Drawing Display Tablet Review - Should You Buy One?
Freitag, 25. September 2020 - keine Kommentare

My XP-Pen Star 03, obviously old, has never given me problems, even till today. Having seen a few display tablets recently, I thought of upgrading my old tablet, because why not? Drawing on-screen is better than on tablet right?
I have watched and read almost all reviews about XP-Pen Innovator 16. it seem good, and much more affordable, with all that laminate screen and other nice features. And so I bought XP-Pen Innovator 16 .
Yes, it was expensive . These things cost some serious money. So prepare yourself to spend some hefty amount of money. I bought the tablet and damn that gave me the exact results I wanted. I could see the lines while I was drawing. It felt natural and a joy to draw. Finally, I could draw like I had drawn in a paper before. Seeing all the lines appear beneath my hand.
This was just awesome and totally what I needed. I was impressed, to say the least. Finally, I got the results I was missing before. Finding that joy in the drawing. It surely wasn't too much of joy with the Star 03 .

I bought it myself, this is not sponsored or whatever. I got it from XP-Pen official store , in 3 days. package is solid, you get one glove, one (no battery, autonomous) pen and the usual cables and manual. The tablet comes with a handful of different adapter options - even the weird three-prong UK one - and it’s really easy to switch them out if you’re on the go.
XP-Pen Innovator 16 Specifications:
Dimensions: 17.5” x 10” x 0.35” (WxHxD)
Screen/Draw Area: 15.6” (13.5 x 7.6 inches)
Panel Type: IPS
Resolution: 1920 x 1080
Response Time: 16.4ms
Display Input: 3-in-1 Cable
Color Gamut: 125% sRGB, 92% Adobe RGB, 88% NTSC
Brightness: 250cd/m2
Contrast: 1200:1
Resolution: 5080 lpi
Viewing Angle: 178°
Aspect Ratio: 16:9
Number of Colors: 16.7 million
Pressure Sensitivity: 8192 levels
Tilt Support: 60 degrees
Data Rate: Max ≥ 220RPS
Function Keys: 8, user assignable
Two Wheels: 2, user assignable
Compatibility: Windows 10/8/7, macOS 10.10 and higher
More details from Official Site : https://www.xp-pen.com/product/638.htmlDesign and Build
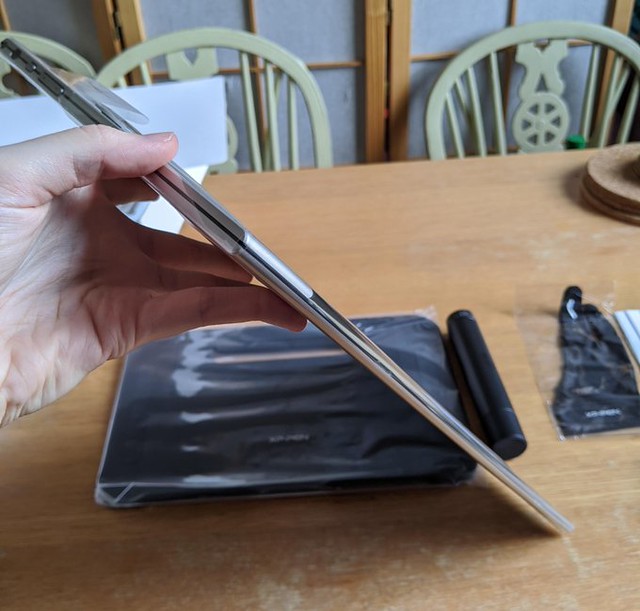
The XP-Pen Innovator 16 is in the middle ground of the company's five size ( 11.6" , 13.3" . 15.6", 21.5" , 23.8" ) pen displays. At 3.6 pounds and significantly less than an inch thick, the 15.6 inch display and integrated pen tablet is also the one of the three size (11.6" , 13.3" . 15.6" ) that's small and light enough to pick up off the desk and work with right on your lap. With a thickness of just 9mm thick, it's thinner than all but the most svelte notebook computers.

Unlike the larger 22 and 24 inch versions, which come by default with conventional LCD monitor stands, the Innovator 16 uses an all plastic stand to support the display at the angle of 20 degrees.
It needs to be hooked up to a laptop or desktop, and needs to be plugged-in. The XP-Pen Innovator 16 uses a clever tri-cable to make this as simple as possible. There's a proprietary socket on the side of the tablet, in which a cable plugs that splits off into three wires – one to hook up to an HDMI port on your computer of choice , another to a USB and a third to the power.
The display side of things is driven via HDMI output, with a single USB connection controlling the input side ( acts as an interface for the digitiser pen ) . Power also can routed through the Innovator 16's video controller as well, so you can work with it without Plug in power .
I think the notable advantage of Innovator 16 is that you don't need any electric outlet to activate it if your computer/laptop is powerful enough to run the tablet through plugging to your PC/laptop alone.
The 1.8 meters cord tethering the display panel to the video controller gives you the ability to work with the Innovator 16 at a pretty decent distance from your desk – great for sketching with the display on your lap.
you will get 8 Shortcut Keys and a two function wheel ( roller and touch ), all of which can be configured with the driver software.
Nice and lightweight display

The main attraction on the Innovator 16 is easily the display panel. The screen measures 15.6 inches with a resolution of 1,920 x 1,080 for full HD viewing at a smidge over 196 pixels per inch. Wrangling 92 percent of Adobe's RGB gamut, the panel sorts 16.7 million colors and offers 250 cd/m2 of brightness.
In practice, 15.6inch size means more zooming in and out when dealing with minute details. Then, there is the small screen size that many consumers state that it interferes with cursor movements along the edges. A larger screen would work well especially for drawings.
The active matrix panel has a brightness of 250cd/m2, "Semi-gloss" probably describes the surface best as it provides just the right amount of sheen without tossing back too many reflections from outside lighting.
It possesses over 16.7 color variations. This means that the user has 256 color tones to work with. and its response time is a generally smear-free 16.4ms. Coupled with the 16:9 aspect ratio, the colors bring to life any drawing done on the graphics tablet.
The color accuracy is pretty spot on for those who really need it to be accurate, the 92% Adobe RGB can satisfy for your needs.
A 178-degree angle of view and its flip-out stand means it can be used on your lap or tilted at 25-degrees on a desk for a more impact-full display but without to many glitches as it is still usable at that angle.
It uses an IPS panel, fitted with a matt screen protector , a natural choice for a product like this.
new Innovator 16 has a laminated display, The point of laminate is that there is no gap, and you feel like you draw where you put your pen at. From an angle I do see a ever so slightly gap between the glass and digitizer. So it's largely an aesthetic thing, but I also think it makes using the pencil feel more authentic. Like you're actually drawing on glass instead of making inputs to a computer under the glass.
As a display designed specifically for visual artists, its quality is far superior to that of any notebook display I've seen. It has true 24-bit color depth (as opposed to the fudged "millions of colors" on standard notebook displays). Colors, brightness, and contrast are even across the face of the screen. And the device calibrates up nicely using a colorimeter.
Digitiser and Stylus

the stylus is batteryless, the tablet provides 8,192 levels of pressure sensitivity and a tilt of up to 60 degrees . As with all of XP-PEN's higher-end tablets, you can expect an excellent and highly naturalistic pen-like response from the Innovator 16 .
Hand movements translate into pen movements, which transmit onto the screen via electromagnetic resonance technology. The 8192 pressure sensitivity levels enable the digital pen to work seamlessly and without friction on the surface. The pen simply glides over the surface allowing the creation of flawless fine lines.
The digital pen achieves a co-ordination accuracy of up to plus or minus 0.01 inch . This means that the possibility of errors during input is minimal and by just 0.01 inch. This factor is important in enabling near perfect input in order to achieve flawless digital images on the screen.
The Innovator 16 graphics tablet tilt sensitivity of plus or minus 60 degrees allows the user to achieve tilt angles quickly and accurately. A reading height of 10mm or more is possible from the cover plate at any screen angle.
Pen tips are removable/replaceable, and XP-PEN supplies several of the default tips. The pen has excellent button quality and the buttons are nicely placed. Making them easy to use.
While the all-plastic pen would actually be slightly more comfortable, in my opinion, it was a bit on the heavy side. The contoured grip area is thick enough to promote good pen holding habits (and reduce long-term fatigue). The rubberized finish on the grip area has about the right amount of give and a nice, easy to hold texture.
Setting Up the Innovator 16
Installation is easy, remember to NOT plug it in before wipping clean any other tablet drivers. Don't even plug it while the AC is off, as your OS will detect it anyway and try to install stuff.
Clean any other brand's file, install the latest XP-Pen drivers, and then turn on the tablet. remember that you need navigate to XP-PEN's website to snag the driver software .
The calibration tool is pretty easy to use, and there's a menu accessible via a button above the tablet for the colors, brightness and contrast. Everything looked fine to me when I first booted it up, but you can fine tune it easily.
In terms of driver software, like all XP-PEN tablets you get a broad range of controls over the tablet and pen behaviours. Including sensitivity, adjustments, for pen tip "feel", tilt sensitivity and assigning controls to any of the buttons or modifier HotKeys.
Top product features

One of the best features of this product is the 8 express keys and two wheels design . These features enable the convenience in switching keyboard shortcuts and mouse clicks. They aid in zooming and scrolling.
Individual configuration preferences enable a user to change and alter the controls according to his or her liking. This versatility ensures full control on connection options and device function keys and touch wheel .
XP-PEN supplies software combination bundle to select like ArtRage 5 or openCanvas which is great for drawing and sketching .
In Use
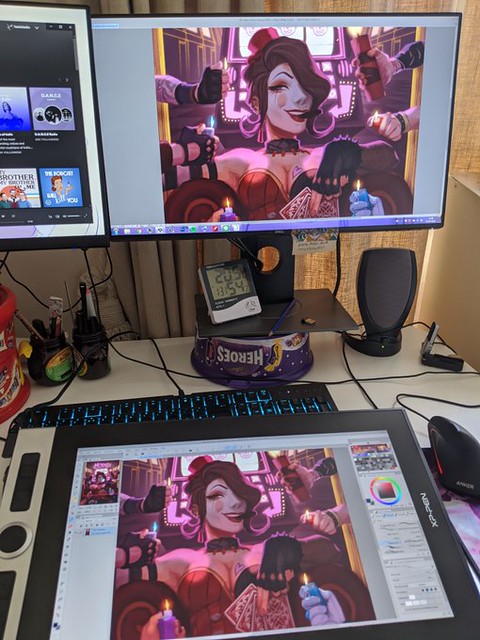
Simply pick up the display or set it in your lap and you're ready to draw. If you're used to working on an angled drawing or drafting table, the Innovator 16 easily goes there too, and its this kind of choose-your-own-adventure flexibility in setting up and using the Innovator 16 that makes it so appealing.
It supports Mac OS X, Windows PCs and Linux devices .It's compatible with all applications, and all major graphics applications have built-in support for the tablet's advanced functionality. including professional software such as Photoshop and Illustrator . It works transparently and is completely plug-n-play.
Graphics work on the 15.6inch Innovator 16 may require more zooming than you're used to on a 20+ inch monitor to make out and manipulate the fine detail rendered by larger, higher-res displays.
With on-tablet programmable buttons and touch & roller wheel that are easy enough to set up for dedicated zooming and scrolling , this isn't as much of an inconvenience as it first seems, and the process quickly becomes second nature.
It takes some getting used to but is worth the effort since it really speeds up workflow. You can zoom in or out of an image in Photoshop / GIMP or, for those more into video production.
This makes the Innovator 16 a joy to use for photographic and retouching work. Display your image on the main monitor, then use the Innovator 16 and its 8 programmable buttons and Touch wheel to touch up the details, while keeping an eye on what effect your changes are having on the overall image. I find that I very seldom need to go back to the keyboard when doing normal editing.
Likewise for jumping back and forth between the XP-PEN and another display: once you figure out how the Innovator 16 behaves in “mouse” versus “pen” mode, reaching across to the primary display to grab work items or select files makes perfect sense.
Because the pen is pressure sensitive, it's very easy and intuitive to use for making selections or painting. With 8,192 levels of pressure sensitivity, it's possible to make anything from the most finessed of pen strokes to the broadest brush sweeps, and the resolution of 5,080dpi makes the Innovator 16 highly accurate.
The colours on the tablet are very vivid and satisfying to look at, The grip on the pen is really good, and the pen itself is very smooth on the screen (smooth and satisfying tbh). Drawing on the screen is a dream – it's responsive, precise, and with practice it's possible to generate some spectacular results. It's sensitive to the tilt of the pen as well, making drawing as realistic as it can be.
The difference is clear from the very first time you fire up Corel Painter or Photoshop. The pen smoothly reacts to your actions like it would in the real world. The only thing you will miss is the drag of the actual pencil or pastel on paper.
Conclusion
If you work with graphics or images, the concept behind the XP-Pen Innovator or Artist series seems like a no-brainer: Combine a display with a pressure-sensitive tablet so that you can directly edit vector art, retouch images, paint, produce video special effects, and so on. True, tablets aren't for everyone. If you work with a tablet now, you'll probably find a XP-Pen Innovator even more fluid and powerful. Drawing directly onscreen helps to improve your accuracy, especially for tricky selections and masking operations.
XP-PEN's Innovator 16 combines the best of its screenless range of graphics tablets with interactive display technology in a portable format that is both flexible and great to use. As anyone who has used a graphics pad will tell you, once you've got one there's no going back, well now after trying one of these, your old non-screen will be left gathering dust.
In short the XP-Pen Innovator 16 is a serious tool with some serious benefits. For the professional designer the pay off period is very short and the question of whether to purchase is a no brainer. For the student it is a good investment for the future and will certainly prove its worth ($499 USD).
You can Get it from United States & Canada official Store: https://www.storexppen.com/buy/innovator-display-16.html , If you live in other regions you can select from official site “Store” List.
What we liked:
Unparalleled digital drawing experience
Excellent build quality
Top quality display
Excellent Portability
Low Price Point
Lots of supported software
Many buttons and wheels
Super flexible software for configurationWhat could be improved:
Cord can become annoying while rotating the tablet
Update to a USB-C cable
